If truth be told, we don't have a lot of recipes that go into regular rotation at our house. I've posted this one before, but we've probably had it 2-3 more times in the period since I first posted it. It's so worth another mention. The Sweet Potatao-Chard Quesadilla dish is one of those recipes where the balance of flavours is just so damn tasty that, not only do you not miss the meat, you also won't miss the dairy.
I swear, sweet potato and chipotle chiles in adobo sauce were made for each other. And as we now have natural light around dinner time, I totally meant to snap a picture of the quesadillas, but... you know. Eating comes before blogging sometimes!
If you have time, check out the Guess the Jelly Contest over on Uncanny Preserves. Correct answers are entered into a draw to win a jar!
We're having a district review of our school tomorrow, so if you don't see a post up, it's only because I spent my evening prepping for being judged! I promise, though, that my favourite homemade donair recipe will be going up later this week. We got it from a newspaper back when we lived in New Brunswick back in the '80s, and it's been in the repetoire since then.

Wednesday, March 30, 2011
Tuesday, March 29, 2011
My new favourite pizza toppings
I've gotta be honest, I wasn't sure how this would pan out.

My husband was equally skeptical of the broccoli.
But, when added along with olives, marinated mushrooms, with aged Gruyere, Emmental, Fourme D'Ambert blue cheese (zomg) along with my favourite pizza base (which is best made the night before), this was one of the finest pizzas I've had in a long time.. You'll note we did half the pizza with pesto and the other half with Mediterranean Pizza Sauce. Yum!
We picked up the blue cheese from my favourite cheese shop: Nancy's Cheese. Love the woman, love the cheese, love the pizza.
My Favourite Pizza Base
(based on Cooking Light's)
Ingredients
1 cup warm water, divided
12 ounce all purpose flour (about 2½ cups) plus more for dusting
1 package dry yeast (about 2 1/4 teaspoons)
1 tsp honey
4 teaspoons olive oil
3/4 teaspoon kosher salt
Cooking spray
Directions
1. In a bowl, mix 3/4 cup warm water with flour until it forms a ragged dough. Cover with plastic wrap and let sit for 20 minutes.
2. After the water-flour mixture has been sitting for about 15 minutes, mix together the remaining ¼ cup warm water with honey. Stir to dissolve and sprinkle yeast on top. Let proof (meaning, let the yeast bubble up) which will take about 5 more minutes.
3. Stir yeast mixture, oil and salt into flour. This will form a sticky dough, dump onto a lightly floured counter and knead, adding more flour, one tablespoon at a time until a soft dough forms.
4. Spray a large bowl with cooking spray. Put dough into bowl, turning to coat with oil. Cover with plastic wrap and place in fridge for 24 hours.
5. Remove dough from fridge, let come to room temperature (about an hour) before punching down. Press or roll into a 12" circle, crimp edges and cover with plastic wrap.
6. Top as desired. Bake on a preheated pizza stone (if available) on the bottom rack of a 500º oven for about 15 minutes.
Monday, March 28, 2011
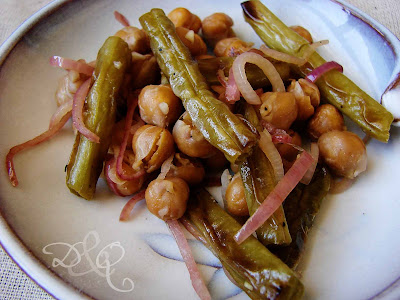
Beans, beans, beans
Sometimes it surprises me how often legumes appear on our table. Like most of my ingredients, I don't purposely set out to use them over, say, a steak. What I've come to realize is I like how easy they are to deal with, how inexpensive they are to buy, and how delicious the recipes end up being.
What has shocked me, at least in terms of legume based revelations, is the realization that I'm just as happy with a great bean salad as I am with a t-bone steak. I know, for a lot of people that's sacrilege! I'm not a vegetarian or vegan by a long shot, and I doubt I ever will be, but I do really appreciate the message that's behind a lot of vegan and vegetarian blogs: if you have a great recipe and execute it well - you won't miss the meat.
That's the biggest lesson I've learned from my Vegan Mondays with Kat. We try a ton of stuff that I would have considered weird in my past life, but in the end we (almost always) produce a delicious meal. How can you possibly miss meat when you've eaten until bursting and had your taste buds excited?
And so, I find myself cooking less and less meat, not out of a conscious choice, but more because there are other recipes I long to try. For reasons not entirely known to me, I keep coming back to bean salads.
This recipe is loosely riffed off of one of Mark Bittman's, though his proportions produce a salad that I find a bit too dry (my husband thought it was perfect, but he's not the one cooking it). I wanted to beef the whole thing up with more herbs as well.
I brought this for lunch twice last week and was very sad when I ran out.
Broiled Bean Salad
(adapted from Mark Bittman)
Ingredients
1 tbsp oil, divided
½ lb green or wax beans, topped & tailed and cut into 1" lengths
1 14oz can chickpeas, drained, rinsed and dried
½ shallot, thinly sliced
1 small clove garlic, minced
2 tbsp sherry vinegar
1 tsp sugar
salt and pepper to taste
2 tbsp chopped fresh basil
2 tbsp chopped fresh parsley
Directions
1. Turn on the broiler of your oven. Place a rack approximately 5" below it. (You may wish to do this in the reverse order, if you'd prefer to handle a cool rack!)
2. On a baking sheet toss green beans with ½ tbsp of the olive oil. Place under the broiler, and broil for 7 minutes, tossing half way through until the beans have patches of dark brown. Place into a large bowl.
3. Using the same baking sheet, toss chickpeas together with remaining olive oil and broil for 5-8 minutes, again, tossing to brown halfway through the cooking time. Pour into the bowl with the green beans.
4. While beans are cooling slightly, mix together sliced shallots, minced garlic, vinegar, sugar, salt and pepper. Pour over still warm (but not pipping hot) beans and toss to coat. Let sit at room temperature for at least an hour so the flavours have a chance to meld. You can store the salad in the fridge for a few days at this point. Toss with herbs right before serving.
What has shocked me, at least in terms of legume based revelations, is the realization that I'm just as happy with a great bean salad as I am with a t-bone steak. I know, for a lot of people that's sacrilege! I'm not a vegetarian or vegan by a long shot, and I doubt I ever will be, but I do really appreciate the message that's behind a lot of vegan and vegetarian blogs: if you have a great recipe and execute it well - you won't miss the meat.
That's the biggest lesson I've learned from my Vegan Mondays with Kat. We try a ton of stuff that I would have considered weird in my past life, but in the end we (almost always) produce a delicious meal. How can you possibly miss meat when you've eaten until bursting and had your taste buds excited?
And so, I find myself cooking less and less meat, not out of a conscious choice, but more because there are other recipes I long to try. For reasons not entirely known to me, I keep coming back to bean salads.

This recipe is loosely riffed off of one of Mark Bittman's, though his proportions produce a salad that I find a bit too dry (my husband thought it was perfect, but he's not the one cooking it). I wanted to beef the whole thing up with more herbs as well.
I brought this for lunch twice last week and was very sad when I ran out.
Broiled Bean Salad
(adapted from Mark Bittman)
Ingredients
1 tbsp oil, divided
½ lb green or wax beans, topped & tailed and cut into 1" lengths
1 14oz can chickpeas, drained, rinsed and dried
½ shallot, thinly sliced
1 small clove garlic, minced
2 tbsp sherry vinegar
1 tsp sugar
salt and pepper to taste
2 tbsp chopped fresh basil
2 tbsp chopped fresh parsley
Directions
1. Turn on the broiler of your oven. Place a rack approximately 5" below it. (You may wish to do this in the reverse order, if you'd prefer to handle a cool rack!)
2. On a baking sheet toss green beans with ½ tbsp of the olive oil. Place under the broiler, and broil for 7 minutes, tossing half way through until the beans have patches of dark brown. Place into a large bowl.
3. Using the same baking sheet, toss chickpeas together with remaining olive oil and broil for 5-8 minutes, again, tossing to brown halfway through the cooking time. Pour into the bowl with the green beans.
4. While beans are cooling slightly, mix together sliced shallots, minced garlic, vinegar, sugar, salt and pepper. Pour over still warm (but not pipping hot) beans and toss to coat. Let sit at room temperature for at least an hour so the flavours have a chance to meld. You can store the salad in the fridge for a few days at this point. Toss with herbs right before serving.
Sunday, March 27, 2011
Proof of a Sauce/Condiment/Spread Take-over
I cleaned out my fridge today and it made me shudder.
Not the kind of shudder that you have when you open that old jar of salsa that's been hanging out in the back of the fridge and discover it's taken to wearing a fuzzy green sweater of mould. It was the kind of shudder that occurs when you realize that your ketchup has been making love to the ballpark mustard and they've had babies.
Lots of babies.
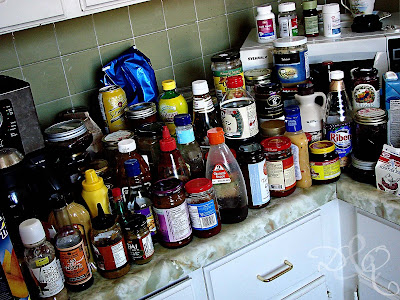
To my dismay, the fresh fruit and vegetables, cheese and meat (read a whole chicken and a package of bacon) had to sit on the kitchen table. The counter was covered with what you see before you.
Among those include:
The horror. The horror.
Not the kind of shudder that you have when you open that old jar of salsa that's been hanging out in the back of the fridge and discover it's taken to wearing a fuzzy green sweater of mould. It was the kind of shudder that occurs when you realize that your ketchup has been making love to the ballpark mustard and they've had babies.
Lots of babies.

To my dismay, the fresh fruit and vegetables, cheese and meat (read a whole chicken and a package of bacon) had to sit on the kitchen table. The counter was covered with what you see before you.
Among those include:
- 8 jars jams/jellies/marmalades (jumbleberry, raspberry, plum, plum ginger, blueberry orange, blood orange-pink grapefruit marmalade)
- 3 jars chutneys (all various onion kinds)
- 6 jars mustard (ballpark, balsamic, hot, dijon, honey, British Beer)
- 4 kinds of salad dressing (Italian, balsamic, ranch, Japanese sesame)
- 2 kinds of homemade booze (sweet cherry liqueur and chestnut brandy)
- an Asian section (sriracha, chili-garlic sauce, black bean sauce, hoisin sauce, soy sauce, okonomiyaki sauce, tamarind ginger sauce, fish sauce, green curry paste)
- a Mediterranean section (oil packed sundried tomatoes, hummus, baba ghanoush, pesto, pizza sauce, olive-artichoke tapenade)
The horror. The horror.
Saturday, March 26, 2011
Scones and Shout-Outs
First off, thanks to all of you who suggested different scone recipes when I asked last week. I ended up making two of the suggestions!
Locavore Family suggested I try Oatmeal Currant Scones from epicurious. They turned out beautifully, and were (I'm actually surprised by this) the class's favourite. I didn't have any oranges, so I grated some lemon peel into the batter.
Adventuresindinner responded with her Gran's recipe, and my god was she right about the scones rising! They were so fluffy and deliciously buttery (I did use butter, not shortening as I didn't have any of the latter)! I wish I'd taken a picture, but my battery died while I was making them, and then I forgot to recharge it before they got inhaled by my students. You know if it gets inhaled by a pack of ravenous 12-13 year olds, it's gotta be good.
Also, no more than 12 stirs? This will be my mantra from now on!
Thanks to everyone! I'm going to try out E_Hayes' chocolate chip pumpkin scones next. And if you haven't checked our her totally awesome fashion blog, I recommend it. I regularly covet her wardrobe!
 |
| Option 1: Oatmeal Currant Scones |
Adventuresindinner responded with her Gran's recipe, and my god was she right about the scones rising! They were so fluffy and deliciously buttery (I did use butter, not shortening as I didn't have any of the latter)! I wish I'd taken a picture, but my battery died while I was making them, and then I forgot to recharge it before they got inhaled by my students. You know if it gets inhaled by a pack of ravenous 12-13 year olds, it's gotta be good.
Also, no more than 12 stirs? This will be my mantra from now on!
Thanks to everyone! I'm going to try out E_Hayes' chocolate chip pumpkin scones next. And if you haven't checked our her totally awesome fashion blog, I recommend it. I regularly covet her wardrobe!
Friday, March 25, 2011
Your Friday Thought of the Day: An Excerpt from Chocolat
"And while she read her cards and muttered to herself, I would leaf through my collection of cookery cards, incanting the names of never-tasted dishes like mantras, like the secret formulae of eternal life. Boeuf en daube. Champignons farcis à la grèque. Escalopes à la Reine. Crème Caramel. Schokoladentorte. Tiramisu. In the secret kitchen of my imagination I made them all, tested, tasted them, added to my collection of recipes wherever we went, pasted them into my scrapbook like photographs of old friends. They gave weight to my wanderings, the glossy clippings shining out from between the smeary pages like signposts along our erratic path.
I bring them out now, like long lost friends."
from Joanne Harris' Chocolat
Happy Friday and have a great weekend all!
I bring them out now, like long lost friends."
from Joanne Harris' Chocolat
Happy Friday and have a great weekend all!
Wednesday, March 23, 2011
Looking for a scone recipe!
No, that's me! I have to make some for "Happy British Food Day" for my students (we're finishing reading Cue for Treason), and these are not something I excel at.
Any suggestions would be deeply, deeply appreciated!
Any suggestions would be deeply, deeply appreciated!
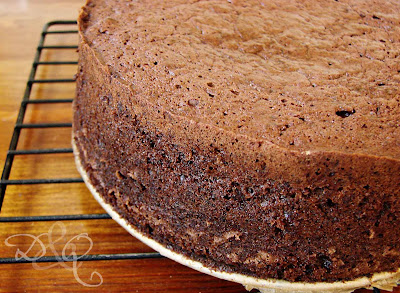
Chocolate Cake with a Super Secret Ingredient
When I think back on the picky eater I used to be, I'm pretty sure she would have run screaming from this chocolate cake if she'd known what was in it.
In fact, even as a much more adventurous eater now, I was still really apprehensive about the secret ingredient in this cake.
It's just... I don't think I've ever seen it in a dessert before.
Which is weird, because here in North America, most of our sugar is derived from it.
Have you guessed now?
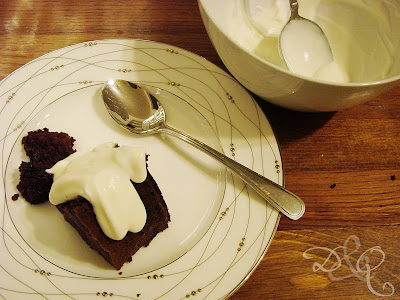
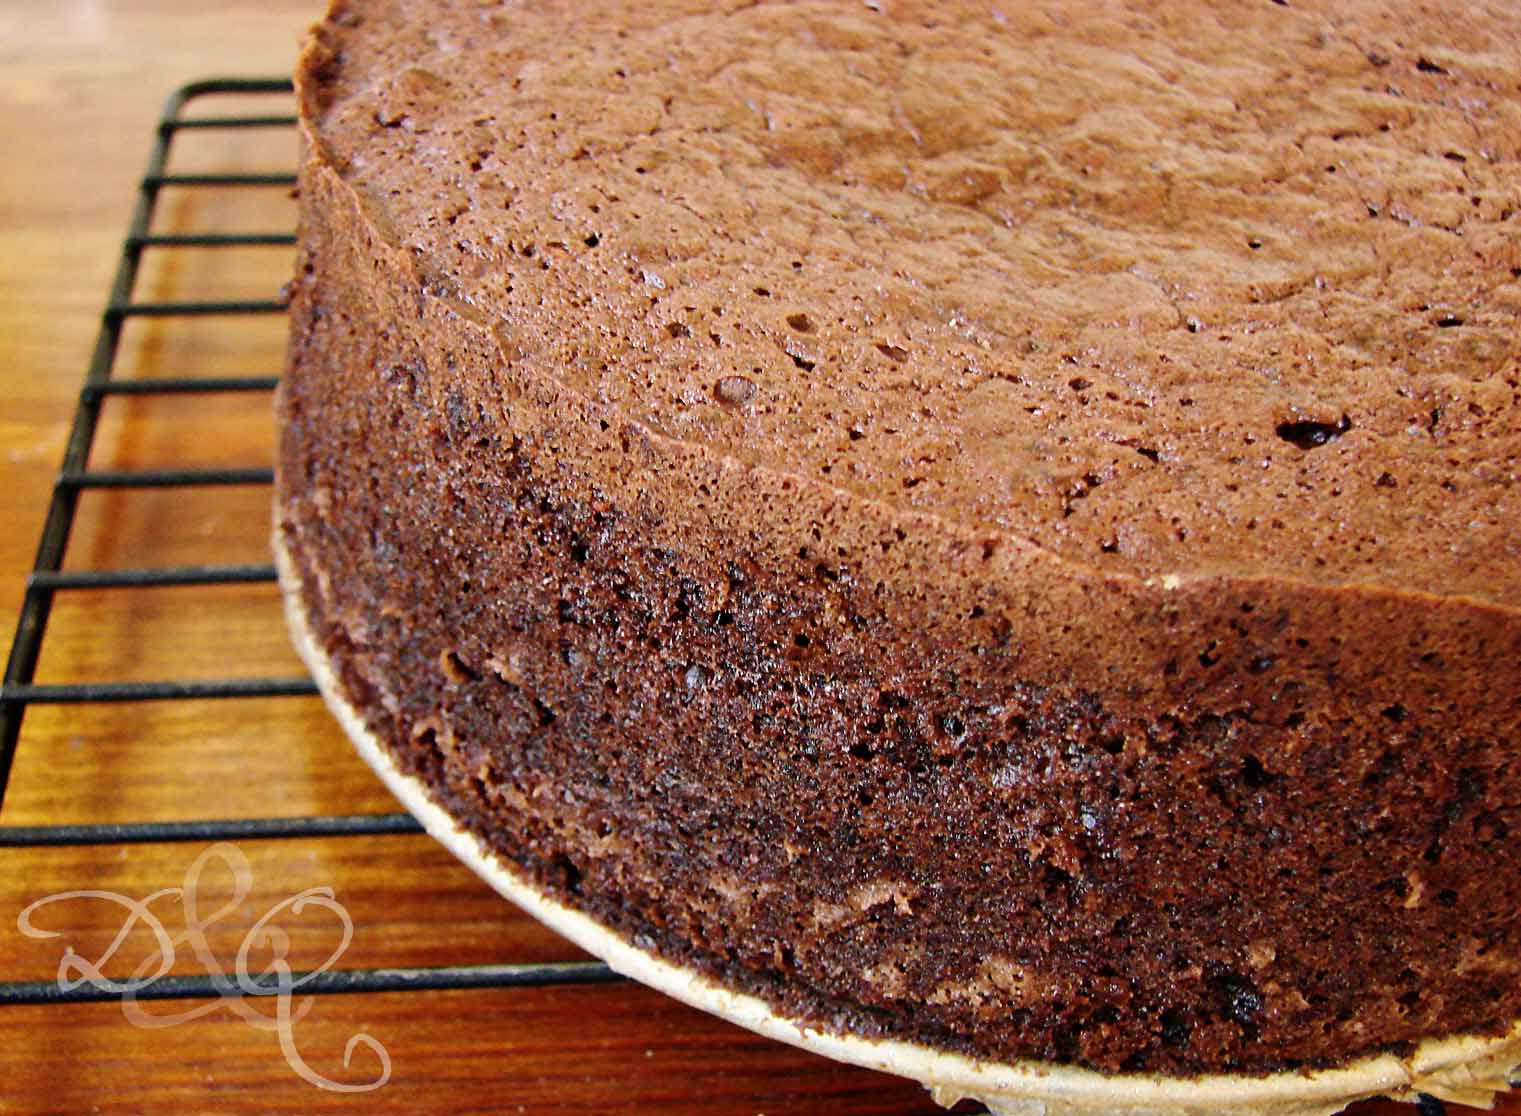
That's right, it's a chocolate beet cake. And it's pretty darned good at that. Now that's not saying that it tastes like your run of the mill chocolate cake. It tastes like there's something different. It gives it a tangier kick, I'd say. My husband says it's one of the most intense chocolatey cakes he's ever had, but that might also be the Callebault chocolate speaking.
I made a half-ish version of the original recipe, owing to the fact that my only springform pan is pretty small (6"). If you have an 8" pan, please see the original recipe in the link.
With this recipe, it's important to set out and organize all your ingredients in advance. Once the chocolate has melted, you've got to move fairly quickly. Not frantically, but quickly.
Chocolate Beet Cake
(adapted from Nigel Slater)
Ingredients
1 medium beet (a little less than ½ lb)
½ cup all purpose flour
3/4 tsp baking powder
1½ tbsp cocoa powder
3 egg whites
½ cup brown sugar
2 egg yolks
¼ lb good quality dark chocolate, chopped
2 tbsp hot brewed strong coffee
½ cup (scant) unsalted butter, cut into small pieces and chilled
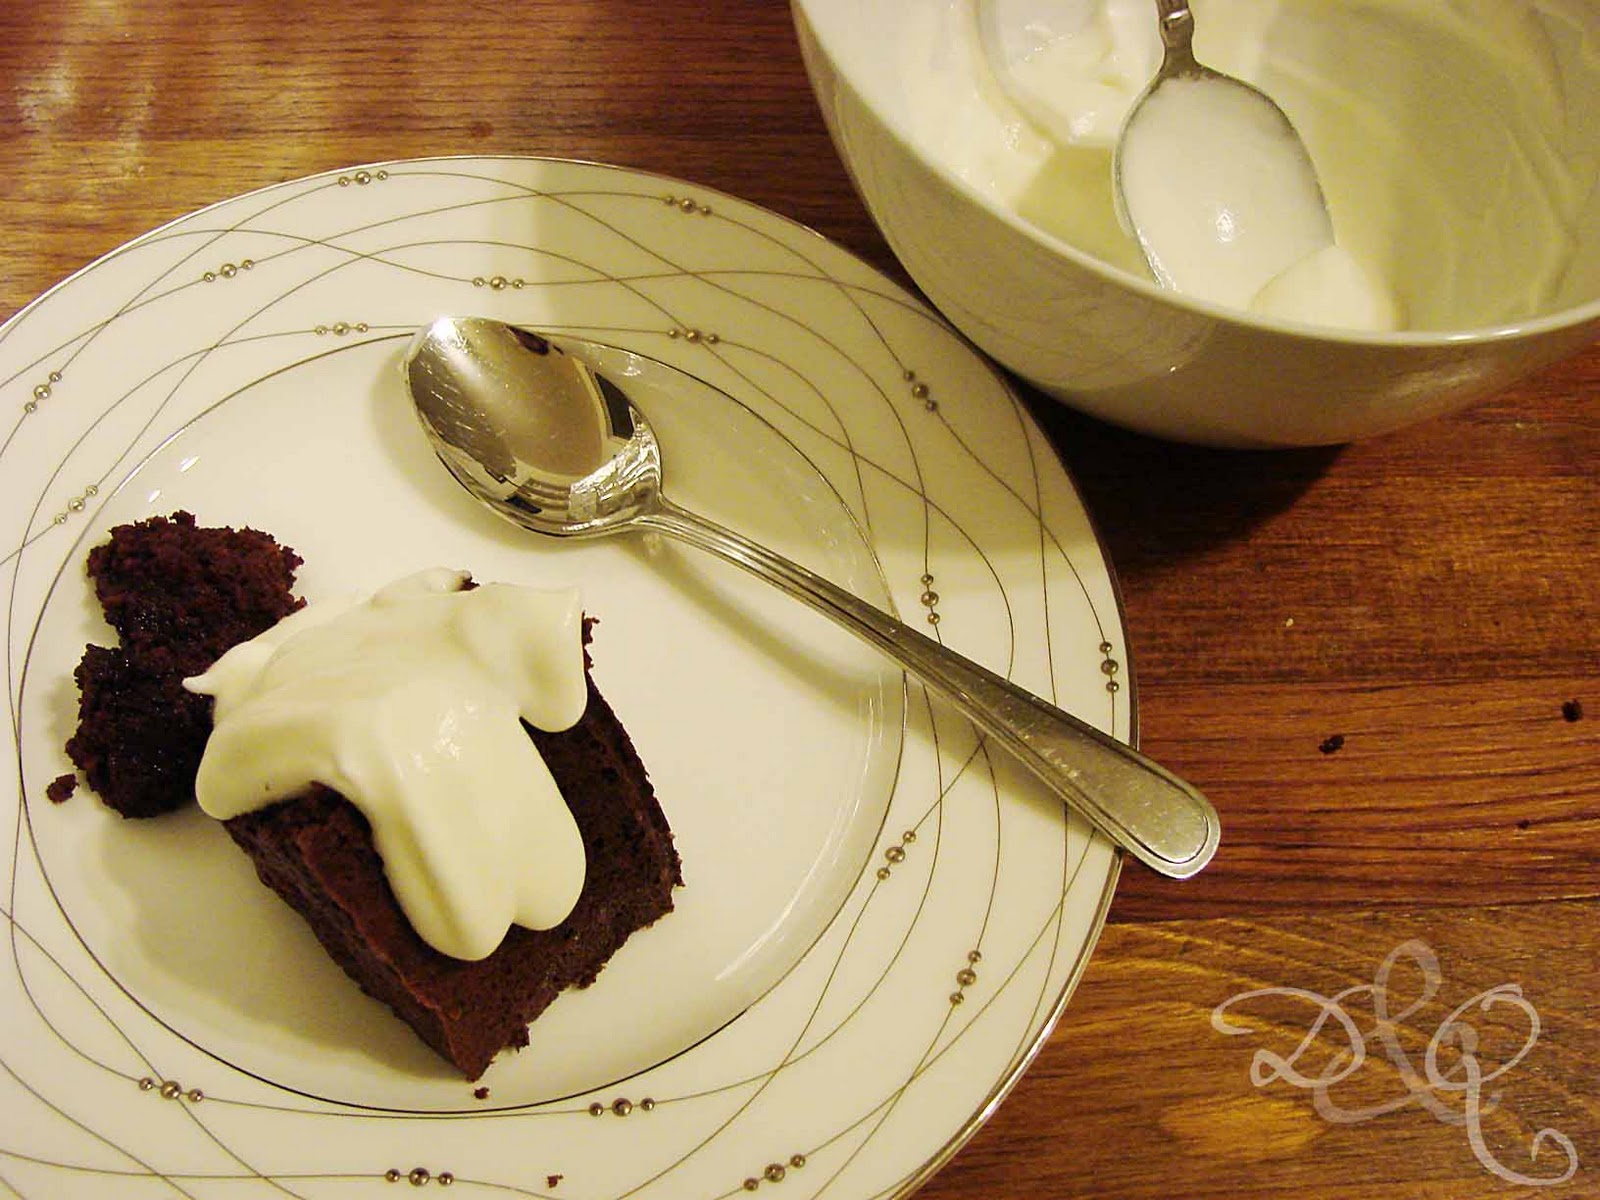
whipped cream (or crème fraiche) to serve
Directions
1. Line the base of a 6" springform pan with parchment paper. Let aside. Preheat oven to 375º.
2. Cook the beet, whole and unpeeled in a large pot of boiling water until tender, about 20-30 minutes depending on size. Remove, drain and run under cold water to both chill the beet and aid in the peeling process. Trim the top and bottom, throw the beet into a food processor and pulse until you have a rough purée.
3. Sift together the flour, cocoa and baking powder into a small bowl and set aside.
4. If you haven't done so already, separate the eggs and place the 3 whites into a large mixing bowl and 2 egg yolks into a small separate bowl. Lightly beat the yolks.
5. Melt the chocolate in a double boiler by setting a large, heatproof bowl over a pot of simmering water. Just dump the chocolate into the bowl and leave it be. That's right. Resist the urge to stir. I had a hard time with it, but Nigel is right! Don't stir. When it looks like the chocolate is just about melted, stir in the coffee. Stir to combine then add butter, pushing it below the surface of the chocolate. Remove the chocolate from heat and let the butter melt into it.
6. Meanwhile, whip the egg whites to soft peaks, then begin adding in sugar, one tablespoon at a time, until sugar is all incorporated and you have stiff peaks. Set aside.
7. Once butter is melted, stir the chocolate and test the temperature. You don't want it to be much more than warm, as you're about to add the eggs. Add in the egg yolks, making sure to stir constantly to combine. Gently fold in egg white mixture into chocolate. Once incorporated, add cocoa-flour mixture, again, quickly but gently. Pour into prepared pan and place pan in oven.
8. Reduce oven temperature to 325º, bake cake for 40 minutes. The outside will feel spongy when touched, and the middle will still jiggle slightly when wobbled. Set aside to cool completely (don't attempt to serve this while evenly vaguely beyond room temperature). It will sink in the middle, and I warn you, that part is dangerously fudgy.
9. Serve with whipped cream and amazed taste buds.
In fact, even as a much more adventurous eater now, I was still really apprehensive about the secret ingredient in this cake.
 |
| It looks like a regular ol'chocolate cake.... |
Which is weird, because here in North America, most of our sugar is derived from it.
Have you guessed now?
 |
| Callebault Dark Chocolate and a Beet |
I made a half-ish version of the original recipe, owing to the fact that my only springform pan is pretty small (6"). If you have an 8" pan, please see the original recipe in the link.
With this recipe, it's important to set out and organize all your ingredients in advance. Once the chocolate has melted, you've got to move fairly quickly. Not frantically, but quickly.
Chocolate Beet Cake
(adapted from Nigel Slater)
Ingredients
1 medium beet (a little less than ½ lb)
½ cup all purpose flour
3/4 tsp baking powder
1½ tbsp cocoa powder
3 egg whites
½ cup brown sugar
2 egg yolks
¼ lb good quality dark chocolate, chopped
2 tbsp hot brewed strong coffee
½ cup (scant) unsalted butter, cut into small pieces and chilled
whipped cream (or crème fraiche) to serve
Directions
1. Line the base of a 6" springform pan with parchment paper. Let aside. Preheat oven to 375º.
2. Cook the beet, whole and unpeeled in a large pot of boiling water until tender, about 20-30 minutes depending on size. Remove, drain and run under cold water to both chill the beet and aid in the peeling process. Trim the top and bottom, throw the beet into a food processor and pulse until you have a rough purée.
3. Sift together the flour, cocoa and baking powder into a small bowl and set aside.
4. If you haven't done so already, separate the eggs and place the 3 whites into a large mixing bowl and 2 egg yolks into a small separate bowl. Lightly beat the yolks.
5. Melt the chocolate in a double boiler by setting a large, heatproof bowl over a pot of simmering water. Just dump the chocolate into the bowl and leave it be. That's right. Resist the urge to stir. I had a hard time with it, but Nigel is right! Don't stir. When it looks like the chocolate is just about melted, stir in the coffee. Stir to combine then add butter, pushing it below the surface of the chocolate. Remove the chocolate from heat and let the butter melt into it.
6. Meanwhile, whip the egg whites to soft peaks, then begin adding in sugar, one tablespoon at a time, until sugar is all incorporated and you have stiff peaks. Set aside.
7. Once butter is melted, stir the chocolate and test the temperature. You don't want it to be much more than warm, as you're about to add the eggs. Add in the egg yolks, making sure to stir constantly to combine. Gently fold in egg white mixture into chocolate. Once incorporated, add cocoa-flour mixture, again, quickly but gently. Pour into prepared pan and place pan in oven.
8. Reduce oven temperature to 325º, bake cake for 40 minutes. The outside will feel spongy when touched, and the middle will still jiggle slightly when wobbled. Set aside to cool completely (don't attempt to serve this while evenly vaguely beyond room temperature). It will sink in the middle, and I warn you, that part is dangerously fudgy.
9. Serve with whipped cream and amazed taste buds.
Tuesday, March 22, 2011
Super Moist Turkey Burgers
This is a recipe born out of laziness and a desire for burgers ASAP. Sometimes, when you've got something in mind, nothing else will do.
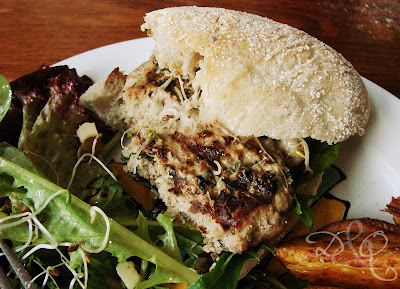
I wanted turkey burgers, and I wanted them now. Beyond that, I wanted a hit of solid, bright flavour and a moist, juicy burger. Enter one of the simplest recipes I have made in a loooong time.
Secret ingredient? Because, when it comes to burgers, there often is.
Baba Ghanoush in the burger mix.
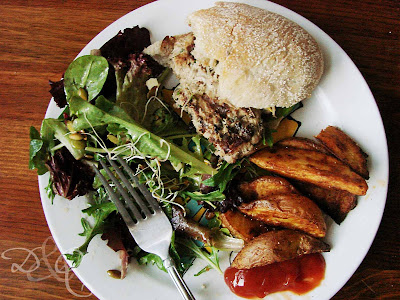
If you're thinking to yourself: huh, it looks like that burger has got a bite taken out of it, you'd be wrong.
There are three bites taken out of it. See?
Which should really tell you how hungry I was. Let me assure you, though, my love of these burgers doesn't stem from my hunger. These are really, really good.
Turkey Burgers with Baba Ghanoush
Ingredients
1 lb ground turkey
¼ cup baba ghanoush
2 tbsp chopped parsley
1 tbsp soy sauce
¼ tsp marmite (totally optional - use Worcestershire sauce in its place)
4 burger buns
lettuce
additional baba ghanoush
avocado slices
alfalfa or onion sprouts
Directions
1. Gently mix together turkey with next four ingredients (until marmite). Form into 4 patties with a quarter sized dent in the middle (this will prevent the burgers from bulging in the middle while cooking up) and place on a plate. Cover with plastic wrap and let chill in the fridge for 30 minutes or so. Because there's no real binder in these burgers, you have to handle them carefully, so letting them firm up in the fridge is an important step.
2. Heat a grill pan covered with cooking spray over medium heat. Cook burgers in pan, about 7-8 minutes per side.

Serve on buns with toppings of your choice! Some tomato or roasted garlic hummus would be great with these as well.
I wanted turkey burgers, and I wanted them now. Beyond that, I wanted a hit of solid, bright flavour and a moist, juicy burger. Enter one of the simplest recipes I have made in a loooong time.
Secret ingredient? Because, when it comes to burgers, there often is.
Baba Ghanoush in the burger mix.

If you're thinking to yourself: huh, it looks like that burger has got a bite taken out of it, you'd be wrong.
There are three bites taken out of it. See?

Which should really tell you how hungry I was. Let me assure you, though, my love of these burgers doesn't stem from my hunger. These are really, really good.
Turkey Burgers with Baba Ghanoush
Ingredients
1 lb ground turkey
¼ cup baba ghanoush
2 tbsp chopped parsley
1 tbsp soy sauce
¼ tsp marmite (totally optional - use Worcestershire sauce in its place)
4 burger buns
lettuce
additional baba ghanoush
avocado slices
alfalfa or onion sprouts
Directions
1. Gently mix together turkey with next four ingredients (until marmite). Form into 4 patties with a quarter sized dent in the middle (this will prevent the burgers from bulging in the middle while cooking up) and place on a plate. Cover with plastic wrap and let chill in the fridge for 30 minutes or so. Because there's no real binder in these burgers, you have to handle them carefully, so letting them firm up in the fridge is an important step.
2. Heat a grill pan covered with cooking spray over medium heat. Cook burgers in pan, about 7-8 minutes per side.

Serve on buns with toppings of your choice! Some tomato or roasted garlic hummus would be great with these as well.
Monday, March 21, 2011
Chewy Pretzels
I haven't made these in years! My dad went through a period where he was making them regularly with his church school group (and with us), and I don't think I've had them since then... which would make it a good 15 or so years ago.

So with March break time on my hands, and the latest issue of the LCBO Food & Drink in my kitchen, I got to work.
Chewy Pretzels
(slightly adapted from Food & Drink Spring 2011)
Ingredients
Dough
3½ cups all purpose flour
2½ tsp instant (or quick-rise) yeast (that's one package)
2 tsp salt
3/4 cup milk
2 tbsp unsalted butter
1 tbsp maple syrup
1/3 cup cold water
Boiling
8 cups water
½ cup baking soda
Coarse salt (about 1 tbsp)
Directions
1. To make dough, mix together flour, yeast and salt in the bowl of a stand-mixer (you can, of course, do this by hand too). In a microwaveable measuring cup, heat milk in microwave to almost boiling, add butter and stir until melted. Then mix in maple syrup and cold water. This will bring the temperature of the liquid down so it doesn't kill the yeast off.
2. With the dough hook on the stand mixer, start mixing away. Slowly add in the milk mixture. If you feel like you need additional liquid, you can add up to 3 more tbsp cold water. Add it in tablespoon at a time, and take it from there. This is a very stiff dough though, so don't add water prematurely. Once mixture has come together and has formed a smooth ball that's pulled away from the sides, let the machine run for an additional 3-5 minutes to develop the gluten. Turn off machine. Remove dough hook and cover bowl with plastic wrap. Let dough rise in place for about an hour or until doubled in bulk.
3. Remove the dough from the bowl, and knead a couple of times to deflate. Turn onto a lightly floured surface and divide dough into 9 balls.
4. Roll each ball into a long rope (about 18-24" long) that's thicker in the middle than it is at its ends.

5. Make a big U out of each rope. Twist the ends of the rope into... well... a twist. Try and keep the twist about 3 inches long, if possible. Then lift up the fat bottom of the pretzel and place ends appropriately. Place dough on baking sheet so ends are on top (not underneath) the pretzel. Repeat with all ropes, and leave 2" on all sides of pretzels on the baking sheets.

6. Loosely cover with plastic wrap. Let rise for 30 minutes, then transfer dough to the freezer. This will help the pretzels keep their shape when you boil them. Freeze for 2 hours on baking sheets. After this, you can either move on to step 7, or you can put the dough into freezer bags and save them for cooking at a later date.
7. Preheat oven to 375º.
8. Bring water and baking soda to a boil in a large (and I do mean large) pot (make sure it's either stainless steel or enamel, other metals will react to the baking soda and make the pretzels taste awful). The water will look foamy, like you've got epsom salts in it. Don't be alarmed. That's totally normal. Meanwhile, line a large baking tray (perhaps the one you used to freeze the pretzels on) with parchment paper.
9. Working one pretzel at a time, cook the dough first in the boiling water for 45-60 seconds. Remove using a slotted spoon; drain on a tea towel, without removing from spoon. Place on baking sheet and sprinkle with coarse salt. Repeat with remaining dough.

10. Once all pretzels are on baking sheet (again, leaving 2" around each), use a sharp knife to cut a slash in the thickest part of each pretzel.

11. Bake for 15 minutes, then rotate and bake for another 3 or until deeply browned. Let cool on a rack.

12. For a traditional condiment, mix 2 parts mayonnaise with 1 part mustard (grainy, yellow, your choice) and dip that pretzel away!

So with March break time on my hands, and the latest issue of the LCBO Food & Drink in my kitchen, I got to work.
Chewy Pretzels
(slightly adapted from Food & Drink Spring 2011)
Ingredients
Dough
3½ cups all purpose flour
2½ tsp instant (or quick-rise) yeast (that's one package)
2 tsp salt
3/4 cup milk
2 tbsp unsalted butter
1 tbsp maple syrup
1/3 cup cold water
Boiling
8 cups water
½ cup baking soda
Coarse salt (about 1 tbsp)
Directions
1. To make dough, mix together flour, yeast and salt in the bowl of a stand-mixer (you can, of course, do this by hand too). In a microwaveable measuring cup, heat milk in microwave to almost boiling, add butter and stir until melted. Then mix in maple syrup and cold water. This will bring the temperature of the liquid down so it doesn't kill the yeast off.
2. With the dough hook on the stand mixer, start mixing away. Slowly add in the milk mixture. If you feel like you need additional liquid, you can add up to 3 more tbsp cold water. Add it in tablespoon at a time, and take it from there. This is a very stiff dough though, so don't add water prematurely. Once mixture has come together and has formed a smooth ball that's pulled away from the sides, let the machine run for an additional 3-5 minutes to develop the gluten. Turn off machine. Remove dough hook and cover bowl with plastic wrap. Let dough rise in place for about an hour or until doubled in bulk.
3. Remove the dough from the bowl, and knead a couple of times to deflate. Turn onto a lightly floured surface and divide dough into 9 balls.
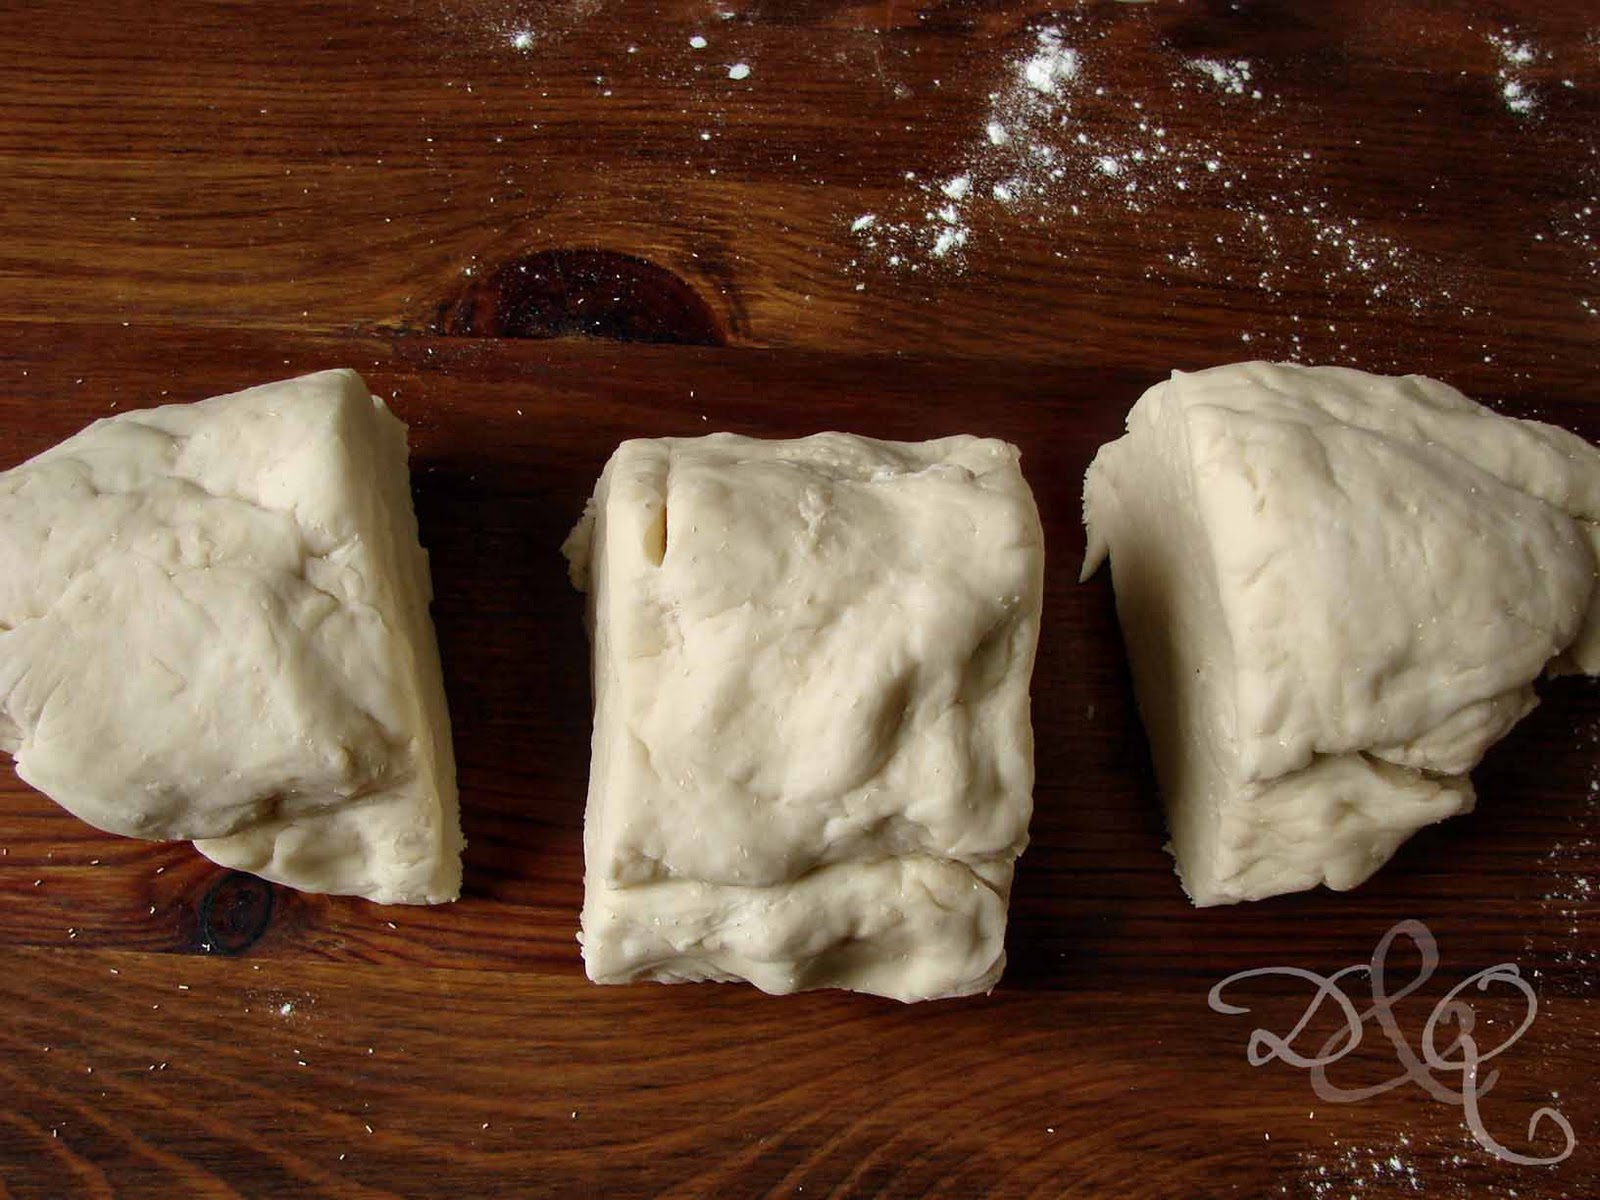 |
| I was worried about getting 9 balls right the first time, so I started by subdividing into 3. |
4. Roll each ball into a long rope (about 18-24" long) that's thicker in the middle than it is at its ends.

5. Make a big U out of each rope. Twist the ends of the rope into... well... a twist. Try and keep the twist about 3 inches long, if possible. Then lift up the fat bottom of the pretzel and place ends appropriately. Place dough on baking sheet so ends are on top (not underneath) the pretzel. Repeat with all ropes, and leave 2" on all sides of pretzels on the baking sheets.

6. Loosely cover with plastic wrap. Let rise for 30 minutes, then transfer dough to the freezer. This will help the pretzels keep their shape when you boil them. Freeze for 2 hours on baking sheets. After this, you can either move on to step 7, or you can put the dough into freezer bags and save them for cooking at a later date.
7. Preheat oven to 375º.
8. Bring water and baking soda to a boil in a large (and I do mean large) pot (make sure it's either stainless steel or enamel, other metals will react to the baking soda and make the pretzels taste awful). The water will look foamy, like you've got epsom salts in it. Don't be alarmed. That's totally normal. Meanwhile, line a large baking tray (perhaps the one you used to freeze the pretzels on) with parchment paper.
9. Working one pretzel at a time, cook the dough first in the boiling water for 45-60 seconds. Remove using a slotted spoon; drain on a tea towel, without removing from spoon. Place on baking sheet and sprinkle with coarse salt. Repeat with remaining dough.

10. Once all pretzels are on baking sheet (again, leaving 2" around each), use a sharp knife to cut a slash in the thickest part of each pretzel.

11. Bake for 15 minutes, then rotate and bake for another 3 or until deeply browned. Let cool on a rack.

12. For a traditional condiment, mix 2 parts mayonnaise with 1 part mustard (grainy, yellow, your choice) and dip that pretzel away!
Saturday, March 19, 2011
A Day O'Fun and a Toronto Restaurant Review: House on Parliament
So, I've been blogging about what goes on in my kitchen since the summer, and the whole idea of blogging about what I'm eating when I go out is pretty foreign to me.
I did used to do it for my blog about living in Japan, but I don't want to pretend that I'm, say, a professional reviewer. I cannot feign impartiality.
We could have a healthy debate about whether it's possible to be objective, but I fall firmly on the side that believes we all have biases, so I don't think it's good to pretend otherwise. If you wow me with a couple of amazing dishes, I'll probably forgive others that don't do as well.
If that makes me a terrible source for reviews, then so be it. I loved Fanny Chadwick's pickled vegetables, their pretzel bread (speaking of pretzels, I'll be posting a recipe for those later this week), their corned beef (which others hated, and points towards further uneveness in the kitchen) and their S'mores. That means I'm willing to forgive the one soggy mushroom pierogie that accompanied the corned beef, you know?
We all make these judgments when we go out. Last time I went to Canoe, I thought the tea-smoked duck breast was a little tough, but that doesn't mean it was a bad meal. The campfire smoked soft egg was insane! The dill pickle drink? Awesome. Will I enthusiastically return? Uh huh.
Okay, I'm sorry. You're probably not here to listen to me talk about the process of reviewing.
My husband and I went out yesterday for our annual Day O'Fun - which basically means he takes the day off work (I'm on March Break) and we go explore a different part of the city. Yesterday, we wandered around Cabbagetown, popped into the Toronto Necropolis (I love saying that word, it conjures up such a great image), ate lunch at House of Parliament, hopped the streetcar to West Queen West toMOCA (Museum of Contemporary Art) MOCCA (Museum of Canadian Contemporary Art) before walking back down Queen West, popping into little galleries and scouting a potential sofa for our living room.
It was a great day.
So we spent the morning walking around here:
Anyway, after traipsing around the Necropolis for an hour or so (I really enjoyed H.A. Knowles' mausoleum), we were in the mood for some grub.
House of Parliament was everything I wanted in pub food. Good, solid, tasty with enough of a twist to the food to keep it interesting. Reminds me a lot of the Manx in Ottawa.

I had the Grilled Cheese Sandwich. Applewood smoked 5 year old cheddar, double smoked bacon (YES) and a sundried tomato tapenade. The house salad was super fresh with a sherry vinaigrette and pumpkin seeds (that's how you should do a green salad, Fanny).
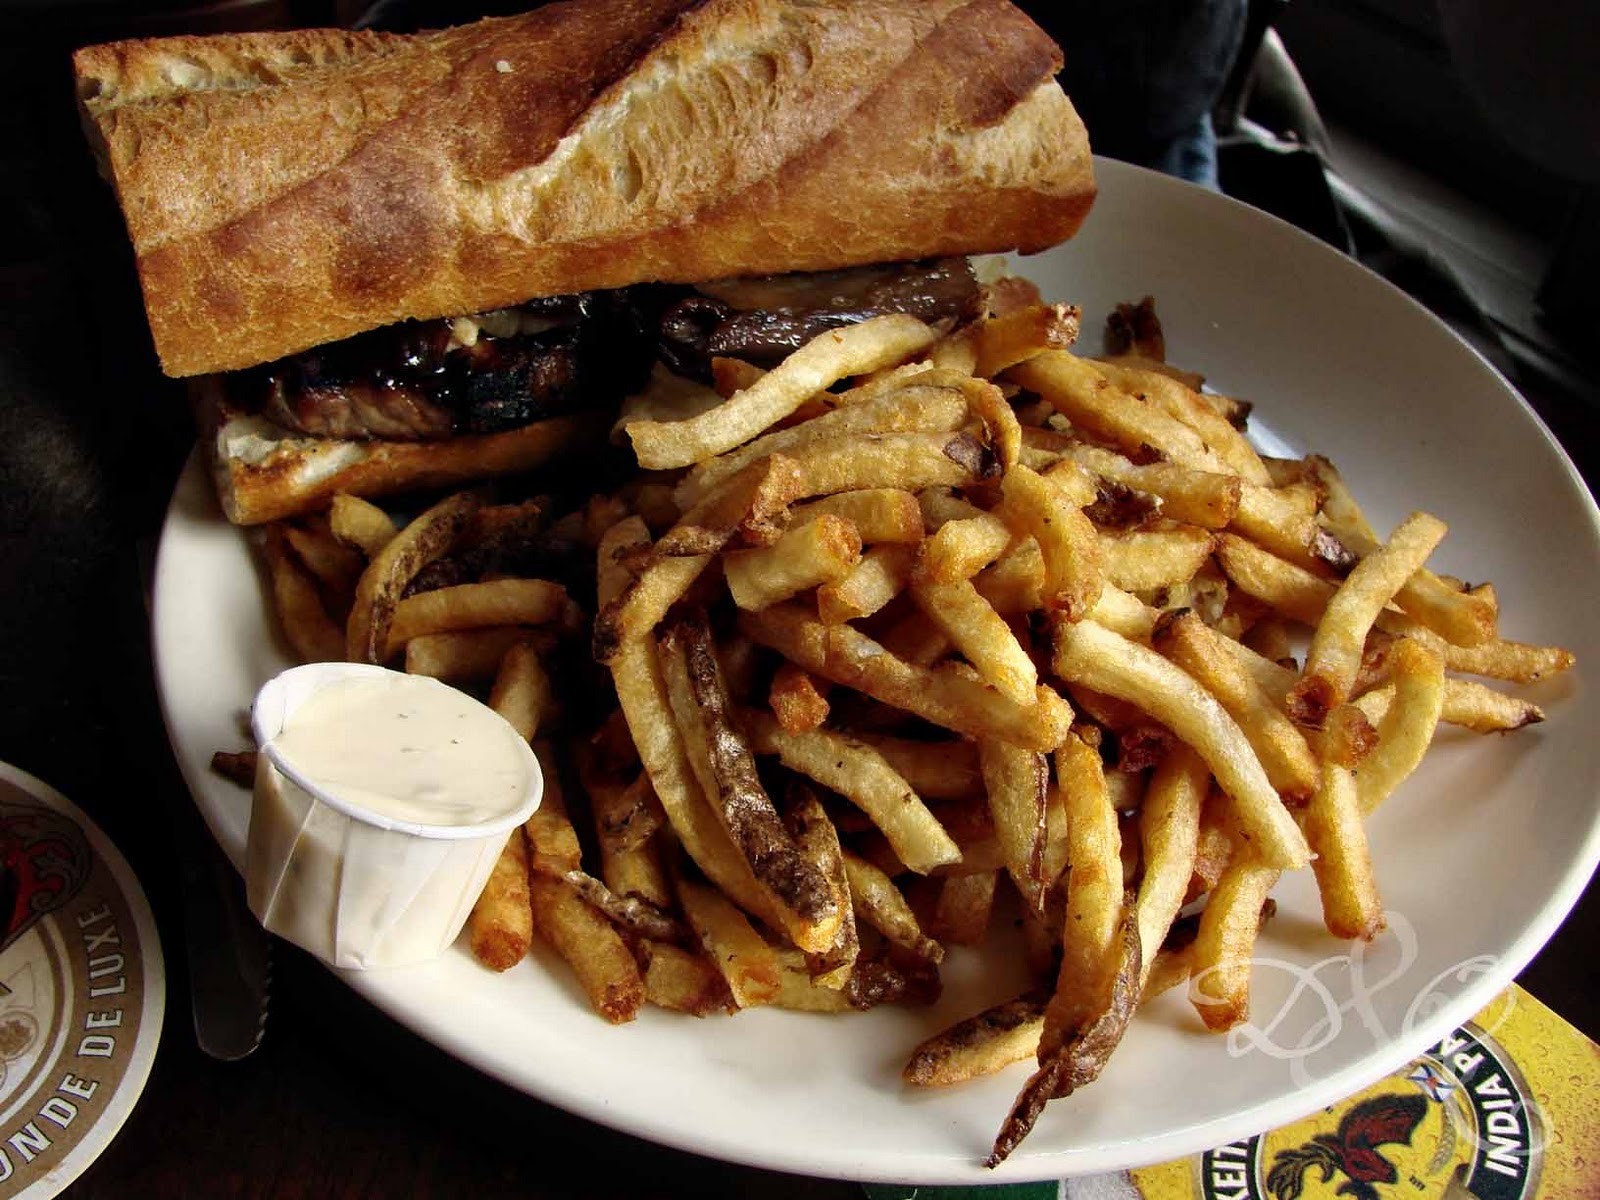
My husband had the steak and blue cheese sandwich with caramelized onions and a massive side of chips served with garlic and herb mayo.

It was exactly what I wanted. It wasn't fancy, but it was well executed, fresh, and tasty. And really, do you want anything else out of your local pub? The rest of the menu looked really good too (as did their whiskey selection). I'd definitely hit this place up again next time we're in the 'hood.
Also, MOCCA is pay what you can and tiny, but also a very, very enjoyable diversion.
I did used to do it for my blog about living in Japan, but I don't want to pretend that I'm, say, a professional reviewer. I cannot feign impartiality.
We could have a healthy debate about whether it's possible to be objective, but I fall firmly on the side that believes we all have biases, so I don't think it's good to pretend otherwise. If you wow me with a couple of amazing dishes, I'll probably forgive others that don't do as well.
If that makes me a terrible source for reviews, then so be it. I loved Fanny Chadwick's pickled vegetables, their pretzel bread (speaking of pretzels, I'll be posting a recipe for those later this week), their corned beef (which others hated, and points towards further uneveness in the kitchen) and their S'mores. That means I'm willing to forgive the one soggy mushroom pierogie that accompanied the corned beef, you know?
We all make these judgments when we go out. Last time I went to Canoe, I thought the tea-smoked duck breast was a little tough, but that doesn't mean it was a bad meal. The campfire smoked soft egg was insane! The dill pickle drink? Awesome. Will I enthusiastically return? Uh huh.
Okay, I'm sorry. You're probably not here to listen to me talk about the process of reviewing.
My husband and I went out yesterday for our annual Day O'Fun - which basically means he takes the day off work (I'm on March Break) and we go explore a different part of the city. Yesterday, we wandered around Cabbagetown, popped into the Toronto Necropolis (I love saying that word, it conjures up such a great image), ate lunch at House of Parliament, hopped the streetcar to West Queen West to
It was a great day.
So we spent the morning walking around here:
 |
| Necropolis Chapel & Crematorium |
 |
| The graveyard |
 |
| Detail of a gate on the chapel. |
 |
| Crematorium side door |
 |
| Detail on a memorial. |
 |
| Fantastically creepy tombstone. |
House of Parliament was everything I wanted in pub food. Good, solid, tasty with enough of a twist to the food to keep it interesting. Reminds me a lot of the Manx in Ottawa.

I had the Grilled Cheese Sandwich. Applewood smoked 5 year old cheddar, double smoked bacon (YES) and a sundried tomato tapenade. The house salad was super fresh with a sherry vinaigrette and pumpkin seeds (that's how you should do a green salad, Fanny).
My husband had the steak and blue cheese sandwich with caramelized onions and a massive side of chips served with garlic and herb mayo.
It was exactly what I wanted. It wasn't fancy, but it was well executed, fresh, and tasty. And really, do you want anything else out of your local pub? The rest of the menu looked really good too (as did their whiskey selection). I'd definitely hit this place up again next time we're in the 'hood.
Also, MOCCA is pay what you can and tiny, but also a very, very enjoyable diversion.
Friday, March 18, 2011
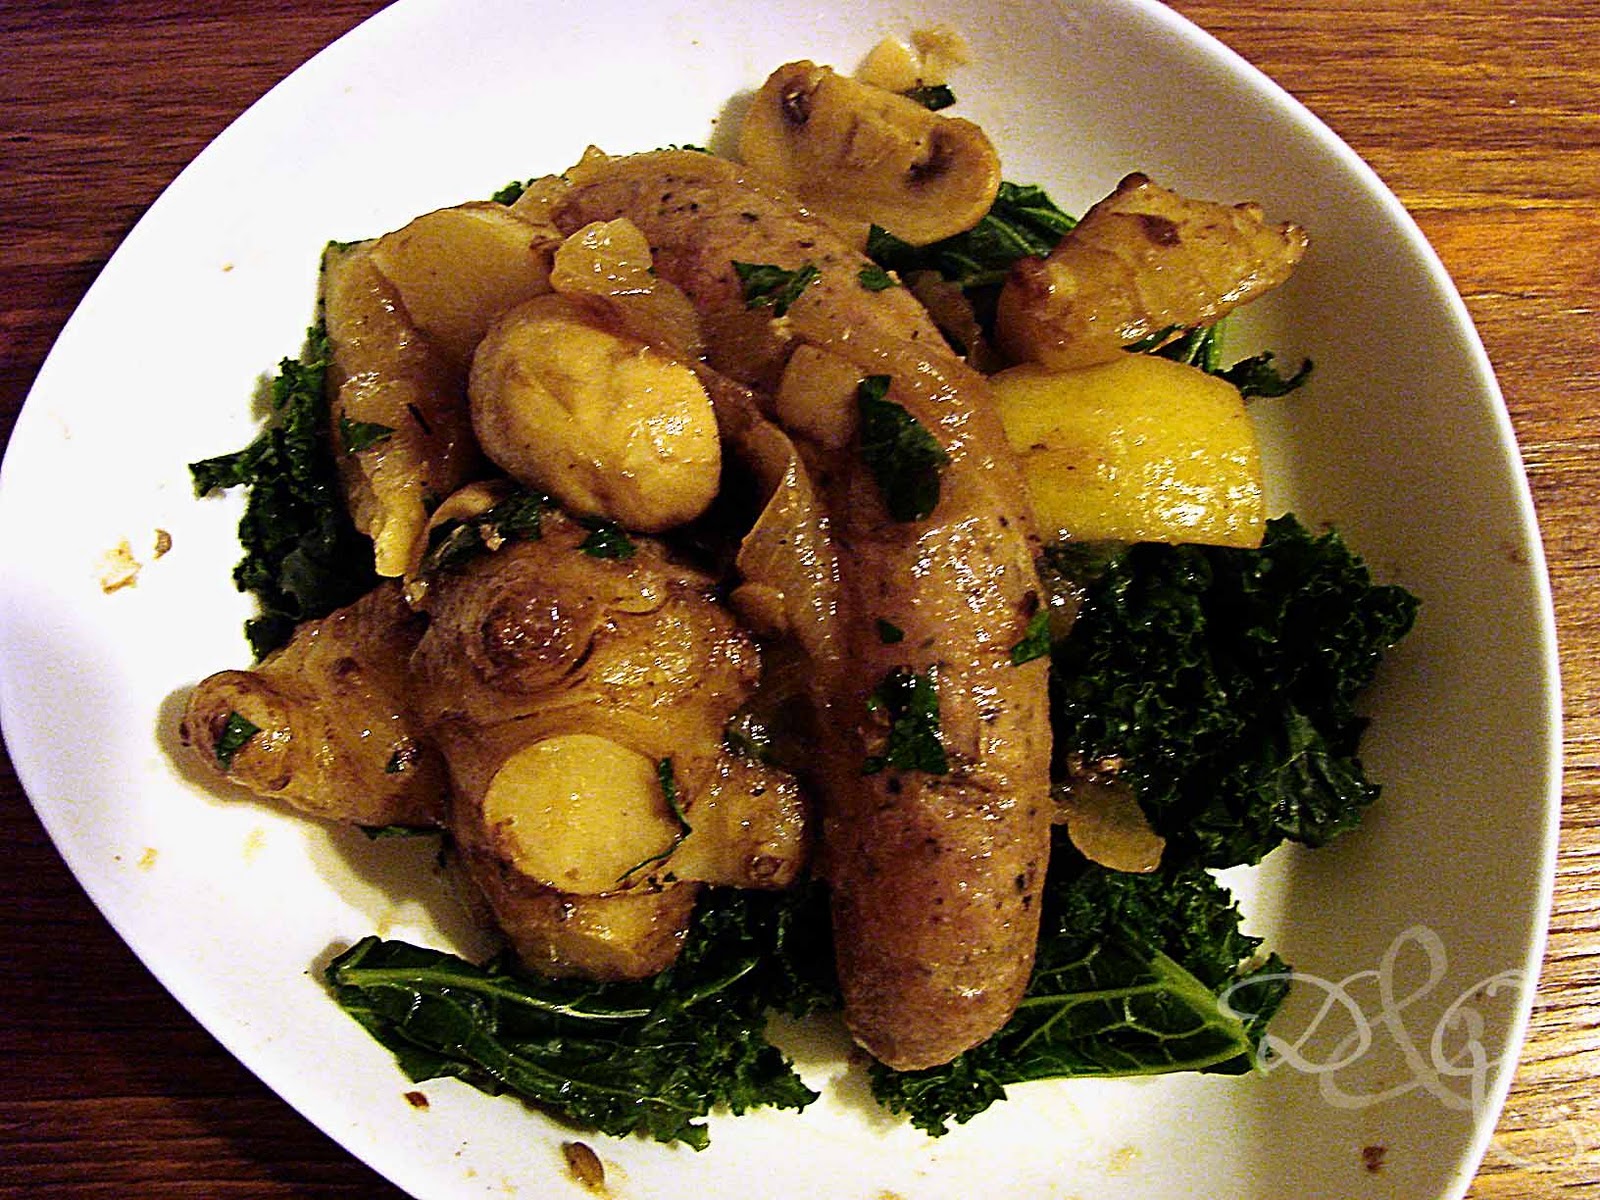
Jerusalem Artichoke and Sausage Simmer with Lemons and Fennel
As we edge closer into spring, the season for Jerusalem artichokes (remember, also known as sunchokes) is drawing to a close. I really adore these knobbly little tubers. I love their texture, but mostly I love their artichoke-like flavour.

When cooking them, I like to leave their skin on (just scrub it a lot). They tend to fall apart if you don't.
Oh, and please keep in mind my earlier warning about gas. I don't want to turn you off these tasty babies, but they're definitely not for a romantic evening for two.
Jerusalem Artichoke and Sausage Simmer with Lemons and Fennel
(adapted from Nigel Slater - it's his week this week)
Ingredients
1 tbsp olive oil
4 good quality, herbal pork sausages
1 onion, peeled and cut into eighths (you want nice big hunks)
1 clove garlic, peeled and thinly sliced
½ lemon, cut lengthwise into 6-8 pieces
6-10 button mushrooms, halved
2/3 lb Jerusalem artichokes, scrubbed and cut in half
2 cups chicken stock or water (approx)
½ tsp (heaping) fennel seeds
salt and pepper to taste
Directions
1. Heat oil in a large, heavy pan over medium heat. Brown sausages on all sides, then remove from pan and reduce heat. Add in onion and get colour gently for 15-20 minutes until onion is soft enough to crush.
It's all about building flavour levels here.
2. Add in garlic, mushrooms, lemon and Jerusalem artichoke halves. Let brown slightly, then return sausages and any accumulated juices to pan. Throw in fennel seeds and a decent grinding of black pepper.

3. Add enough stock to cover artichoke mixture, bring to a boil, then reduce heat and simmer for about 30 minutes, or until artichokes are tender (they'll still be a bit toothsome, don't expect them to go the consistency of potatoes). Season with additional salt and pepper to taste and serve over a bed of steamed greens.

Nigel calls this a recipe for deepest, darkest winter, but I think the fennel and lemon brighten the whole thing up so nicely that it's a great recipe for the transition in Canada that some call Spring, but I like to call The Melting Season.

When cooking them, I like to leave their skin on (just scrub it a lot). They tend to fall apart if you don't.
Oh, and please keep in mind my earlier warning about gas. I don't want to turn you off these tasty babies, but they're definitely not for a romantic evening for two.
Jerusalem Artichoke and Sausage Simmer with Lemons and Fennel
(adapted from Nigel Slater - it's his week this week)
Ingredients
1 tbsp olive oil
4 good quality, herbal pork sausages
1 onion, peeled and cut into eighths (you want nice big hunks)
1 clove garlic, peeled and thinly sliced
½ lemon, cut lengthwise into 6-8 pieces
6-10 button mushrooms, halved
2/3 lb Jerusalem artichokes, scrubbed and cut in half
2 cups chicken stock or water (approx)
½ tsp (heaping) fennel seeds
salt and pepper to taste
Directions
1. Heat oil in a large, heavy pan over medium heat. Brown sausages on all sides, then remove from pan and reduce heat. Add in onion and get colour gently for 15-20 minutes until onion is soft enough to crush.
It's all about building flavour levels here.
2. Add in garlic, mushrooms, lemon and Jerusalem artichoke halves. Let brown slightly, then return sausages and any accumulated juices to pan. Throw in fennel seeds and a decent grinding of black pepper.

3. Add enough stock to cover artichoke mixture, bring to a boil, then reduce heat and simmer for about 30 minutes, or until artichokes are tender (they'll still be a bit toothsome, don't expect them to go the consistency of potatoes). Season with additional salt and pepper to taste and serve over a bed of steamed greens.
Nigel calls this a recipe for deepest, darkest winter, but I think the fennel and lemon brighten the whole thing up so nicely that it's a great recipe for the transition in Canada that some call Spring, but I like to call The Melting Season.
Thursday, March 17, 2011
Carrot and Cilantro Fritters
I'm definitely having one of those weeks where, in the kitchen anyway, things are not going entirely to plan. We'd bought some Rowe Farms marinated chicken legs and threw them out thanks to a super strong funky fish smell.
Last time I checked, chicken should not smell like fish. Not amused, Rowe Farms, not amused.
So, we were left with my planned side dish: carrot cilantro fritters.
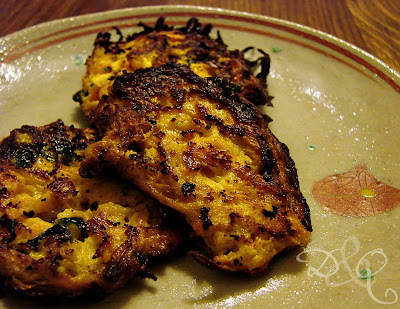
Remember how I was complaining the other day about my lack of photographic ability? I don't know that any photographer could have salvaged what these fritters looked like. I made two key mistakes early on. I started cooking before the oil was hot enough and then, I didn't let the first few get enough of a crust on the bottom. Consequently they ended up looking like... well... like a carrot slaw exploded all over the frying pan.
Having confessed that much, the mess was still delicious to eat, so I decided to keep trying to cook the fritters up.
I'm glad I did too, because, by the end of the whole traumatic experience (the kitchen still stank of that horrible fishy-chicken smell), I'd gotten the hang of it, fixed my mistakes (and tweaked the recipe) and was happily nomming away on the freshly cooked fritters as they popped out of the pan.
No more carrot slaw explosion.
Note: If you're not the patient type, do not attempt this recipe. You need to drop the food in and then leave it alone. I can't emphasize this enough. If you're like me and like moving stuff around in the pan and checking it every couple of minutes or so, this recipe will not work for you. You have to let these get a good, solid crust on before even thinking of flipping them over.
Carrot and Cilantro Fritters
(again, from good ol'Nigel)
Ingredients
2 large carrots, coarsely grated
½ small onion, finely grated
a hunk of strong cheddar (I used about 3 oz of Dubliner Irish cheddar), grated
1 egg, lightly beaten
salt and pepper to taste
2 heaping tbsp flour
1 palmful cilantro, chopped (if cilantro isn't your thing, use chervil or parsley instead)
neutral flavoured oil for frying
Directions
1. Squeeze excess liquid from carrots and onion, then mix together with cheese, egg, flour, cilantro, salt and pepper in a large bowl. Batter should be thick and not runny.
2. Pour enough oil into a large, cast iron skillet to coat the base. Heat over medium-low. Oil is ready when you drop a test bit of carrot-batter in and a crust is created on one side in 3-4 minutes.

3. Drop heaping tablespoon amounts of the carrot batter into the frying pan 2-3 at a time. Let brown on one side for about 4 minutes. Do not attempt to move these babies before they've had the time to develop that crust. Once the crust is formed, gently flip over and fry for 3-4 more minutes. Remove from pan and let drain on a paper towel. Serve as they pop out of the pan.
A great meal for two of you standing around in the kitchen, drinking wine.
Wednesday, March 16, 2011
Cleaning out the Crisper
It's one of those grey days where I'm too bummed to go out to the shops for food, which means it's time to retreat to the pantry where I have cans upon cans of chickpeas (thank Costco for that).
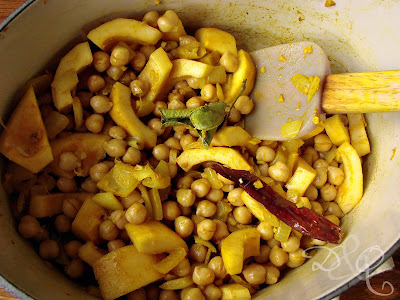
I've had a squash in my cupboard for the past 6 months. So, that was my challenge - one small squash and some chickpeas. Bonus points for use of the leftover half can of coconut milk in the fridge.

And voila:
A Softly Spiced Chickpea Squash Simmer
(inspired by a pumpkin recipe from Nigel Slater's Tender I)
Ingredients
1 14oz can chickpeas
1 small delicata squash (but really, any squash or pumpkin will do)
1 tbsp canola oil
1 medium onion, chopped
2 cloves garlic, minced
1 thumb size knob of ginger, peeled and finely chopped
3 lime leaves (use 2 stalks lemongrass, or the zest of one lime if you don't have the lime leaves)
1 tsp ground coriander
1 tsp turmeric
3 whole cardamon pods, lightly crushed
1 dried whole chili pepper (or two minced fresh, seeded chilies)
1 cup vegetable (or chicken) stock
1 cup coconut milk
salt and pepper to taste
½ tbsp canola oil
½ tbsp mustard seed
palmful chopped cilantro
Directions
1. Drain and rinse chickpeas, set aside. Peel squash and seed, pulling out tough inner fibres. Chop into bite size chunks.
2. Heat oil in a dutch oven over medium-low heat. Add onions and cook for about 3 minutes, softening without colouring. Add ginger and garlic, cooking, stirring constantly for another minute. Add lime leaves, coriander, turmeric, cardamon pods and dried pepper, cook for about 30 seconds to allow the spices to bloom. Add in chickpeas, squash and stock.
Partially cover and let simmer until squash is just tender, about 20 minutes (this will, of course, depend on the kind of squash you use). You may need to add more liquid if the mixture looks like it's drying out.
3. Once squash has reached the right consistency, stir in the coconut milk and reduce heat to low. Let simmer gently while you complete step 4.
4. Heat remaining oil over medium low heat. Once hot, add mustard seeds and cook just until they begin to pop. Mix oil and mustard seeds into the chickpea-squash mixture. Stir in cilantro and season with salt and pepper to taste.

The lime leaves are for decorative purposes only! Don't eat them.
I've had a squash in my cupboard for the past 6 months. So, that was my challenge - one small squash and some chickpeas. Bonus points for use of the leftover half can of coconut milk in the fridge.

And voila:
A Softly Spiced Chickpea Squash Simmer
(inspired by a pumpkin recipe from Nigel Slater's Tender I)
Ingredients
1 14oz can chickpeas
1 small delicata squash (but really, any squash or pumpkin will do)
1 tbsp canola oil
1 medium onion, chopped
2 cloves garlic, minced
1 thumb size knob of ginger, peeled and finely chopped
3 lime leaves (use 2 stalks lemongrass, or the zest of one lime if you don't have the lime leaves)
1 tsp ground coriander
1 tsp turmeric
3 whole cardamon pods, lightly crushed
1 dried whole chili pepper (or two minced fresh, seeded chilies)
1 cup vegetable (or chicken) stock
1 cup coconut milk
salt and pepper to taste
½ tbsp canola oil
½ tbsp mustard seed
palmful chopped cilantro
Directions
1. Drain and rinse chickpeas, set aside. Peel squash and seed, pulling out tough inner fibres. Chop into bite size chunks.
2. Heat oil in a dutch oven over medium-low heat. Add onions and cook for about 3 minutes, softening without colouring. Add ginger and garlic, cooking, stirring constantly for another minute. Add lime leaves, coriander, turmeric, cardamon pods and dried pepper, cook for about 30 seconds to allow the spices to bloom. Add in chickpeas, squash and stock.

Partially cover and let simmer until squash is just tender, about 20 minutes (this will, of course, depend on the kind of squash you use). You may need to add more liquid if the mixture looks like it's drying out.
3. Once squash has reached the right consistency, stir in the coconut milk and reduce heat to low. Let simmer gently while you complete step 4.
4. Heat remaining oil over medium low heat. Once hot, add mustard seeds and cook just until they begin to pop. Mix oil and mustard seeds into the chickpea-squash mixture. Stir in cilantro and season with salt and pepper to taste.

The lime leaves are for decorative purposes only! Don't eat them.
Tuesday, March 15, 2011
Toronto Restaurant Review: moved
Hey y'all. I've moved the second Fanny Chadwick review down with the first. I was worried that people wouldn't see the follow-up post.
Alrighty, please return to your regularly scheduled programming.
Alrighty, please return to your regularly scheduled programming.
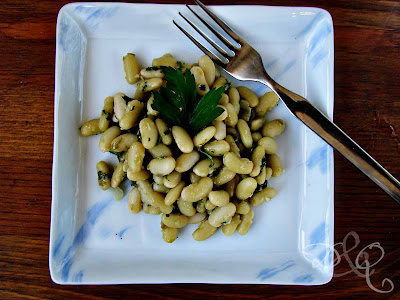
A Bright and Springy Flageolet Salad
I have no idea what the weather has been like near you lately, but for us here in Toronto, it's felt like winter is just dragging its feet on the way out the door. Last weekend, the rain put me into a continuous funk that I didn't get out of until I was met by the sunshine today.
It probably helped that I got to get up at 9:30 as well. Usually I'm up 3 hours earlier.
I had great dinner plans with a friend for tonight that totally fell through in the wake of her work deadlines, so I found myself scrambling for something to make for dinner. I'd gone grocery shopping earlier in the day, but most of my meals had been bought with dark and dreary weather in mind, not the lemon sunshine and azure skies kind of day like we had.
Over the winter months, my cooking incorporates a lot of legumes. I love how hearty and stick-to-your-ribedness they are. I also love how much using them reduces our meat consumption and (by extension) our grocery bill. But, legumes aren't just for those pork rich casseroles, they also make great foils for bright flavours like lemon, capers and parsley.

300 grams (about 2/3 of a pound) dried flageolet beans,
broken ones picked over and discarded
1 lemon, scrubbed and cut in half
1 whole head of garlic, cut in half horizontally
1 stalk celery, cut into 4 inch hunks
3 bay leaves
kosher salt
4 tbsp capers, rinsed
2 cloves garlic, minced
2 tbsp olive oil
3 tbsp canola oil
1 tbsp fresh lemon juice
a palmful of parsley leaves (20-30), coarsely chopped
4-5 mint leaves, coarsely chopped
salt and pepper to taste
Directions
1. Place dried beans in a non-reactive container. Cover with cold water and let sit overnight. Beans will swell in size.
2. Drain beans from their soaking liquid and place in a large non reactive pot with lemon halves, garlic halves, bay leaves and celery.

DO NOT add salt at this point. Doing so will toughen the skins of the beans. Cover with plenty of water and bring to a boil over high heat. Once boiling, reduce heat and cook, continuing to boil gently for 35-60 minutes (cooking time will depend on the freshness of your beans). Once beans are almost tender (45 minutes for me), add salt to cooking liquid. Continue to cook until completely tender.
3. In a food processor, pulse too mix together capers and garlic. Slowly add in oil, pouring through tube. Continue pulsing to add in lemon juice, parsley and mint. The mixture will resemble sludge, but you're actually aiming for that!
4. Remove celery, whole garlic, lemon halves and bay leaves from beans. You may also need to fish out some garlic skins. Drain beans and place in a large, non reactive bowl. Pour dressing mixture and toss gently to combine.
This salad needs a least a half hour to let the flavours combine and take the edge off the dried garlic. Feel free to let it mellow overnight. Be sure to leave it on the counter for at least a ½ hour before eating so the olive oil is in its liquid state.
It probably helped that I got to get up at 9:30 as well. Usually I'm up 3 hours earlier.
I had great dinner plans with a friend for tonight that totally fell through in the wake of her work deadlines, so I found myself scrambling for something to make for dinner. I'd gone grocery shopping earlier in the day, but most of my meals had been bought with dark and dreary weather in mind, not the lemon sunshine and azure skies kind of day like we had.
Over the winter months, my cooking incorporates a lot of legumes. I love how hearty and stick-to-your-ribedness they are. I also love how much using them reduces our meat consumption and (by extension) our grocery bill. But, legumes aren't just for those pork rich casseroles, they also make great foils for bright flavours like lemon, capers and parsley.
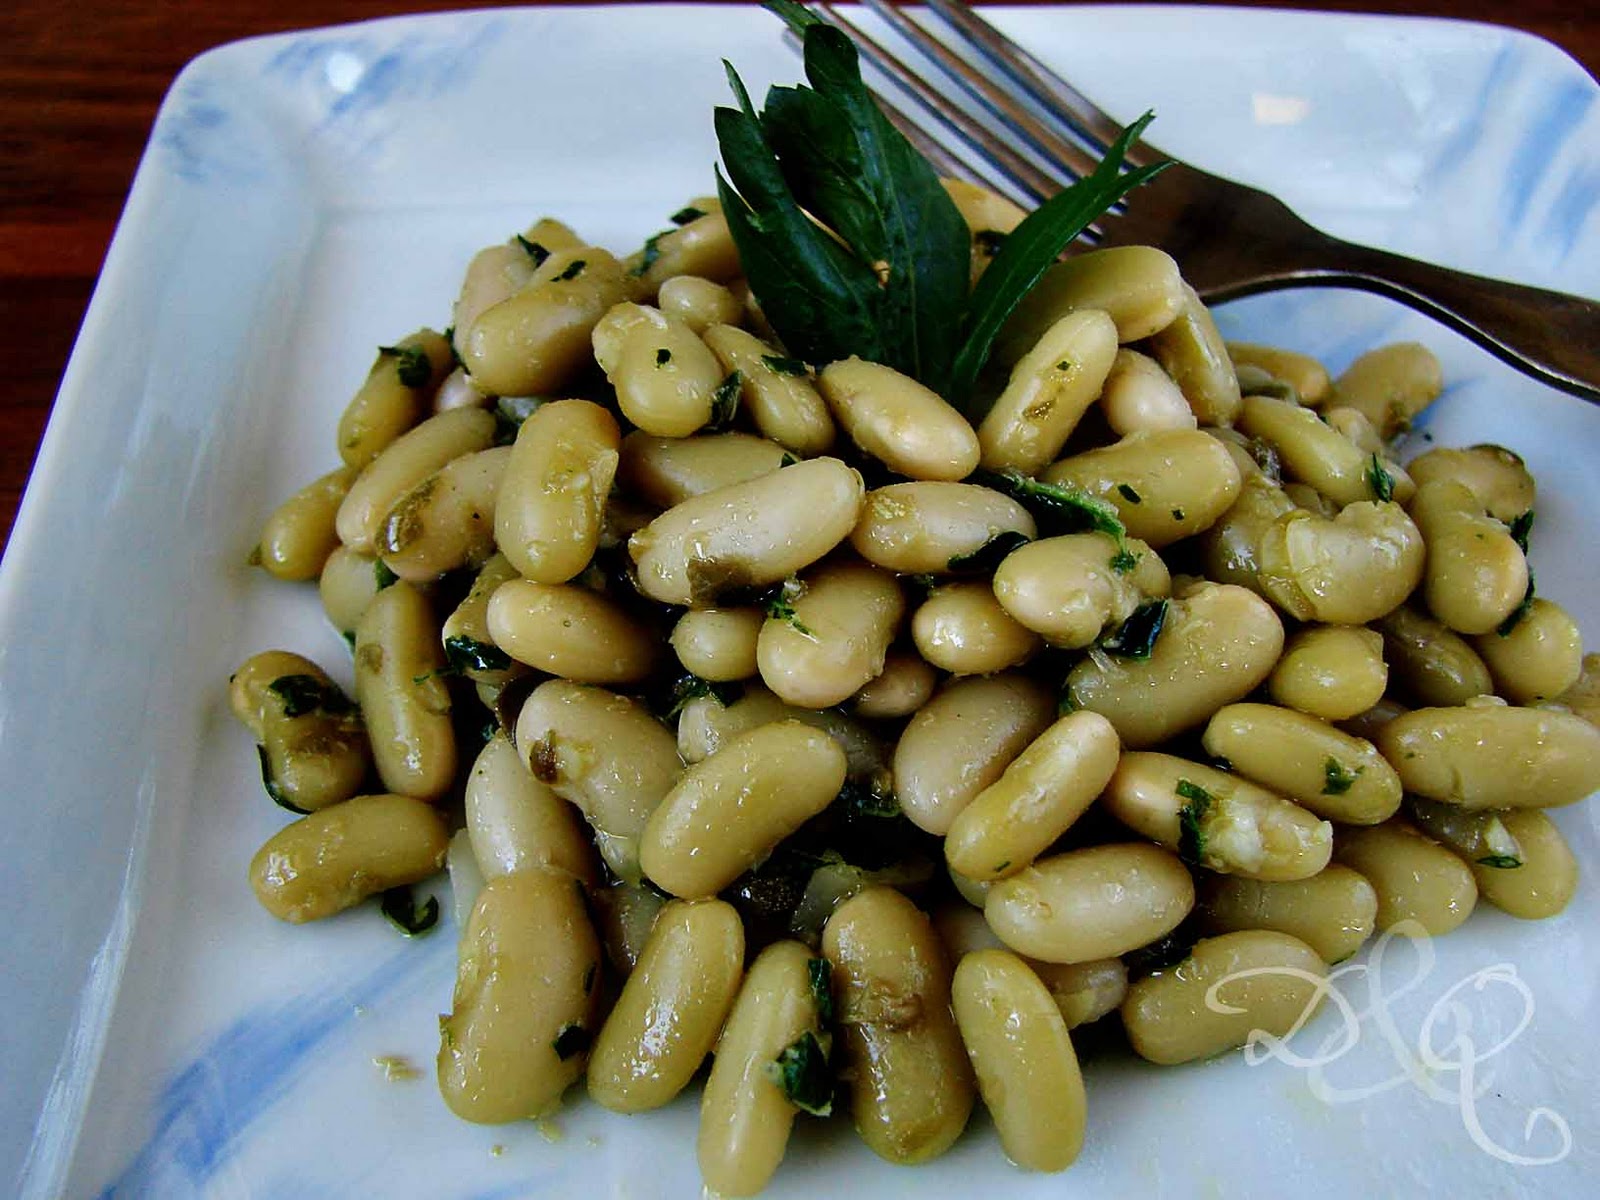
Flageolet Salad with Lemons and Capers
(adapted from Nigel Slater's Real Food)
Ingredients
300 grams (about 2/3 of a pound) dried flageolet beans,
broken ones picked over and discarded
1 lemon, scrubbed and cut in half
1 whole head of garlic, cut in half horizontally
1 stalk celery, cut into 4 inch hunks
3 bay leaves
kosher salt
4 tbsp capers, rinsed
2 cloves garlic, minced
2 tbsp olive oil
3 tbsp canola oil
1 tbsp fresh lemon juice
a palmful of parsley leaves (20-30), coarsely chopped
4-5 mint leaves, coarsely chopped
salt and pepper to taste
Directions
1. Place dried beans in a non-reactive container. Cover with cold water and let sit overnight. Beans will swell in size.
2. Drain beans from their soaking liquid and place in a large non reactive pot with lemon halves, garlic halves, bay leaves and celery.

DO NOT add salt at this point. Doing so will toughen the skins of the beans. Cover with plenty of water and bring to a boil over high heat. Once boiling, reduce heat and cook, continuing to boil gently for 35-60 minutes (cooking time will depend on the freshness of your beans). Once beans are almost tender (45 minutes for me), add salt to cooking liquid. Continue to cook until completely tender.
3. In a food processor, pulse too mix together capers and garlic. Slowly add in oil, pouring through tube. Continue pulsing to add in lemon juice, parsley and mint. The mixture will resemble sludge, but you're actually aiming for that!
4. Remove celery, whole garlic, lemon halves and bay leaves from beans. You may also need to fish out some garlic skins. Drain beans and place in a large, non reactive bowl. Pour dressing mixture and toss gently to combine.

This salad needs a least a half hour to let the flavours combine and take the edge off the dried garlic. Feel free to let it mellow overnight. Be sure to leave it on the counter for at least a ½ hour before eating so the olive oil is in its liquid state.
Monday, March 14, 2011
What NOT to do with bread pudding.
I think it's important to showcase my absolute failures. Cooking should be about embracing those failures, not pretending we all don't have them, you know? Blogs where people believe (erroneously or not) that they're the expert in their field... I'm just not interested. I'm interested in the effort and the experiments! And, judging from the number of hits my post about my failed macaroons, many of you feel the same way.
So, without further ado, I give you my most recent failure: panettone bread pudding.
In answer to the question I asked myself 24 hours ago: No, you shouldn't cook the custard before pouring it on top of the bread.

That way lies disaster. I don't know why I thought this would be a good idea. It really wasn't... and I knew it wouldn't be as soon as I poured the custard out of the pan onto the bread.

It glooped.
It doesn't absorb into the bread, and forms an eggy topping. Have I mentioned that my husband hates eggs?
But, in answer to my other question: Do make sandwiches with the bread and some marmalade first.
That way lies deliciousness. So... it was ultimately a good learning experience!

Anyone else have a recent kitchen disaster they want to share?
Sunday, March 13, 2011
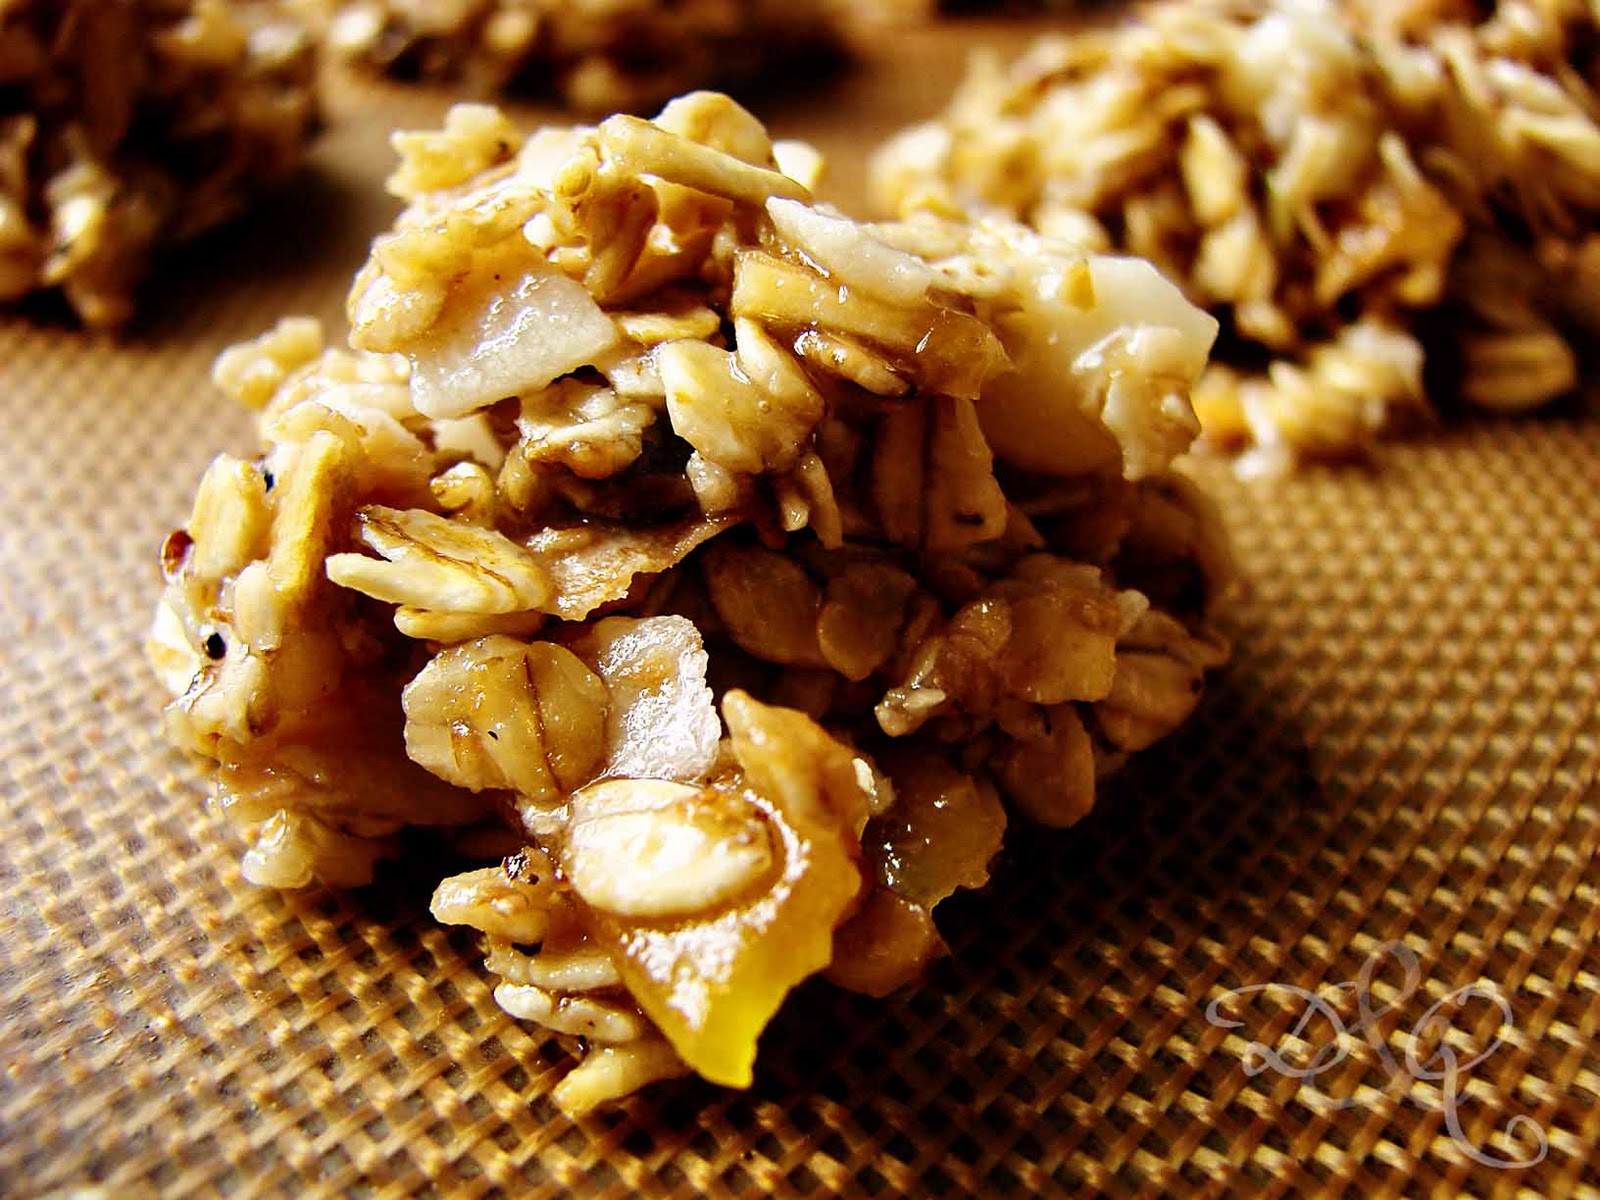
No-Bake Granola Cookies
There are times when I crave sugar. My husband calls those days weekdays. But, for Lent, I gave up all things candy and so, I'm left with a sugar void.
I may have given up candy, but I haven't given up cookies. Especially ones that are made from that healthy, no-added fat granola. I won't lie, these aren't healthy cookies, but they aren't as bad for you as they could be.
And really, who cares? They're delicious, plus you get to use up leftovers!

I whipped up a fresh batch of this stuff yesterday, opting for a tropical variation.
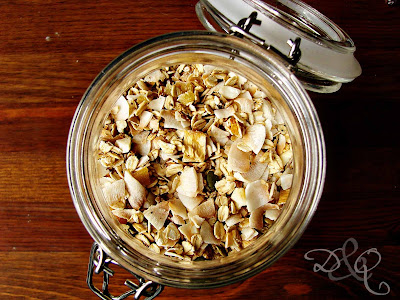
For the orchard fruits and nuts, I swapped just about everything out and used dried pineapple and mangoes, a bit of candied ginger, some pumpkin seeds and some chopped macadamia nuts. I used ¼ cup of maple syrup and ¼ cup of coconut milk. And, because I used the coconut milk, the whole thing took about 35 minutes to cook, in order for the excess liquid to evaporate.
It's not as colourful a granola as my last batch, but man, is it tasty!

I also lucked in to some huge coconut flakes, which really makes a difference in texture. Ultimately, you can use whichever granola you happen to have on hand, but, given the amount of sugar used to bind these cookies together, I recommend using a granola with minimal sweeteners!
No Bake Granola Cookies
(makes about 20)
Ingredients
¼ cup butter (or Earth balance buttery spread to make this vegan)
¼ cup milk (dairy, coconut, soy, rice, almond - your choice)
2/3 cup sugar
¼ tsp vanilla extract
¼ tsp coconut extract*
2 cups granola
* if you're not using a granola with a prominent coconut flavour, you may wish to replace the coconut extract with almond extract, or remove it all together and have ½ tsp of vanilla extract instead.
Directions
1. Melt butter with milk and sugar in a saucepan over medium heat. Bring to a boil, and let boil for 1 minute. Remove from heat and stir in extracts.
2. Stir in granola, mixing thoroughly to coat. Drop by heaping tablespoonfuls onto a parchment lined baking sheet. Dip fingers in water and pat into desired shape. Let cool on baking sheet.

There's no need to aim for perfection here! Aim for free form shapes, I say.
I may have given up candy, but I haven't given up cookies. Especially ones that are made from that healthy, no-added fat granola. I won't lie, these aren't healthy cookies, but they aren't as bad for you as they could be.
And really, who cares? They're delicious, plus you get to use up leftovers!

I whipped up a fresh batch of this stuff yesterday, opting for a tropical variation.

For the orchard fruits and nuts, I swapped just about everything out and used dried pineapple and mangoes, a bit of candied ginger, some pumpkin seeds and some chopped macadamia nuts. I used ¼ cup of maple syrup and ¼ cup of coconut milk. And, because I used the coconut milk, the whole thing took about 35 minutes to cook, in order for the excess liquid to evaporate.
It's not as colourful a granola as my last batch, but man, is it tasty!

I also lucked in to some huge coconut flakes, which really makes a difference in texture. Ultimately, you can use whichever granola you happen to have on hand, but, given the amount of sugar used to bind these cookies together, I recommend using a granola with minimal sweeteners!
No Bake Granola Cookies
(makes about 20)
Ingredients
¼ cup butter (or Earth balance buttery spread to make this vegan)
¼ cup milk (dairy, coconut, soy, rice, almond - your choice)
2/3 cup sugar
¼ tsp vanilla extract
¼ tsp coconut extract*
2 cups granola
* if you're not using a granola with a prominent coconut flavour, you may wish to replace the coconut extract with almond extract, or remove it all together and have ½ tsp of vanilla extract instead.
Directions
1. Melt butter with milk and sugar in a saucepan over medium heat. Bring to a boil, and let boil for 1 minute. Remove from heat and stir in extracts.
2. Stir in granola, mixing thoroughly to coat. Drop by heaping tablespoonfuls onto a parchment lined baking sheet. Dip fingers in water and pat into desired shape. Let cool on baking sheet.
There's no need to aim for perfection here! Aim for free form shapes, I say.
Thursday, March 10, 2011
You know those weeks...
... especially ones before vacations when everyone at work gets a bit nutty and there's fisticuffs and otherwise sane individuals behave like raging monsters?
Welcome to teaching during the week before March break.
Welcome to teaching during the week before March break.
Wednesday, March 09, 2011
When your cooking doesn't look as pretty as the picture...
Sometimes, I wish I was one of those bloggers who had the ability (and the equipment) to take amazing food photographs.
Heck, I'd settle for decent ones.
But, as I do most of my cooking in the evening (and, I'm not about to stop that any time soon), I work under artificial light. And artificial light is not photograph friendly.
And no, I'm not about to build a light box any time soon. That kind of nonsense would just take up too much room in our apartment, but I'll confess to a twinge of jealousy for those people who do have the room and inclination to undertake a blogging project like that.
So, I'm always in awe of what other bloggers can do. So many have the art of food styling down... and, as we all know, we eat with our eyes first.
Most of the time, I tell myself that the photos don't matter, that the food tastes great and that's the most important thing. But, every once and a while, I'll cook something that looks so far removed from its original source that I'm embarrassed to share it.
First off, go check out the lovely blog Indian Simmer here and here.
Don't worry, I'll still be here when you come back.
You done? See how she makes very simple, homey things look amazing?
Alright, here's how those two recipes turned out for me.

Mmm. Brown sludge with a side of mustardy-brown... erm... bits. Nowhere nearly as attractive.
And that's where I get really frustrated, because all three recipes found on this plate were delicious, in spite of the picture. Today, I'm going to share one of the three recipes with you. Stay tuned tomorrow for one other recipe, and please trust me when I ask you to try this out.
Indian Lentil and Bean Simmer
(heavily adapted from Indian Simmer)
Ingredients
3/4 cup dried cranberry beans
2 cups red lentils
2-3 tbsp French lentils (they don't fall apart)
1 tsp tumeric
10 peppercorns
4 whole cloves
½ tsp salt
2 tbsp vegetable oil
2 bay leaves
1 onion, chopped
4 cloves of garlic, crushed and minced
1 inch ginger, grated or finely chopped
1 tbsp tomato paste
2 tsp hot curry powder (more if you like it spicy)
1 tbsp coriander powder
2/3 cup whole fat coconut milk
salt to taste
palmful of cilantro leaves, chopped (optional)
Directions
1. Soak the cranberry beans over night. You'll watch them grow (like magic!) over that time frame. See?
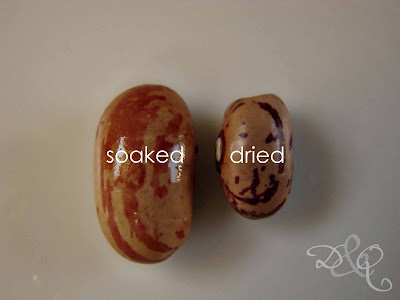
2. Place beans in a pot of cold water. Bring to boil over high heat, reduce and simmer for about 45 minutes, or until beans are just tender. They don't need to be completely cooked, as you'll be adding them to the lentils in the next step. Drain and set aside. You'll notice that the beans have changed once again! The colour changes drastically.
3. Rinse lentils and add to a large pot (and I do mean large), add in beans. Cover mixture with water (water level should be about an inch above lentil/bean mixture) - this is between 6-8 cups. Add the tumeric, salt, peppercorns and cloves. Heat over high until boiling, then reduce heat and simmer until tender, thick and lentils have fallen apart. This will take about an hour, and you want to make sure the consistency isn't watery!
4. In a frying pan, heat oil over medium-low heat. Add bay leaves and onions to oil and sauté until onion is translucent. Stir in garlic and ginger and continue sautéing until everything is golden. Add tomato paste, curry powder and coriander. Stir in coconut milk.
5. Pour onion mixture into lentil mixture, add additional salt to taste. I added close to another teaspoon. Garnish with chopped cilantro leaves.
Heck, I'd settle for decent ones.
But, as I do most of my cooking in the evening (and, I'm not about to stop that any time soon), I work under artificial light. And artificial light is not photograph friendly.
And no, I'm not about to build a light box any time soon. That kind of nonsense would just take up too much room in our apartment, but I'll confess to a twinge of jealousy for those people who do have the room and inclination to undertake a blogging project like that.
So, I'm always in awe of what other bloggers can do. So many have the art of food styling down... and, as we all know, we eat with our eyes first.
Most of the time, I tell myself that the photos don't matter, that the food tastes great and that's the most important thing. But, every once and a while, I'll cook something that looks so far removed from its original source that I'm embarrassed to share it.
First off, go check out the lovely blog Indian Simmer here and here.
Don't worry, I'll still be here when you come back.
You done? See how she makes very simple, homey things look amazing?
Alright, here's how those two recipes turned out for me.

Mmm. Brown sludge with a side of mustardy-brown... erm... bits. Nowhere nearly as attractive.
And that's where I get really frustrated, because all three recipes found on this plate were delicious, in spite of the picture. Today, I'm going to share one of the three recipes with you. Stay tuned tomorrow for one other recipe, and please trust me when I ask you to try this out.
Indian Lentil and Bean Simmer
(heavily adapted from Indian Simmer)
Ingredients
3/4 cup dried cranberry beans
2 cups red lentils
2-3 tbsp French lentils (they don't fall apart)
1 tsp tumeric
10 peppercorns
4 whole cloves
½ tsp salt
2 tbsp vegetable oil
2 bay leaves
1 onion, chopped
4 cloves of garlic, crushed and minced
1 inch ginger, grated or finely chopped
1 tbsp tomato paste
2 tsp hot curry powder (more if you like it spicy)
1 tbsp coriander powder
2/3 cup whole fat coconut milk
salt to taste
palmful of cilantro leaves, chopped (optional)
Directions
1. Soak the cranberry beans over night. You'll watch them grow (like magic!) over that time frame. See?

2. Place beans in a pot of cold water. Bring to boil over high heat, reduce and simmer for about 45 minutes, or until beans are just tender. They don't need to be completely cooked, as you'll be adding them to the lentils in the next step. Drain and set aside. You'll notice that the beans have changed once again! The colour changes drastically.
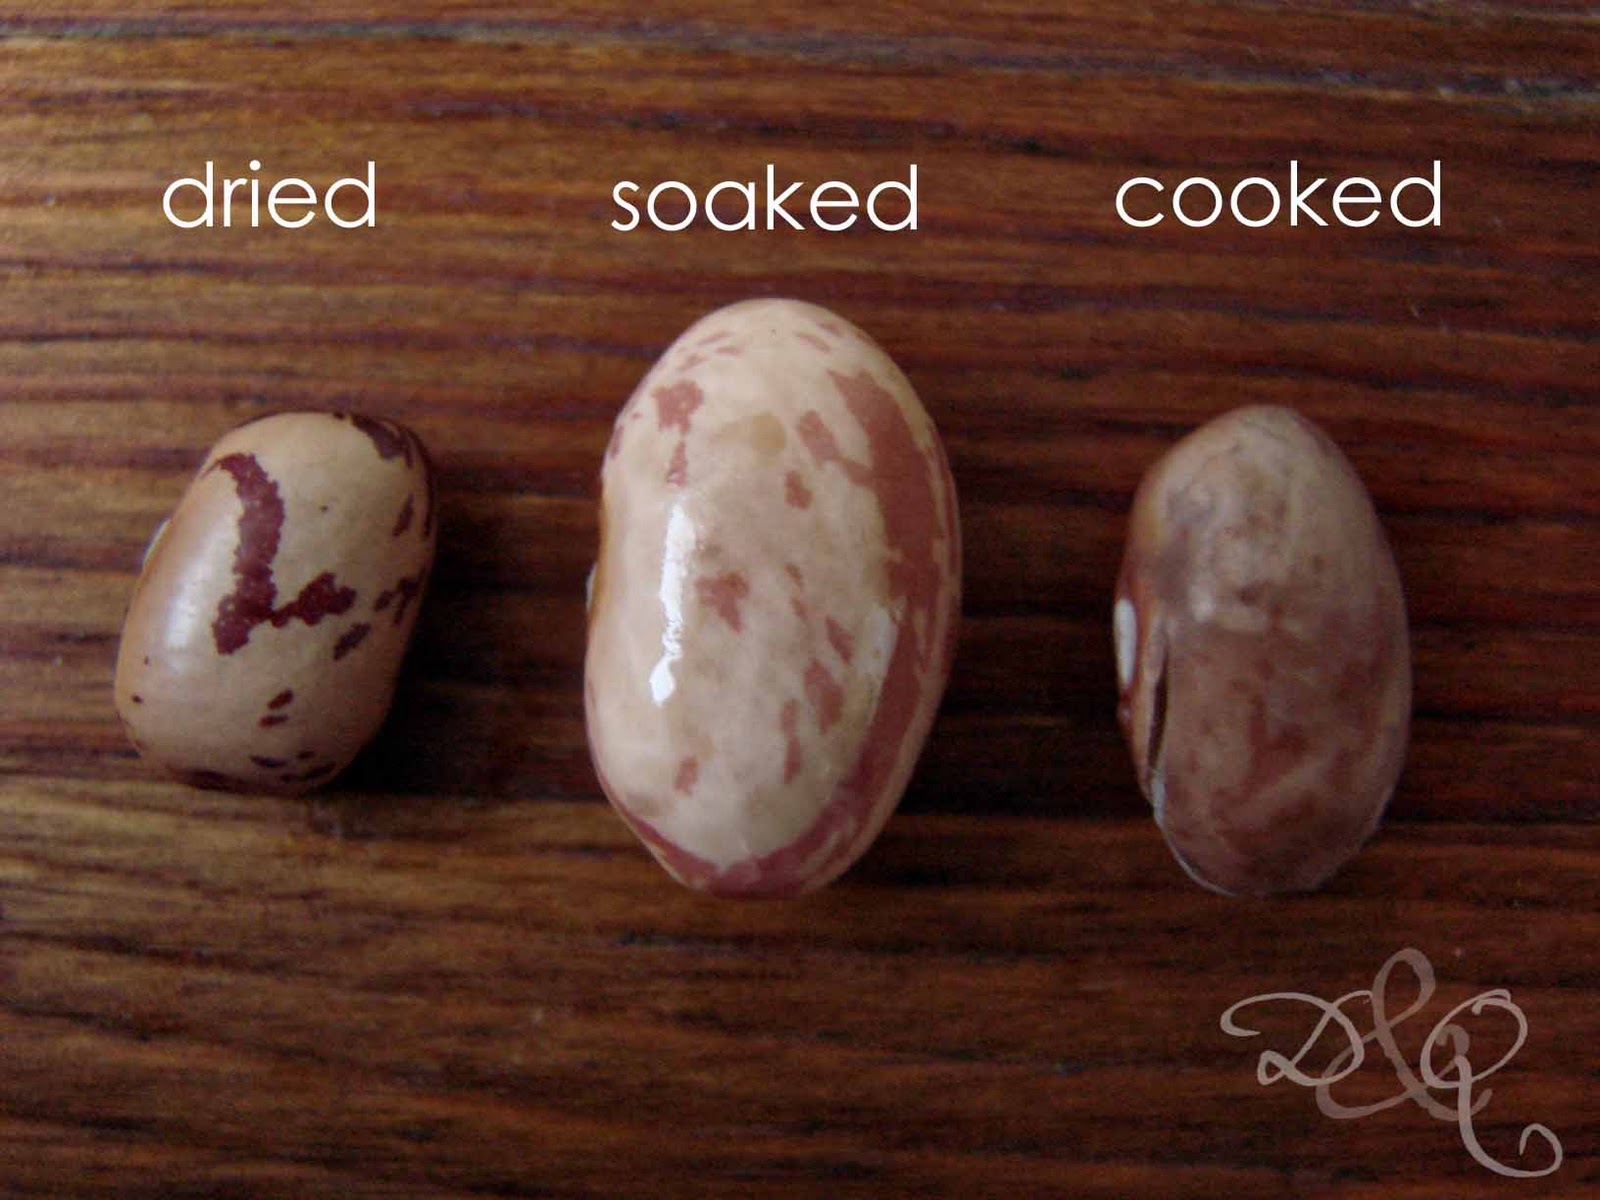 |
| It's disappointing to lose that pretty colour, isn't it? |
4. In a frying pan, heat oil over medium-low heat. Add bay leaves and onions to oil and sauté until onion is translucent. Stir in garlic and ginger and continue sautéing until everything is golden. Add tomato paste, curry powder and coriander. Stir in coconut milk.
5. Pour onion mixture into lentil mixture, add additional salt to taste. I added close to another teaspoon. Garnish with chopped cilantro leaves.
Tuesday, March 08, 2011
Nostalgia and Cooking
I think I've mentioned this before... but when I was a kid, I was one of those awful children who refused to eat vegetables.
I would tolerate the following: cooked broccoli and carrots. Occasionally cooked cauliflower.
This is probably one of the reasons my Mum was so fond of the recipe I'm about to post today. It originally comes from the 1995 Milk Calendar, which, incidentally, includes another of my favourite childhood recipes: a smoothie consisting entirely of milk, ice and orange juice concentrate.

Ah, the '90s. It even looks like a '90s style casserole, doesn't it?
Whatever, it was still delicious, though next time I'm going to pep it up with some more garlic and whole tomatoes.
This meal was capped off by my watching PBS show the Les Misèrables's 25th Anniversary Special. Les Mis could have been the soundtrack to '93/'94. I caught myself having flashbacks to my bad 15 year old self.
Alright. I was nerdy and bookish and not at all bad. At least not in the causing trouble outside the house sense.
My parents and brother probably have a different opinion about this.
Tortellini Casserole
(adapted from Milk Calendar 1995)
Ingredients
3 tbsp butter
2 cloves garlic, finely chopped
1 small onion, finely chopped
3 tbsp all-purpose flour
2 cups milk
1 cup puréed tomatoes
1 tbsp tomato paste
½ tsp each dried thyme, basil and oregano
½ tsp salt
½ tsp pepper
350g - 1 lb (500g) tortellini (meat or cheese)
1 bunch broccoli, trimmed and cut into chunks
1½ cups grated marble cheese
½ cup grated Parmesan cheese
Directions
Have I ever shown you how I write directions down for myself?

Not particularly useful for those of you who live outside my head!
1. Preheat oven to 350º.
2. Over medium heat, melt butter in large, oven proof pot (this will save you dirtying a casserole dish). Sauté onion until translucent, then add in garlic. Sauté 1 minute, or until fragrant. Do NOT let the butter brown. Stir in flour and let cook for 3 minutes, until well incorporated with fat.

3. Whisk in milk slowly, until you have a paste. Continuing whisking and add strained tomatoes, tomato paste, oregano, thyme, basil, salt and pepper.
4. Meanwhile, bring a large pot of water to a boil. If using fresh tortellini, pour into pot, cook for one minute and then add broccoli. Cook for an additional 3 minutes, or until broccoli is bright green and tender crisp. Drain tortellini and broccoli and toss with sauce.
5. Stir marble cheese into sauce. Sprinkle Parmesan over top.

6. Bake in oven for 30 minutes, or until cheese is bubbling and golden. Serve hot with a green salad and garlic bread.

Feel free to jazz up this recipe with whatever pleases you most - sundried tomatoes would be an excellent touch, I think. It's much better suited to kids' palates than adults!
I would tolerate the following: cooked broccoli and carrots. Occasionally cooked cauliflower.
This is probably one of the reasons my Mum was so fond of the recipe I'm about to post today. It originally comes from the 1995 Milk Calendar, which, incidentally, includes another of my favourite childhood recipes: a smoothie consisting entirely of milk, ice and orange juice concentrate.
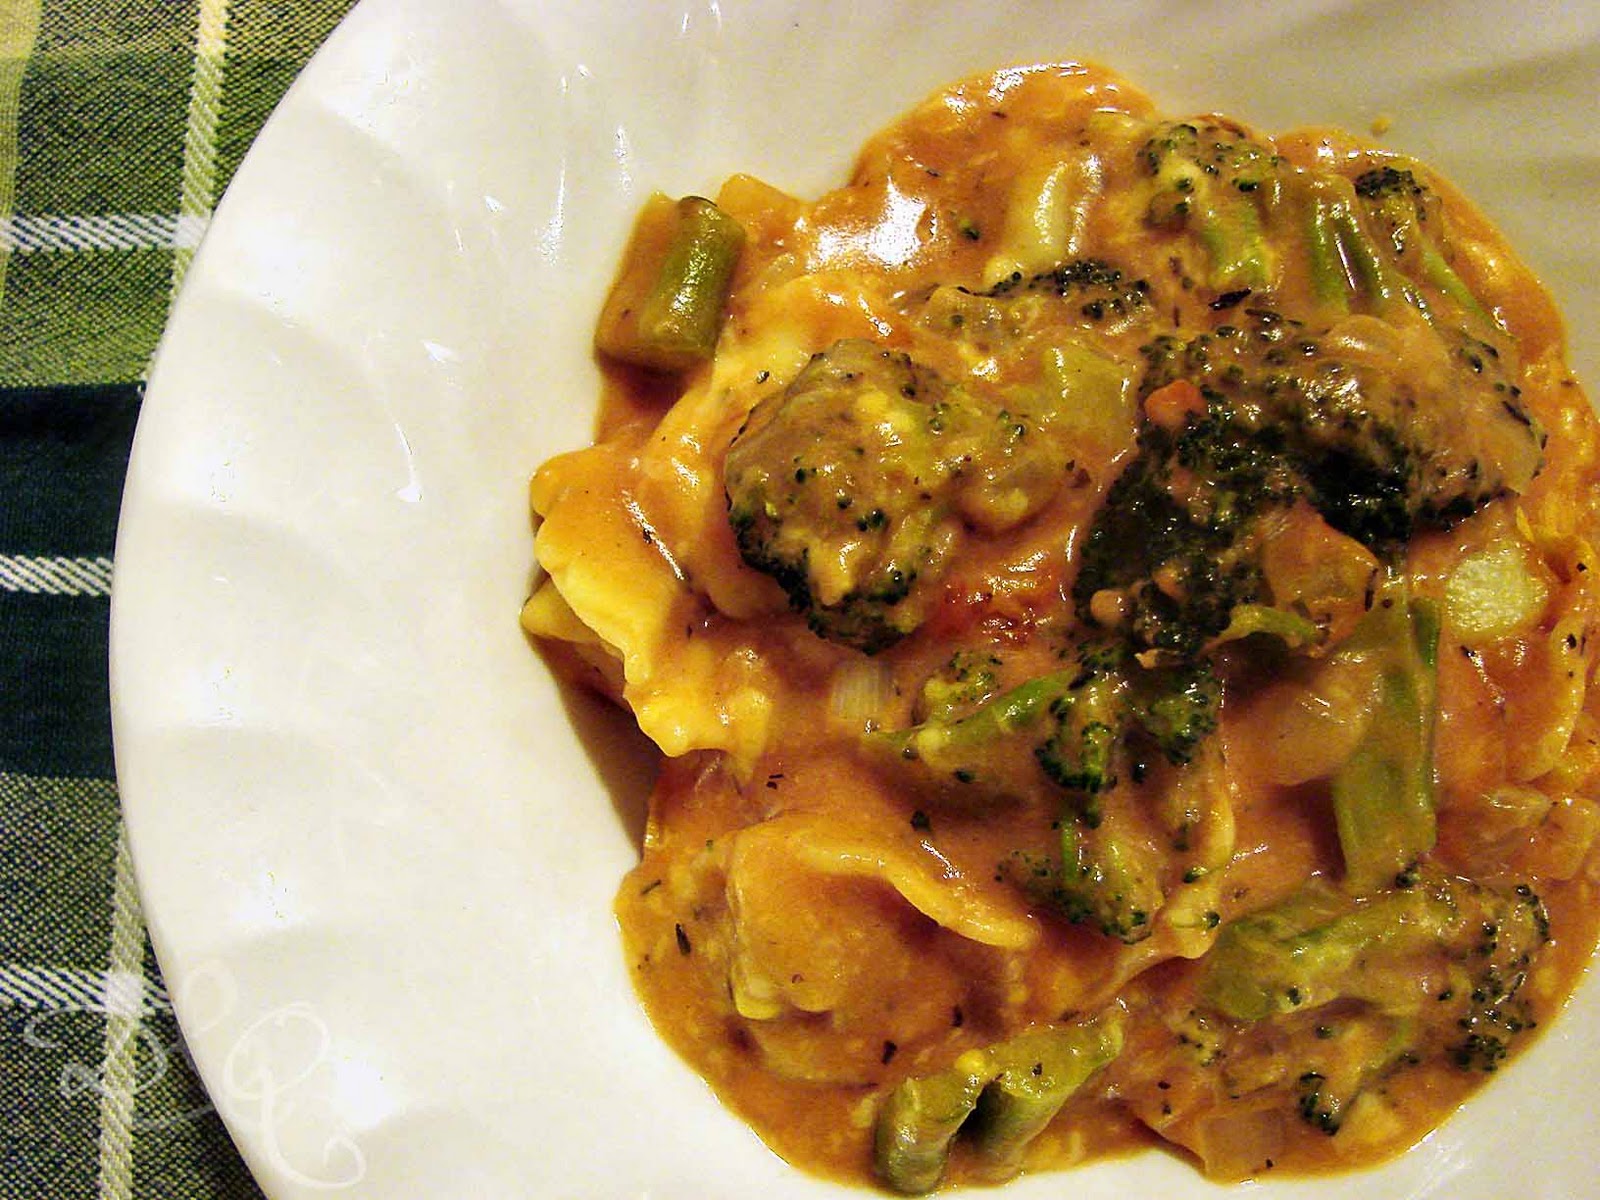
Ah, the '90s. It even looks like a '90s style casserole, doesn't it?
Whatever, it was still delicious, though next time I'm going to pep it up with some more garlic and whole tomatoes.
This meal was capped off by my watching PBS show the Les Misèrables's 25th Anniversary Special. Les Mis could have been the soundtrack to '93/'94. I caught myself having flashbacks to my bad 15 year old self.
Alright. I was nerdy and bookish and not at all bad. At least not in the causing trouble outside the house sense.
My parents and brother probably have a different opinion about this.
Tortellini Casserole
(adapted from Milk Calendar 1995)
Ingredients
3 tbsp butter
2 cloves garlic, finely chopped
1 small onion, finely chopped
3 tbsp all-purpose flour
2 cups milk
1 cup puréed tomatoes
1 tbsp tomato paste
½ tsp each dried thyme, basil and oregano
½ tsp salt
½ tsp pepper
350g - 1 lb (500g) tortellini (meat or cheese)
1 bunch broccoli, trimmed and cut into chunks
1½ cups grated marble cheese
½ cup grated Parmesan cheese
Directions
Have I ever shown you how I write directions down for myself?
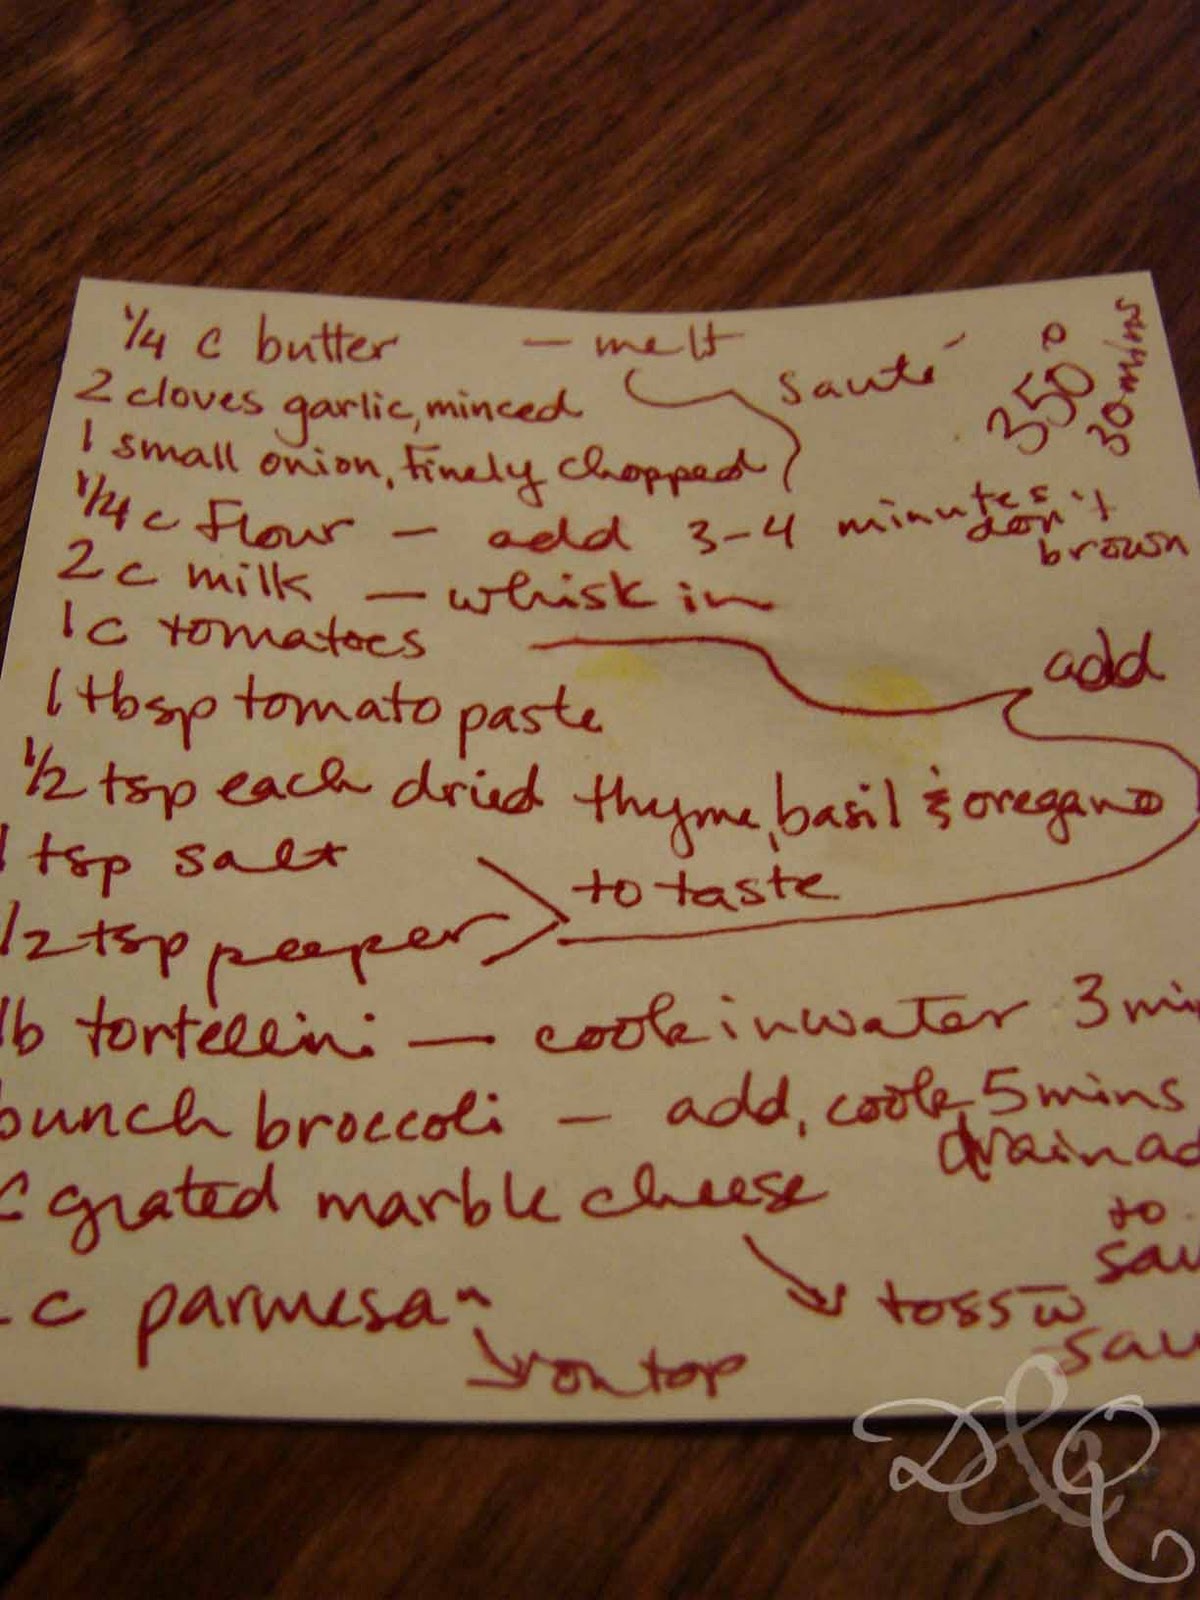
Not particularly useful for those of you who live outside my head!
1. Preheat oven to 350º.
2. Over medium heat, melt butter in large, oven proof pot (this will save you dirtying a casserole dish). Sauté onion until translucent, then add in garlic. Sauté 1 minute, or until fragrant. Do NOT let the butter brown. Stir in flour and let cook for 3 minutes, until well incorporated with fat.

3. Whisk in milk slowly, until you have a paste. Continuing whisking and add strained tomatoes, tomato paste, oregano, thyme, basil, salt and pepper.
4. Meanwhile, bring a large pot of water to a boil. If using fresh tortellini, pour into pot, cook for one minute and then add broccoli. Cook for an additional 3 minutes, or until broccoli is bright green and tender crisp. Drain tortellini and broccoli and toss with sauce.
5. Stir marble cheese into sauce. Sprinkle Parmesan over top.
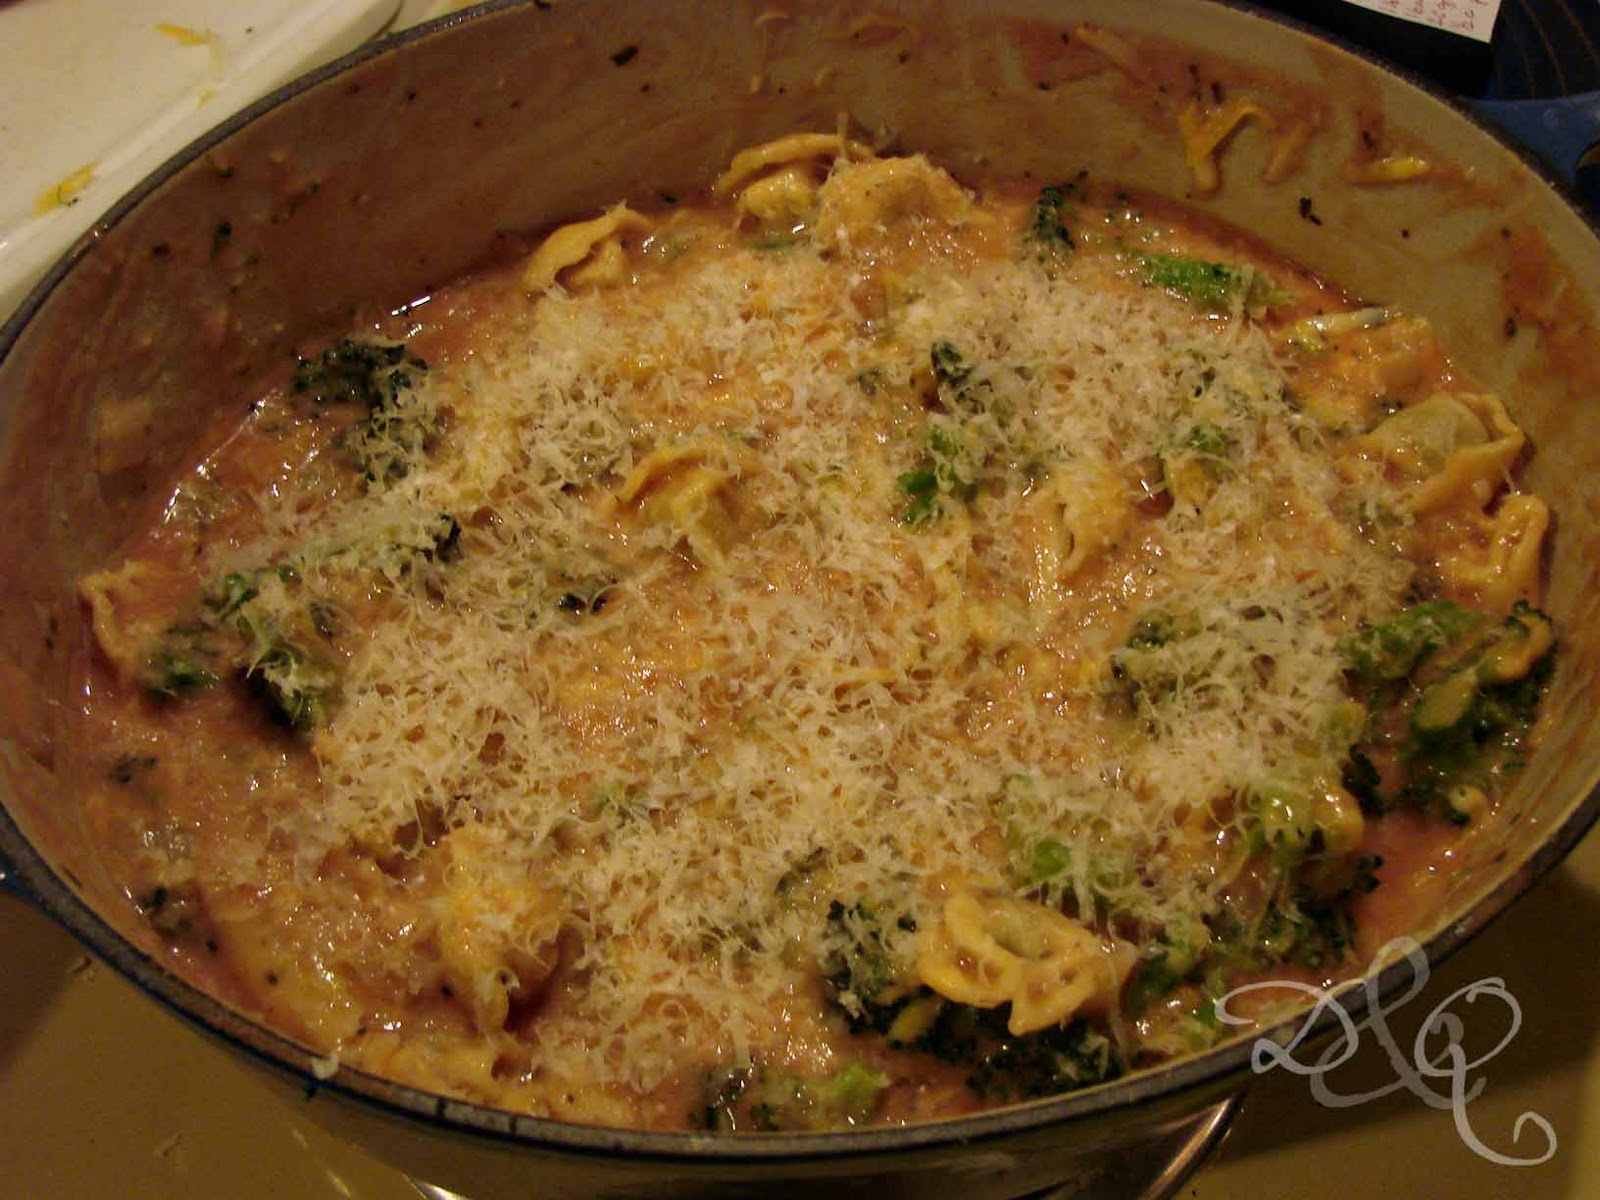
6. Bake in oven for 30 minutes, or until cheese is bubbling and golden. Serve hot with a green salad and garlic bread.

Feel free to jazz up this recipe with whatever pleases you most - sundried tomatoes would be an excellent touch, I think. It's much better suited to kids' palates than adults!
Subscribe to:
Posts (Atom)