Thursday, July 28, 2011

Passion Fruit Sorbet

Hello, hello, good morning all! We're flying off for Victoria tonight, so here's my last pre-Hawaii recipe post for my absolute all time favourite sorbet: passion fruit.


I just cannot get enough of this stuff! It's bright, tangy and sweet. It has a mere 3 ingredients and it's also the perfect foil for the rich and creamy coconut jelly I posted about yesterday.

Passion Fruit Sorbet

Ingredients

2 cups water
1 cup sugar
1½ cup passion fruit puree (often available frozen from Latin American grocery stores)

Directions

1. Heat water and sugar in a saucepan, stirring until sugar dissolves. Stir in passion fruit puree, remove from heat and let chill in the fridge.

2. When cool, place in ice cream maker and process according to manufacturer's directions.


Ta Dah! How's that for an easy, hands off dessert?

I'll probably be off for a few days, but can't wait to post about my experiences as a kitchen monkey at this weekend's wedding and all the deliciousness on Kauai and Maui!

Wednesday, July 27, 2011

Rich and Creamy Coconut Jelly Squares

Oh, I can taste the tropics just on the horizon. In a week from today, I'll be enjoying the lush green forests and dramatic coasts of Kauai.

And hopefully, I'll be enjoying some coconut based deliciousness along the way! This recipe is made using agar agar, meaning it's suitable for vegetarians and vegans.


It also uses creamed coconut - which you should not confuse with coconut cream! Creamed coconut is the unsweetened, dried flesh of the coconut ground into a paste and then formed into solid blocks (coconut cream, on the other hand, is a liquid.) It adds an intense coconut flavour to dishes and means you don't have to use any coconut extract to amp up that delicious flavour.


Coconut Jelly Squares

Ingredients

1½ cups full fat coconut milk
3/4 cups water, divided
¼ cup creamed coconut (not to be confused with coconut cream)
3/4 cup sugar
4 heaping tsp agar agar powder

Directions

1. In a medium saucepan, whisk together coconut milk, ½ cup water, creamed coconut, sugar and heat until just simmering.

2. In a separate, small saucepan, bring remaining ¼ cup water to a boil. Sprinkle with agar agar powder and let boil for 3-4 minutes, until agar agar is dissolved. Pour mixture into coconut mixture, stir well to combine and simmer for 3-4 more minutes.


3. Rinse a 5"x9" loaf pan with water. Pour coconut mixture into loaf pan and refrigerate for at least 1 hour, or until set. Cut into 1" squares and serve with toasted coconut or your favourite tropical sorbet.


Tuesday, July 26, 2011

The Last to Catch On

Do you ever feel like you're the last person to catch on to a trend? I've been reading about people combining watermelon and feta to make a salad for years now, and only did it myself last night for the first time.


The contrast between the salty feta and the sweet watermelon is dynamite. I through in some chopped parsley, Hawaiian Haleakala sea salt (it's an earthy red), freshly ground black pepper and some olive oil. And voila! Done!

I can see using some mint in there as a great addition too.

Monday, July 25, 2011

Nectarine White Iced Tea

We're heading off to Salt Spring Island for my cousin's DIY island wedding on Thursday night, and I've finally, FINALLY, settled on the two recipes we'll be using for the iced tea and the lemonade. In one gigantic container, we'll be having some nectarine white iced tea, and in the other, some raspberry lemonade.

As I was making up the ingredient list, I realized we'd need 104 lemons.

That means 104 lemons need rolling, juicing and measuring to hopefully make 13 cups of fresh lemon juice. Yikes! Luckily, I should have some help in the kitchen... which is great, because although the recipes are kept to no more than 4 ingredients each (sugar, fruit, water, tea/lemons), there's steeping, straining, pureeing, etc.


Anyway, here's the recipe for Nectarine White Iced Tea. It's a Canadian Living recipe. They use peeled peaches, but I'm lazy and used unpeeled (but washed!) nectarines.

Friday, July 22, 2011

Minted Quinoa and Cannellini Bean Salad with Watermelon, Peas & Feta

This recipe was inspired by a Cooking Light recipe that called for farro, watermelon and peas. I was intrigued by the combination, but wanted to make the salad a more substantial meal and balance it out with more salty and tangy flavours.


Quinoa and Cannellini Bean Salad with Watermelon, Peas & Feta

(inspired by Cooking Light)

serves 6

Ingredients

1 cup quinoa
1½ cups water
1 cup freshly shelled peas
1½ cups diced seedless watermelon
1 can cannellini beans, drained and rinsed
½ cup minced parsley
¼ cup shredded mint
1/3 cup crumbled feta
2 tbsp lemon juice
1 tbsp olive oil
½ tsp kosher salt
¼ tsp freshly ground black pepper

Directions

1. Rinse quinoa in a fine mesh strainer, rubbing grains between fingers to remove any residue. Place in a large pot with the water, bring to a boil, then reduce heat, cover and simmer for 15 minutes. Stir in the peas in the last two minutes of cooking time, and replace lid. If peas are not bright green and tender after two minutes, let cook for a minute longer. Remove from heat, drain any excess water off and rinse under cold water.

2. Place quinoa mixture in a large bowl. Toss with watermelon, cannellini beans, parsley, mint and feta.

3. Whisk together dressing ingredients (lemon juice through pepper) in a separate bowl. Pour over quinoa, toss again and serve.

Thursday, July 21, 2011

Some things don't need recipes

Last night, Phil came home with two punnets of the most amazing jewels from the farmer's market.

They glowed in the early evening light.


Black and golden raspberries, warmed by the afternoon haze.

I was entranced by the way the yellows and apricots of the golden raspberries seemed to capture and hold the sunlight. 


And the way the black raspberries' deep purple melted into shades of eggplant, mulberry and burgundy.


We could have eaten them  with softly whipped cream as part of a fool or tossed them with sugar.

Instead, we devoured each berry naked, savouring each explosive burst of sweet flavour, until there was nothing left of them but their memory on our stained fingers and lips.

Perfection.

Wednesday, July 20, 2011

Counting pennies

My mother's birthday present from my father has always been a change jar. Throughout the year, he'd dump all of his spare change in a hidden canister, and we'd all count it up on her birthday. The four of us would make bets as to how much was in the jar based on the weight, not on sight.

A year before our wedding, Phil and I decided to start a minimoon jar. While we have other saving goals in mind, this jar is dedicated to fun and play. We couldn't afford to go on a full-out honeymoon, so we figured we'd amass enough money for a dinner out. We pulled in 300$, which I thought was great, as I rarely use cash. So, we had that killer dinner at Alan Wong's that I talked about here.

Obviously it was amazing, because I'm still talking about it.

So, we've been back into savings mode for the last two years. And the jar was FULL.

Add caption
Quick! Off the top of your head, how much change does a large can of coffee hold?


Why, it's this much!

I guessed that we had 680$, and Phil guessed that we had 760$.


Look at those nice, neat little piles! We calculated our total starting with the pennies and progressing upward in denomination. What started with 4.65$ in pennies exploded when we hit 300$ worth of toonies.

So, in the end, we were both wrong. Including the leftover money and some Christmas money from Phil's parents, we clocked in at more than 1000$! Holy moly, do I ever love those loonies and toonies!

Now the question is: how many amazing restaurants on Maui and Kauai can I eat at with this? Or do we spend it on some gorgeous koa wood? Or do we save it and put it towards our next big vacation?

Decisions, decisions. Any suggestions?

Tuesday, July 19, 2011

Sweet Cherry & Brown Sugar Panna Cotta

My desire for all things smooth and creamy is a reaction to the unbearable heat we're having right now. Today it feels like 42ºC with the humidex. And, while I'm enthuiastically looking forward to the heat and humidity of Hawaii, that's a far more gentle humidity than the smog filled reek of Toronto.

Thanks to Phil's heroic efforts last year to get us an air conditioner (He seriously got the last one available in the downtown core), our top floor apartment is relatively cool at 26º. And while this spells good news for our ability to sleep at night, it does mean that our electricity bill is skyrocketing as I write this.

So, as I turn up the thermostat on the a/c one more degree (how high can we go before it's no longer bearable in the bedroom?), I find myself craving the cool and the creamy.


This panna cotta is so smooth, you'll never believe there's no cream in it. Just look at those gorgeous white tops:


This is a very gently set panna cotta - and the cherry gelatin is very gently set.

Wobbly, I believe is the word to describe it.

You can, of course, attempt to unmold it from its glass or ramekin, but I quite like serving it as it is, inside a glass vessel. You're forced to dig down to the bottom for the cherry layer, and I'm a sucker for treasure hunting.

Sweet Cherry & Brown Sugar Panna Cotta

(inspired by this recipe from epicurious)

serves 4 as a small dessert or 2 very generously

Ingredients

for cherry layer

½ tsp gelatin
½ cup cherry juice
½ tbsp lemon juice
½ cup pitted, quartered sweet cherries
½ tbsp amaretto (optional)

for yogurt layer

1 tsp gelatin
½ cup 1-2% milk
¼ cup packed brown sugar
1 cup thickened yogurt (see step 1)
½ tsp vanilla
1/8 tsp salt


Directions

1. Place ¼ cup cherry juice in a small saucepan. Sprinkle with ½ tsp gelatin. Allow gelatin to soften for 5 minutes. Heat juice/gelatin mixture and stir, until gelatin is dissolved. Remove from heat and stir in remaining cherry layer ingredients. Divide mixture evenly between ramekins/glasses/whatever you're serving these in. Place in the freezer for 30 minutes to set up.

2. Clean small saucepan. There's no sense in getting another one dirty! Pour in ¼ cup milk and sprinkle with 1 tsp gelatin.Allow to sit for 5 minutes so gelatin can soften. Heat over medium heat, stirring gently, until gelatin is completely dissolved. Remove from heat and stir in remaining yogurt layer ingredients. Remove glasses from freezer. Gently pour some of the yogurt mixture over top of the cherry mixture. It's important to do this gently, as the cherries will not totally have set yet. Repeat with remaining glasses. Place in the fridge to set, at least 4 hours before serving.


And guess what, made with 4% yogurt, this recipe still clocks in at a lowly 220 calories per serving, based on 2 servings per recipe. That makes this beach goer very, very happy!

Monday, July 18, 2011

An Inauthentic Flammekueche

Lately, I've been really trying hard to steer clear of cheese. As much as I love it, it just doesn't seem to love me. And when cheese goes... well... I've tried to love pizza without the cheese, but I just haven't been successful.

Enter the Alsatian dish: Flammekueche.


Flammekueche (or Flammekuchen in German) roughly translates into baked in fire... which means you're required to get that oven piping hot. It's a thin crust, topped with fromage blanc (or, in my inauthentic case, full fat sour cream), onions and cooked bacon.

I like mine with a beer crust.

Beer. Bacon. Shallots. It's a winner based on those ingredients alone.

Flammekueche

(adapted from bonjourlafrance.com)

serves 4-6

Ingredients

2¼ cups all purpose flour, divided
¼ cup warm water (100º-110ºF)
1 tbsp granulated sugar
2¼ tsp active dry yeast
1 tsp kosher salt
¼ cup dark beer
6 tbsp milk

1 cup sour cream
½ tsp kosher salt
¼ tsp freshly ground black pepper
3 pinches ground nutmeg (crucial to the dish)
3 slices bacon, chopped into ¼"-½" wide strips
4 large shallots, peeled and thinly sliced

Directions

1. In a large bowl, mix together ¼ cup flour with water, sugar and yeast. Set aside for 30 minutes, or until bubbly. Stir in remaining flour, 1 tsp kosher salt, beer and milk. Turn ingredients onto a lightly floured surface and knead until you have a smooth, elastic ball. Place in a greased bowl, turning dough all over to coat. Cover with a tea towel and set aside in a draft free location, and let rise for 1 hour, or until doubled in bulk. Punch down and let rise again for 1 more hour.

2. Meanwhile, with a rack in the middle, preheat oven to 475º and line your largest square baking sheet with parchment paper.

3. In a bowl, stir together sour cream, salt, pepper and nutmeg. Set aside

4. Heat a skillet over medium heat and fry bacon until crispy. Remove bacon and drain off all but ½ tbsp fat. Fry shallots in fat until golden and brown, about 5 minutes. Remove from pan and set aside.

5. Roll dough out on a lightly floured surface until  as thin as you can manage to transfer. Transfer to baking sheet, cover with tea towel and let rest for 5 - 10 minutes.

6. Spread sour cream mixture over surface of dough, leaving a ½" border on all sides. Sprinkle with shallots and bacon. Fold up sides of dough.

7. Bake for 15 minutes, or until bottom is golden. Let cool on rack for 5 minutes before cutting and serving.


Best enjoyed with beer, in my opinion.

Sunday, July 17, 2011

Dark Chocolate Parfaits with Mango & Passion Fruit

With our vacation to Kauai and Maui less than two weeks away, my husband and I have been talking nonstop about what we're going to do... and, in my case, where we're going to eat!

You've gotta have priorities.

I've already picked out Josselin's Tapas Bar as one of the places I'd like to hit up, along with Merriman's (the Maui one, I think) and the Haili'imale General Store (who catered our wedding). I'm determined to hit up as many of restaurants belonging to the twelve original pioneers of Hawaiian regional cuisine as possible. On previous trips, we've gone to Roy's and Alan Wong's (whose five course tasting menu left me breathless and incredibly stuffed - but how could I NOT finish the butter poached lobster?) and I've been blown away each time.

Can you tell I'm dreaming tropical right now? I'm also dreaming luxury, as we'll be spending some time at the Hyatt. And when I think luxury, I think chocolate.

But I'm prepping for a whole lot of time in my swim suit, so it can't be too luxurious.

Out goes the cream, in comes the yogurt!


For dinner on Saturday night, I pulled together some dark chocolate parfaits with mango and passion fruit. It took me very little hands on time - really, most of it was waiting for the yogurt to drain. You could use just about any fruit with this. Those raspberries that are in season right now would be killer! And if you're into white or milk chocolate, I say go ahead and switch it up!


Chocolate, Mango and Passion Fruit Parfaits

(serves 2)

Ingredients

1 cup 3-4% plain yogurt (don't use one that has all sorts of thickeners in it - go organic/natural - I use Saugeen)
2 tbsp milk
1½ oz good quality dark chocolate, chopped
1 mango, finely diced
2½ tsp passion fruit purée, divided (optional)

Directions

1. Line a fine mesh strainer with several layers (I used 3) of paper towel and pour yogurt on top. Set on top of a bowl and place in the fridge to drain for several hours, or until yogurt is the consistency of cream cheese. You can speed the process along by twisting the paper towel up to form a pouch and gently squeezing the excess liquid out. Discard liquid and place thickened yogurt into a bowl.

2. Place milk in a microwave safe container. Heat until hot. Add in chocolate and stir until melted. Set aside until cooled, then mix into yogurt. Add in 1½ tsp passion fruit purée. Set in fridge for at least 15 minutes, or up to 6 hours.

3. Toss mango with remaining passion fruit puree. In two glasses, layer mango with yogurt mixture. You should have enough for 2 layers of each.


You'll never notice the absence of whipping cream!

Saturday, July 16, 2011

Vanilla Rice Pudding with Raspberry Coulis

My little brother went through a period where he was obsessed with rice pudding. There was constantly a container of Kozy Shack in the fridge.

And when I say container, I mean Costco sized vat.

Basically, the entire fridge consisted of Kozy Shack. The rest of us were forced to live off the land and forage for food. It was a hard existence, but we learned to fend for ourselves in the wilderness of Andrew Haydon Park.

Okay. That might be an total slight exaggeration.


For the record, I think Kozy Shack is gross, but I do love a creamy, well made rice pudding, which this, another French Women Don't Get Fat inspired recipe is.

Use your best risotto rice for this, stir frequently and you'll get something amazing.

Vanilla Rice Pudding with Raspberry Coulis

(adapted from French Women Don't Get Fat)
serves 2

Ingredients

1½ cup raspberries, divided
1/3 cup granulated sugar, divided
1/3 cup short grain rice (2¼ oz)
2 cups 1% or 2% milk (don't use skim)
½ tsp vanilla extract
1 egg yolk
1 tbsp unsalted butter

Directions

1. In a bowl, toss together 1 cup raspberries with 1 tablespoon sugar. Set aside in the fridge to macerate.

2. Bring a medium pot of water to a boil. Add rice and cook for 2 minutes in boiling water. Drain and set aside.

3. Bring milk to a boil in a heavy saucepan. Stir in rice, remaining sugar and vanilla. Reduce heat and cook gently for 30 minutes, stirring frequently. Taste the rice to see if it's finished. If it is to your liking, remove pot from heat and stir in egg yolk. This will turn your pudding into a vanilla masterpiece. Add the butter and stir until melted. Set aside to cool.

4. Take berries out of the fridge and stir in a ½ tablespoon water. Toss, then press berries through a fine mesh sieve to create a coulis. You could replace the water with cassis for added oomph!


5. Layer coulis and rice pudding in clear glasses or serving dishes. Top with reserved berries.

Friday, July 15, 2011

Italian Chicken en Papillote (a non-recipe post)

One of the great things about having my mornings in class is I'm forced to get up at the same time as I do when I teach. Now, I know some of you are putting your hands up to say, what the heck? There's method in my madness, I promise.

When I have time off, I stay up late. And then I sleep in. And my sleep cycle gets pushed further and further out of whack.

I don't like it when my sleep schedule gets pushed out of whack.

Believe it or not, I like productive mornings. It's so nice to get everything out of the way right at the beginning!

Plus, it means I don't have to feel guilty for my daily afternoon naps.

It's all about having guilt free naps.

Yesterday, after a drama class filled with some interpretive dance on war/peace to Zoe Keating, I walked to the library for my annual summer library reading binge. I wasn't carrying any bags on me, so I only picked up a few books, one of which was the French Women Don't Get Fat cookbook.

This recipe (if you can call it that) isn't from the book, but was inspired by her several recipes using the en papillote technique. For those of you not familiar with en papillote, it means you take meat or fish and place it, along with other flavourful ingredients, in parchment paper packages which are then baked in the oven. This steams the meat inside, but also infuses it with whatever ingredients you've thrown in along with it.


I opted for chicken with lemons, parsley (although, if you have fresh rosemary, all the better), olives, sundried tomatoes and capers.

The brilliance of this recipe, is that there really isn't one. Use what you've got on hand; just keep it to no more than 2 tbsp of toppings, plus something beneath the chicken to infuse from below. Sautéed shallots or spinach would make a great base. A few cloves of garlic in there with some lemon and lots of black pepper? Delish!

And the bonus? No added oils!

The packages are made by creating a circle out of parchment and layering all the ingredients on one half of the circle.


You then fold the other side of the paper over to create a half moon shape. Fold the sides up along the edge of the circle so it looks like this:


Bake in the oven on a baking tray at 400º for about 30 minutes.

If you're into theatrics, give everyone at the table a pair of scissors and allow them to cut a cross into the top of the package and then tear it open. The big reveal is half the fun.


Do be careful of the steam though. There's a lot of it trapped in there!

Thursday, July 14, 2011

Tsukune (つくね): an izakaya favourite

Whenever Phil and I went to Daikichi's in his town Tokishi, there were a few standard dishes that we often ordered. And, because it was an izakaya (Japanese pub), it meant that there was lots of delicious food on sticks.

I really, really miss Daikichi's. In fact, about a year ago (almost to the day!), I said about the same thing.

It was a hole in the wall, the guys who ran the place smoked over the food as they grilled it, its tiny booths and stools were often packed with drunk salarymen and attractive young women (who were probably not their wives) and we enjoyed copious amounts of sake, beer and meat on sticks.

We occasionally got eggplant and onion too... but mostly we ordered meat on sticks.

Until recently, I haven't tried to recreate Daikichi's. Anything I do won't live up to the memory in my mind.

Anyway, we always got the chicken-cheese (grilled chicken thighs with a cheese slice on top and special mildly spicy sauce) and the aspara-bacon (grilled bacon wrapped asparagus), and usually got another dish, tsukune.

I attempted those this week, and they're about as authentic as they're going to get given that:

a) I'm not chain smoking over the skewers and
b) I don't have a grill

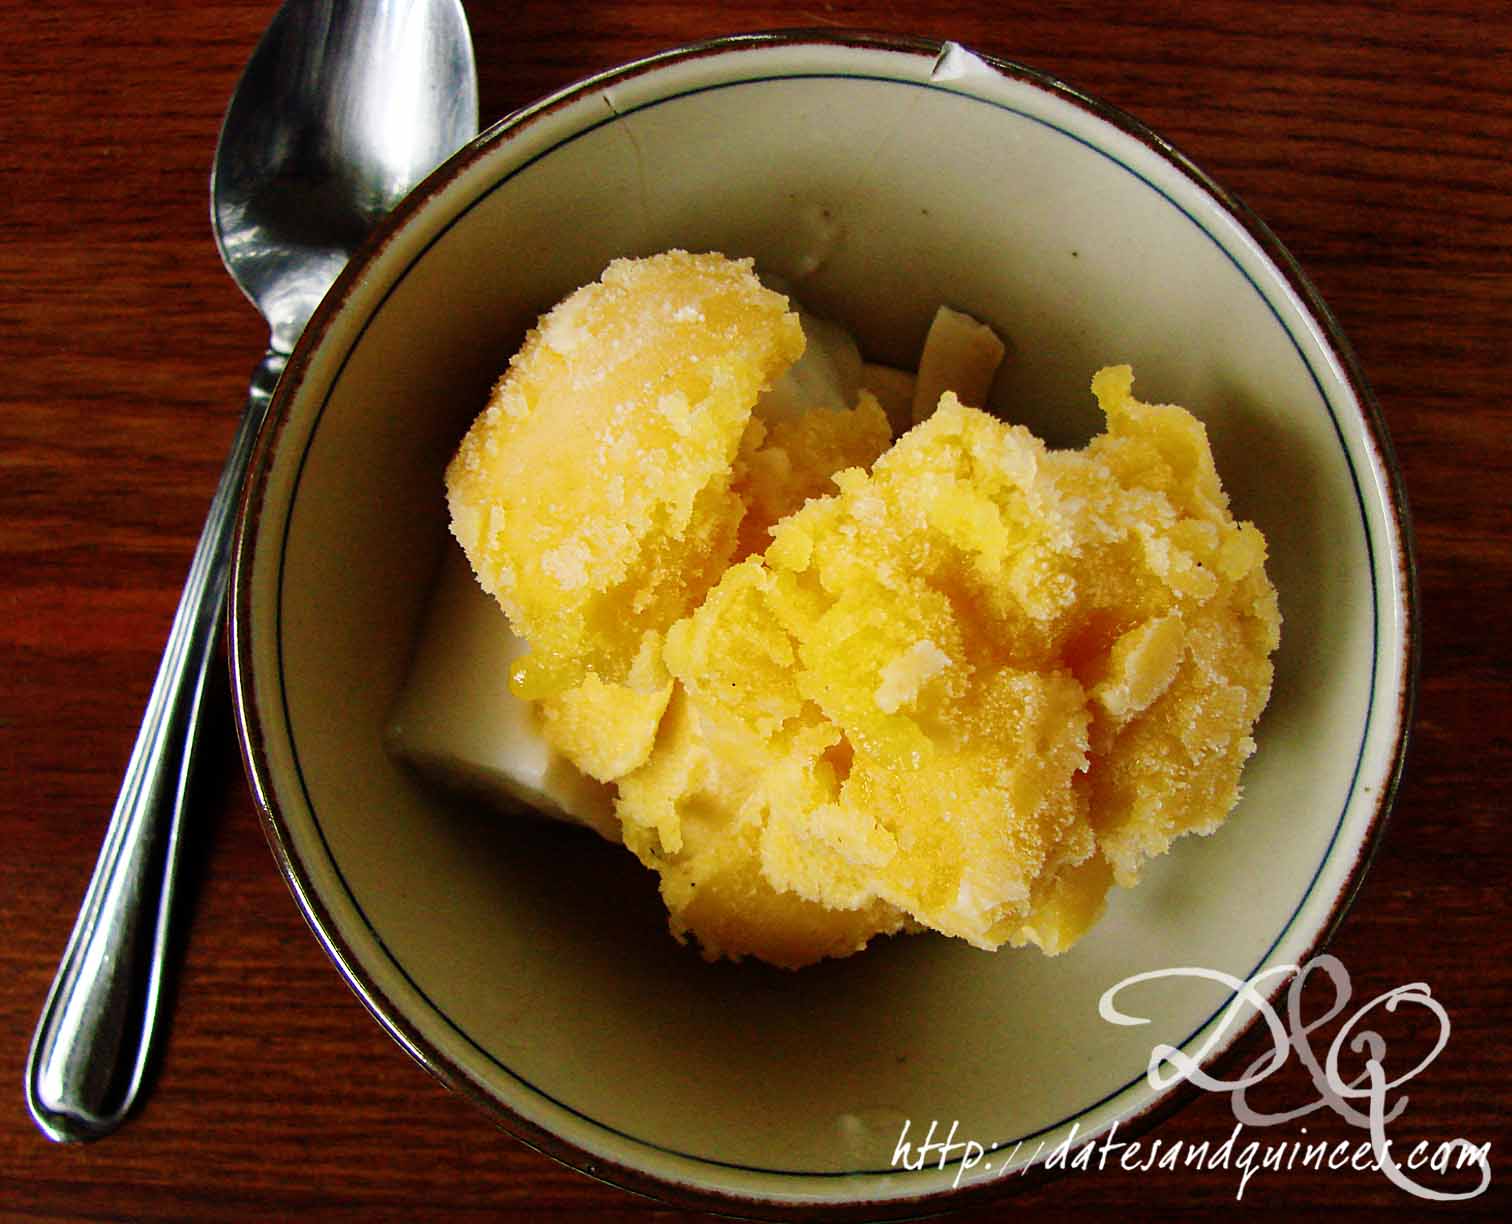
Tsukune (つくね) are essentially very smooth chicken meatballs seasoned with ginger, sesame and green onion, dipped repeatedly in tare (垂れ) and grilled until dry in between dips. Tare is basically the awesome older brother of the insipid teriyaki sauce we have here.

When I moved to Japan and asked about buying teriyaki sauce in the grocery store, I was met by a round of blank stares. Ask for tare.

Better yet, don't buy it from the grocery store. It's dead easy to make.


Now, I like my tsukune well browned with the tare. Those found at Daikichi's tend to be less assertive. Also, I have yet to perfect the art of perfectly spherical meatballs.
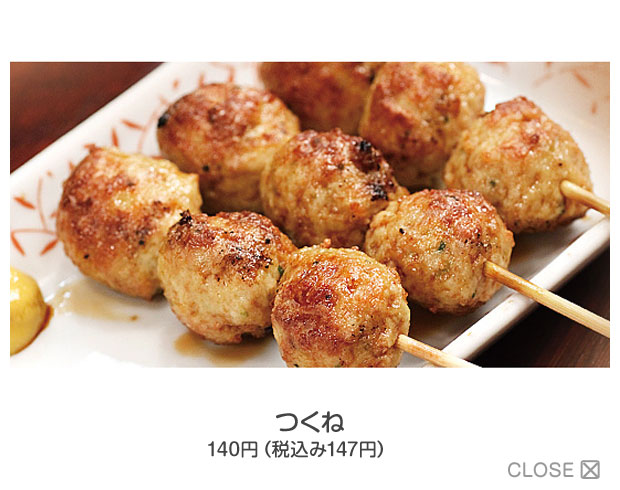
Daikichi's tsukune
Anyway, you can see where the inspiration was and where I ended up, and frankly, I'm really happy with this recipe!

Here are a few pictures of our favourite joint:


A friend outside Daikichi

Inside our Daikichi's
My very young, red faced, and hairier husband fans the grilled goods.
I heard that, after we left Japan, the Daikichi's in Phil's neighbourhood closed down. Clearly our consumption of sake and food on sticks kept the place afloat!

Tsukune: Grilled Chicken Meatballs

(from Hiroko Shimbo's Japanese Kitchen)

Ingredients

1 lb ground chicken or turkey
½ tsp kosher salt
½ tsp finely ground black pepper
2 green onions, both green and white parts, minced
1½ tsp freshly grated ginger
1 egg white, lightly beaten
2 tsp sesame oil
1 tbsp canola oil
sansho pepper (optional)
tare sauce (recipe below)

Directions

1. Begin by soaking 8 bamboo skewers in water for 15 minutes. Set aside.

2. Using a food processor, pulse ground chicken until it forms a coarse paste. Add in salt and black pepper, and pulse again. Alternatively, you can use your hands to squeeze the mixture over and over again (we're talking a good 5 minutes or so) and it'll achieve similar results. Remove mixture from food processor, stir in ginger and green onions. Once they are evenly distributed, mix in the egg white and sesame oil. Divide the mixture into 16 evenly sized balls.

3. Heat 1 tbsp canola oil in a large, non-stick frying pan. Working in batches, cook tsukune for 1 minute or so on each side or just until they're white and firm. You don't actually want to finish cooking them at this stage; you'll finish them off either on the grill or beneath the broiler.

4. Heat the grill on medium high heat or turn on your oven's broiler, making sure the rack is placed about 3-4" below the element. While you're waiting for it to heat up, remove bamboo skewers from water, and thread 2 tsukune onto each. Once your cooking medium is hot, grill or broil the tsukune, for 1 minute. Flip over and repeat on the other side.

5. Once tsukune have been cooked on each side, flip again, and brush with tare. Place back on grill or under broiler and cook until dry, about 1 minute. Remove, flip and brush again with tare. Repeat this procedure once more on each side of the tsukune, ensuring the balls are dry before applying the next coating of tare.

Serve piping hot with a sprinkle of sansho pepper.

Tare: Basting sauce for Yaki-tori

Ingredients

¼ cup sake
1/3 cup + 2 tbsp mirin
1 tbsp granulated sugar
1/3 cup + 2 tbsp soy sauce

optional: add in one dried shiitake mushroom

Directions

1. In a small pot, bring sake and mirin to a boil. Add in the sugar. Cook, stirring until sugar is dissolved. Add the soy sauce (and the mushroom if using) and bring to a boil. Reduce heat and simmer for 30 minutes. Sauce will be thick and glossy. Remove mushroom (feel free to eat it, it's super tasty) and use right away or keep in the fridge for up to a month.

Tuesday, July 12, 2011

Grilled Hanger Steak with My Favourite Marinade

One of the many, many things that I both love and hate about my local (independent) grocery store is its selection of food. Sometimes, you'll be overwhelmed with options, and sometimes, you'll go in for a flank steak and be met with skirt and hanger steaks and nothing else.

This was the first time I've seen a hanger steak carried in our store, and I couldn't believe how inexpensive it was. If my reading of Bon Appetit is anything to go by, hanger steak has become really popular with chefs over the last few years for its depth of flavour. Its texture makes it a great steak to grill up for fajitas too.


I opted to marinate the steak before grilling it using my all time favourite marinade: a Pam Collacott recipe from way back in the day. This is both my mother's and my favourite recipe. Best of all, if you let the meat marinate overnight, you're practically guaranteed tenderness, regardless of the cut.

Pam Collacott's Budget Steak for a Bunch

(adapted from Canadian Living)

Ingredients

3 tbsp soy sauce
2 tbsp lemon juice
2 tbsp canola oil
1½ tbsp Worcestershire sauce
1 tbsp Dijon mustard
1 tbsp minced onion
1 small clove garlic, minced
½ tsp coarsely ground black pepper
¼ tsp dried thyme

1 lb steak (your choice of cut)

Directions

1. Whisk all ingredients except steak together in the bowl/bag you plan on marinating the meat in. Place meat into marinade, turning to coat. Let marinade in fridge for at least 4 hours, but preferably overnight.

2. Grill steak for 6 minutes, turning once for rare, about 8-9 minutes for medium and 12 for well done. Let rest for 5-10 minutes before cutting into thin slices.

In case you haven't seen hanger steak before, here's what the whole marinated and grilled looks like:


Deliciousness!

Monday, July 11, 2011

Three Bean Salad with Corn and Red Peppers

Sometimes I think my mother and I are the only people on the planet who love bean salads. There's something so delightfully passé about them. I always associate them with the '80s... Does anyone else?

When I was in elementary school, we had several Canadian Living seasonal cooking magazines, and inevitably the summer ones had bean salads in them. Whenever the teachers had lunch & learn sessions at school, the library would be set up with tons of food with a mandatory gigantic bowl of bean salad. As a kid, I just assumed that they were making bean salads out of the Canadian Living magazines, because that was the logical assumption to make.

I'm all about the logic.

I'd lobby to bring back the bean salad into vogue. It's healthy, filling, fibre rich, and, when done right, colourful. Plus, it makes a quick and easy lunch to bring.


So, now, my go to bean salad recipe is based off a Canadian Living recipe: Red Barn Bean and Corn Salad. It serves 12 and keeps a decent amount of time in the fridge which especially important if you're, like me, not serving 12 people at once.

If you're alone in liking bean salads in your house, be prepared to be eating this for the better part of a week. It makes about 9 cups worth!

But, it's way better than those drenched salads from the supermarket, and you know you love it. So go ahead, grab a gigantic spoon and dig in.

Three Bean Salad with Corn and Red Peppers

(adapted from Canadian Living)

Ingredients

1 14oz can chickpeas, drained and rinsed
1 14oz can black beans, drained and rinsed
1 14oz can red kidney beans, drained and rinsed
½ cup finely chopped sweet onion
1 cup frozen corn, thawed
½ cup celery, chopped
1 red pepper, chopped
1 tbsp dried basil (you can use ¼ cup fresh, if you anticipate no leftovers)
¼ cup chopped fresh parsley

½ cup apple cider vinegar
3 tbsp olive oil
1 clove garlic, minced
1 tbsp Dijon mustard
1 tsp kosher salt
½ tsp freshly ground black pepper

Directions

1. Mix together first 9 ingredients, chickpeas through parsley in a large bowl. Toss well. In a measuring up, whisk together remaining ingredients. Pour over bean mixture, toss well and refrigerate for at least 1 hour to let flavours meld together.


How easy was that?

Saturday, July 09, 2011

Grilled Potato Salad with Bacon, Shallot and Brown Sugar

The first time I made this recipe was back in the late '90s, when my aunt, uncle and cousins were visiting Ottawa from Yarmouth, N.S. Wanting to veer away from the traditional mayonnaise based salad, we decided to try a recipe from Martha Stewart's Great Parties book. It's one of Martha's earlier books, but I still use it regularly. The recipe for Grilled Peach Chicken is a staple in our cottage cooking, just as this potato salad is.


Fifteen years after first making it, I've made several tweaks (the original recipe serves 14!) to the amount of oil and vinegar, and I always up the amount of bacon required.

In fairness, just because I cook more bacon, doesn't mean the bacon makes it into the salad. Sometimes quality control needs to ensure the freshness and... uhm... deliciousness of the bacon.

This potato salad is, compared to both the mayonnaise types and the German types, quite dry. And, that's the point. It's not meant to be swimming in dressing! It's a refreshing change from tradition and a great accompaniment to ribs and baked beans.

I've given amounts to serve 2-3 people. Adapt up as you see fit!

Grilled Potato Salad with Bacon, Shallots and Brown Sugar

(adapted from Martha Stewart's Great Parties)

Ingredients

1 lb red potatoes (new are especially nice), scrubbed
2 slices really good bacon
1 large shallot, peeled, halved lengthwise and sliced into half moons
1 tbsp + 1 tsp packed brown sugar
2 tsp apple cider vinegar
1 tbsp + 1 tsp olive oil, divided
salt and pepper to taste

Directions

1. Place potatoes in a large pot of cold, salted water. Bring to a boil, reduce heat and simmer until potatoes are almost fork tender, amount 15 minutes (for large potatoes). You want to get them out just before, as you'll be finishing these off on the grill.

2. While potatoes are cooking, cook bacon in a skillet over medium-low heat until crispy. Remove bacon, and drain on a paper towel. Crumble and set aside. Pour off all but ½ tbsp of bacon fat from pan. Add shallot to pan and cook until golden brown, about 5 minutes. Stir in brown sugar, cider vinegar and 1 tsp olive oil. Stir just until brown sugar is dissolved. Remove from heat and set aside while you finish off the potatoes.

3. Remove potatoes from heat and cut into halves, if potatoes are small, or thick slices if potatoes are large. Try to leave the skin intact wherever possible! Brush with remaining 1 tbsp of oil and place on a greased grill to get brown and crispy, about 3 minutes on each side. Remove from heat. If you're using the thick slices, you may want to cut them again into bite sized quarters. Toss with reserved dressing and season with salt and pepper.

Thursday, July 07, 2011

Thai Pork Lettuce Wraps

A friend of mine posted this recipe on the now abandoned August Cooks blog, and I've really loved it for ages, though haven't made it since last summer.

Lime, sriracha, jalapeno, shallots, brown sugar, fish sauce... This recipe hits all the right notes, sweet, spicy, salty, sour. Amped up with some pickled carrots (leftover from a batch based on Gwyneth Paltrow's recipe) and cucumber, these wraps are pretty much heaven on a plate for me.


What I love most about it is how messy they are! Be prepared for dripping juices.

Thai Pork Lettuce Wraps

(adapted from August Cooks)

Ingredients

½ tbsp canola oil
1 lb ground pork
1 clove garlic, minced
1 medium shallot, minced
1 jalapeno, seeded and minced
juice of one lime
1½ tbsp fish sauce
1 tsp brown sugar
1 tsp sriracha

pickled carrots
sliced cucumber
washed, separated leaves boston or bibb lettuce (about 12-16)
handfuls of chopped fresh mint, cilantro and basil

Directions

1. Heat canola oil in a large skillet set over medium heat. Add pork, garlic, shallot and jalapeno. Cook, stirring occasionally, until pork is browned and fat is rendered. Drain fat from pan. Return to heat, reducing temperature to low while preparing the lime mixture.

2. Mix together lime juice, fish sauce, brown sugar and sriracha. Pour over pork. Return heat to medium and stir until liquid has mostly been absorbed. Remove skillet from element.

3. Using lettuce as a cup, place some carrots and cucumbers inside, then top with a couple tablespoons pork mixture. Sprinkle herbs over top, and repeat with remaining lettuce leaves and pork.


Serves 3-4.

Wednesday, July 06, 2011

Ramp Pesto & Two Tomato Bruschetta

My friend Kat does a lot of work in a communal garden here in Toronto, and one of the things I love most about our Monday night cook-a-thon is she often brings over produce from the garden. Earlier this week, she brought over a jar of ramp pesto! Paired with a quick two tomato bruschetta!


Now, ramps' season is spring, but in the spirit of root to tip and waste-not/want-not cooking, Kat decided to use what was left of the plant.

I'll let her explain it.

The portions of the ramps we used were the buds/heads; the ramps had gone to seed so it was sort of like using the flowery tops of chives instead of the oniony bottom if you know what I mean. Ramp season is fiddlehead season - around April. So these are what's left of the plant at this stage of the year.

Kat's Ramp Pesto


Ingredients

1 bunch of basil, just the leaves, washed
3-4 ramp heads
¼ cup of dry roasted almonds
2 Tbsp olive oil
1-1.5 tsp sea salt
1 tsp pepper
3 Tbsp nutritional yeast
dash of water

Directions

1. Blend all ingredients together in a mini chopper or food processor. If you're not vegan, feel free to replace the nutritional yeast with Parmesan cheese.

My Two Tomato Bruschetta

Ingredients

12 thin slices baguette
2 tbsp olive oil, divided
1 clove garlic, halved
½ pint cherry tomatoes, seeded and chopped
¼ cup chopped oil packed sun dried tomatoes
¼ cup thinly sliced basil
½ tbsp balsamic vinegar
¼ tsp salt
¼ tsp cracked pepper

Directions

1. Preheat broiler of oven. Brush one side of the baguette slices with ½ tbsp olive oil. Broil until lightly browned. Flip over, brush with ½ tbsp oil and toast again until lightly browned. Remove from pan and rub one side of each slice with garlic. Discard garlic

2. In a bowl, mix together remaining ingredients. Let sit for 10 minutes. Check seasoning.

3. If using pesto, spread 1 tbsp on each baguette slice. Top with bruschetta.


Bonus points for using yellow and red cherry tomatoes.

Monday, July 04, 2011

A Cool Salad of Herbs and Yogurt with Honey Sriracha Tempeh

I love, love, LOVE it when leftovers from dinner provide the perfect next-day lunch. Last night, we chowed down on Bon Appetit's Yogurt Marinated Chicken and Cucumber-Mint Raita from Epicurious. Both were amazing, and highly recommended. I set aside one of the two chicken breasts that I'd grilled last night for today's lunch.

Originally intending to make a sandwich with the chicken and raita, I found myself wilting in the heat and instead cravings something fresher. So, a salad it was!

I marinated a package of tempeh in sriracha, lime, honey and shallot to play off the balance of cool herbs in the raita. Grilled and served opposite the cold chicken, the salad totally hit the spot.


Hello summer! Aren't you looking colourful? Heirloom Ontario tomatoes, carrots, snow peas, lettuce, cucumber, romaine and butter lettuce, plus fresh mint to garnish. Man, oh man, was this some seriously tasty stuff. I'm planning on making a massive batch of raita up to dip veggies in this week.

Honey Sriracha Tempeh

Ingredients

1 block tempeh, cut into 16 slices
2 tbsp honey
2 tbsp sriracha
2 tbsp lime juice
1 shallot, minced
¼ tsp kosher salt


Directions

1. Whisk together honey, sriracha, lime juice and shallot. Place in a ziploc bag with tempeh. Marinate in fridge for at least 1 hour, preferably overnight.

2. Remove tempeh from marinade. Sprinkle with salt and grill over medium heat for 2 minutes on each side, just until grill marks form. Cut into chunks and sprinkle over salad.


Is there anything more beautiful than summer's produce? I think not.

Sunday, July 03, 2011

How I See This Summer Playing Out

This is going to be one crazy month.

Starting tomorrow, I'm going back to school (as a student, not a teacher) to do my Drama Part 2 class. (For those of you not familiar with the teaching system in Ontario, you have to complete 3 university courses in a subject in order to be considered an authority [they call it a specialist] in the field). I'm intending on becoming a drama specialist by the end of the winter session so that I can stay on as the head of the arts department at my school.

One of the huge bonuses to being a head is the position means you can't be surplussed. I think that would be very, very nice.

Anyway, it means there's not going to be much of a break for me this month! The class will be a lot of work, but I'm looking forward to learning more about designing drama curricula, and not being bored.

Not being bored is good. Very good.

Oh, and we're going to see Carrie Fischer in Wishful Drinking next week.

On top of the schooling, I'm still working my butt off in these four weeks to get at least vaguely bathing suit ready for Hawaii.

I'd settle for vaguely. Fat ass and all.

On my last day of classes, we're flying out to Victoria for a destination wedding on Salt Spring Island. I get to be in the wedding and I'm ridiculously excited about it. Like. SERIOUSLY. I've got a super cute bridesmaid dress that I'm very excited to re-wear in Hawaii.

Then, from BC, my parents, husband and I are all flying down to Hawaii for 12 nights. We're mostly going to be on Kauai and Maui (we have a layover on Oahu), and I cannot wait for everything. I'm planning on trying out Stand Up Paddling, and Phil and I are escaping for 3 nights to the Kauai Hyatt.

Once we get back from Hawaii in mid-August, I have three weeks left before school starts again. I've got a week going in to the hospital for allergy tests (patch tests, joy oh joy), hopefully a week in Ottawa to hit up the cottage and then one more week to do all of my years' planning for all the new classes.

Did I mention that one class includes 5 different classes? ESL A-D as well as grade 9 applied English. I have NO idea how I'm going to do it. I'm terrified out of my mind of that class!

But, I'm not going to dwell on it right now. Right now, I'm going to dwell on the amazing bowl of Ontario strawberries tossed with orange segments and a whiff of orange blossom water that I have sitting in front of me.

It's all about living in the moment.

Friday, July 01, 2011

Vanilla Honey & Yogurt Pound Cake

Is there anything more lovely than strawberries for Canada Day? The two were clearly, clearly meant for each other.


And the fact that they're local strawberries picked up at yesterday's farmer's market? Yes please! Better than this would be strawberries we'd picked ourselves at a local farm, but that's hard to come by in downtown Toronto.

Did you pick strawberries with your family when you were young? I remember it was always a highlight of early summer. We'd be freshly off school and my mum would take my brother and I to the fields. I can remember the intense heat of the sun and the squish of the occasional fallen berry beneath my sandals.

And the taste of a freshly picked strawberry eaten in the field? There is so better tasting strawberry.

I know my brother would agree. When he was little, he'd eat himself practically to sickness on the berries. Let's just say more seemed to make it into his mouth than into his basket.

Strawberry thievery. The most delicious of all illicit fruit theft.

Let's go back to the cake, which I posted a picture of, but haven't talked about at all. Tthis isn't a true pound cake - there's no pound of sugar/flour/butter going on. But, for lack of a better word, to describe it, I'm going to go with pound cake. You bake it in a loaf pan and it looks like a pound cake.

And, I'm just not one of those people who gets wrapped up in semantics.

Anyway, it's got a great crumb and a lovely, subtle vanilla and honey flavour. Perfect for showing off strawberries or whatever toppings you might have on hand.

Vanilla Honey & Yogurt Pound Cake


Ingredients

1½ cups all purpose flour
2 tsp baking powder
¼ tsp salt
1 cup whole milk yogurt
3 eggs
3/4 cup granulated sugar
4 tbsp wildflower honey, divided
1 tsp vanilla extract
1/3 cup canola oil (or any other neutral flavoured oil)

Directions

1. Preheat oven to 350º. Grease a 9"x5" loaf pan with cooking spray and set aside.

2. In a large bowl, sift together flour, baking powder and salt. Set aside.

3. In a separate bowl, whisk together yogurt, eggs, sugar, 3 tbsp honey, vanilla and oil. Once combined, pour into dry ingredients. Stir just until combined. Pour into prepared pan and bake in over for 45-50 minutes, or until a cake tester (I use a chopstick) comes out clean.

4. Drizzle remaining tablespoon of honey on the still warm cake. This will create a totally delicious crust.


Serve with fresh local strawberries!

EDIT: I take it back. Don't serve it with local strawberries. I mean, they're delicious, but even better? Uncanny Preserves's Cherries in Almond Syrup.

Holy sweet Jesus.


It's amazing.


It's a thing of beauty. Look at the way that syrup is soaking the cake. DROOOOOOOOOOOOOL.


No... uhm... I wasn't licking the syrup off my fingers. Nor did I stick them back in the jar.

Pshaw.

How dare you insinuate as much.


Okay. Maybe. Maybe it happened.

Anyway, hop on over to Uncanny and try to get yourself a jar of these bad boys. They're outstanding. PERFECT with the cake.
Related Posts Plugin for WordPress, Blogger...