Does anything say love more than the warmth of cinnamon and sugar?
Need I say more?
Flavoured with vanilla and nutmeg and rolled in cinnamon sugar, these donuts are the perfect fluffy antidote to a bad work day. Best of all, they take less than 30 minutes in total. In the interest of full disclosure, I made these as a vegan treat, but it's easily done non-vegan too.
Cinnamon Sugar Donut Muffins
(from C'est La Vegan)
Ingredients
3/4 cup granulated sugar
2 tsp baking powder
1½ cups all purpose flour
¼ tsp salt
heaped ¼ tsp ground nutmeg
1 flax egg (1 tbsp ground flax mixed with 3 tbsp water OR 1 egg)
3/4 cup milk (non-dairy or dairy)
¼ cup canola oil (or melted coconut oil)
1½ tsp vanilla extract
2 tsbp earth balance (or butter)
1/3 cup granulated sugar
1 tsp ground cinnamon
Directions
1. Preheat oven to 350º. Grease or spray a standard 12 cup muffin tin with cooking spray.
2. In a small bowl, whisk together dry ingredients (sugar through nutmeg). In a large bowl, stir together wet ingredients (flax egg through vanilla extract). Stir dry ingredients into wet. Spoon into muffin tin, filling each about 2/3 full. Bake for 18-21 minutes until they spring back when touched lightly.
3. Meanwhile, melt earth balance and stir together sugar and cinnamon a dish. Brush warm muffins with earth balance, then roll in cinnamon sugar mixture. Let cool on rack.
Showing posts with label quick and easy. Show all posts
Tuesday, February 14, 2012
Saturday, February 11, 2012
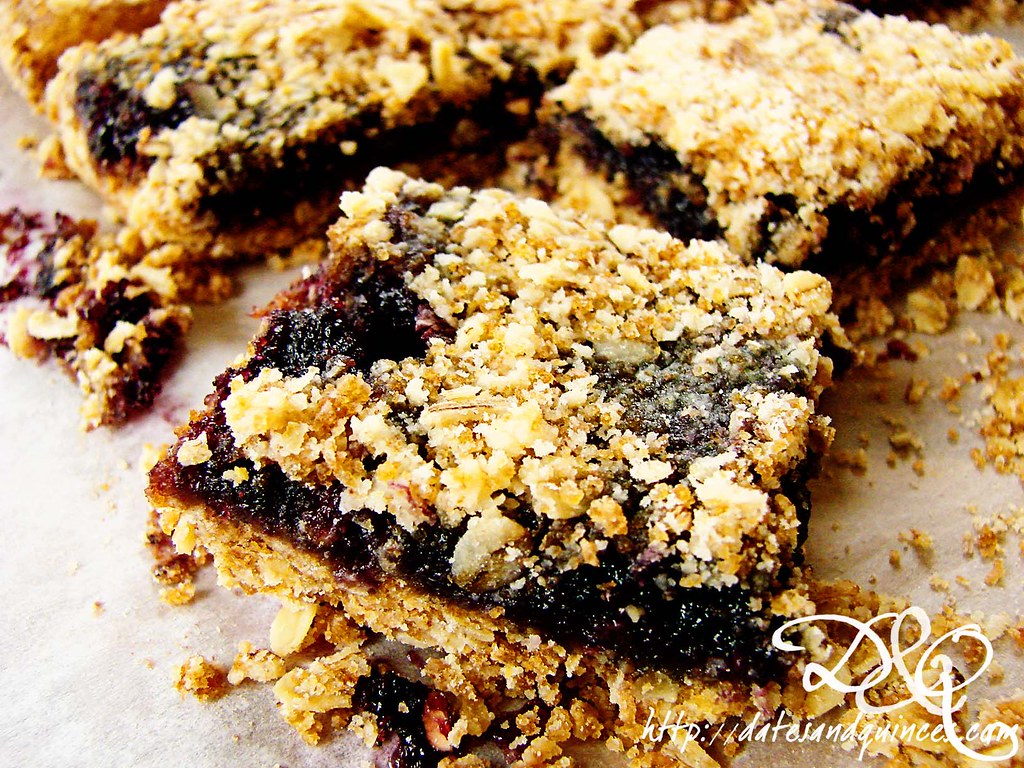
Jam Oat Bars
When I was, oh, I don't know, maybe 12 or 13, my mother had (and I believe she still does have) a Company's Coming Bars and Squares cookbook. There was one recipe in there that I love so much, that it was the first thing I knew how to make by heart - chocolate chip squares. They were so easy, I could throw them together on a week night for our lunches throughout the week.
This post isn't really about the chocolate chip squares. It IS about throwing together some bars for lunches mid-week, AFTER you've made dinner, you're exhausted and pregnant.
Expedient. That's the name of the game.
I'd like to think I've upped the health ante somewhat on your typical jam bar by using spelt flour (you could just as easily use all purpose or whole wheat) and gluten free oats. And, since all I have on my shelves is homemade jam, I used up what was left of a jar of my mother's Ginger, Pear & Crème de Cacao jam AND finally cracked into one of my jars of elderberry jam.
In the interest of honesty, let me admit that the elderberry jam scared me. When I made it, I was totally turned off by the smell. But, as it turns out, if you let the jam sit for the better part of 6 months, you're in for a decadent treat. This is up there with blackcurrant jelly in terms of rich berry flavours.
Which is a big relief, given how much effort I put into making the stuff.
Jam Oat Bars
Ingredients
1 3/4 cups flour (spelt, whole wheat, all purpose, or a mixture)
1 cup packed brown sugar
¼ tsp salt
½ tsp baking soda
3/4 cups chilled unsalted butter (use earth balance if you want to make this vegan), cut into chunks
½ tsp vanilla extract
1½ cups GF oats
1½ cups jam
Directions
1. Preheat oven to 350º. Line a 9"x13" baking ban with parchment paper, ensuring that paper extends over the sides of pan. This will make it easy to remove the bars.
2. In a food processor, pulse together, flour, sugar, salt and baking soda. Add in chilled butter and vanilla, pulsing until small granules are formed. Add in oats and pulse twice. You want some of the oats to be in small pieces and others left whole.
3. Put 3/4 of the flour-oat mixture into the baking pan, patting down to firm. Spread jam over base. If you're using two flavours of jam, spread half on one side and half on the other. Sprinkle with remaining flour-oat mixture. Bake for 20-25 minutes, or until jam is bubbly.
4. Remove from oven and let cool completely in pan on a rack. Makes about 28 pieces, but you decide how much jammy goodness you need in a serving!
This post isn't really about the chocolate chip squares. It IS about throwing together some bars for lunches mid-week, AFTER you've made dinner, you're exhausted and pregnant.
Expedient. That's the name of the game.
I'd like to think I've upped the health ante somewhat on your typical jam bar by using spelt flour (you could just as easily use all purpose or whole wheat) and gluten free oats. And, since all I have on my shelves is homemade jam, I used up what was left of a jar of my mother's Ginger, Pear & Crème de Cacao jam AND finally cracked into one of my jars of elderberry jam.
In the interest of honesty, let me admit that the elderberry jam scared me. When I made it, I was totally turned off by the smell. But, as it turns out, if you let the jam sit for the better part of 6 months, you're in for a decadent treat. This is up there with blackcurrant jelly in terms of rich berry flavours.
Which is a big relief, given how much effort I put into making the stuff.
Jam Oat Bars
Ingredients
1 3/4 cups flour (spelt, whole wheat, all purpose, or a mixture)
1 cup packed brown sugar
¼ tsp salt
½ tsp baking soda
3/4 cups chilled unsalted butter (use earth balance if you want to make this vegan), cut into chunks
½ tsp vanilla extract
1½ cups GF oats
1½ cups jam
Directions
1. Preheat oven to 350º. Line a 9"x13" baking ban with parchment paper, ensuring that paper extends over the sides of pan. This will make it easy to remove the bars.
2. In a food processor, pulse together, flour, sugar, salt and baking soda. Add in chilled butter and vanilla, pulsing until small granules are formed. Add in oats and pulse twice. You want some of the oats to be in small pieces and others left whole.
3. Put 3/4 of the flour-oat mixture into the baking pan, patting down to firm. Spread jam over base. If you're using two flavours of jam, spread half on one side and half on the other. Sprinkle with remaining flour-oat mixture. Bake for 20-25 minutes, or until jam is bubbly.
4. Remove from oven and let cool completely in pan on a rack. Makes about 28 pieces, but you decide how much jammy goodness you need in a serving!
Main Ingredients:
bars,
dessert,
elderberry,
gluten free,
jam,
oats,
pears,
quick and easy,
weeknight
Monday, October 24, 2011
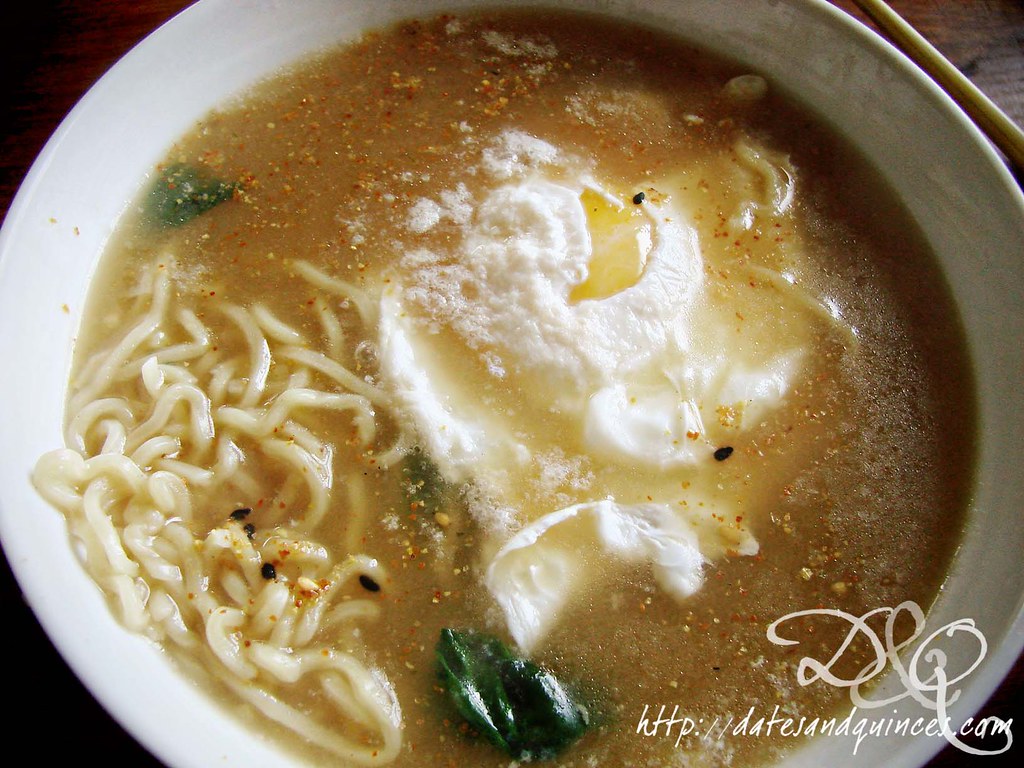
Miso Ramen with Poached Egg and Spinach
Unlike many students who were forced - out of poverty - to subsist on a diet of dehydrated ramen noodles throughout their university years, I was lucky enough to live at home and, you know, eat healthily. That's not to say that I didn't have the occasional msg and sodium laden convenience product. My brother and I would regularly split a package when we watched WWE Raw that we would stir fry with veggies instead of turning it into soup.
Yes, I said WWE. I love Shakespeare, Jane Austen and the WWE. I also play video games. It weirds my students out to no end, but I like to say that my interests don't fit into nice, neat boxes.
The first time I went out and ate ramen noodles outside of my house was in my husband's town in Japan. There was a great shop in Toki-shi along Route 19 that served the most gloriously gigantic bowls of noodles. The first time we ate there, it was a painfully chilly, rainy Sunday night in November. The rain was pounding umbrellas with icy fury and we were both exhausted. We'd come back from Nagoya and with a long line at our regular Sunday night sushi joint, we decided to brave the vicious weather and try somewhere new.
Let me tell you, ramen is the perfect antidote to combat the bone chilling rain of an autumn storm. When your monster sized bowl arrives, you're immediately bathed in steam from the broth. On first bite, the noodles are so hot you almost burn your tongue, but you slurp them down anyway. And then, as you begin spooning the salty broth into your mouth, a warmth uncurls itself in your belly and begins to radiate throughout your limbs.
Frankenstein's monster could have been brought to life with ramen. If he had been, he probably would have been in a much better mood.
That first night, I had miso-butter ramen with corn, an egg, and bamboo shoots. And though I tried many other different varieties in my time there, I always returned to the comfort of miso ramen to warm myself.
I don't make ramen much for myself these days - only a handful of times for those chilly days in autumn and winter. The dehydrated stuff just doesn't do it for me. Luckily, there's a company in the GTA (Marufumi Foods) that makes fantastic fresh ramen and freezes it. Their stock base is a miso based paste, not a powder. If you can get hold of fresh or frozen ramen, you're working in a whole new ballpark of awesome.
Miso Ramen with Poached Egg and Spinach
(serves 1)
Ingredients
1 package ramen with seasoning mix (preferably miso)
1 tbsp white vinegar
1 egg
1 handful baby spinach leaves
shichimi, or chili-garlic paste to taste
Directions
1. Cook ramen according to package directions. Meanwhile, bring a pot with 1" water in it to a boil. Add vinegar and reduce heat to a gentle simmer. Crack egg into a small dish and slide into simmering water. Cook for 1-2 minutes or until your desired doneness.
2. Add spinach leaves to ramen and broth. Cook for 30 seconds, just until wilted. Ladle into a large bowl. Remove egg from poaching water with a slotted spoon and place on top of noodles. Sprinkle with shichimi to taste.
Yes, I said WWE. I love Shakespeare, Jane Austen and the WWE. I also play video games. It weirds my students out to no end, but I like to say that my interests don't fit into nice, neat boxes.
The first time I went out and ate ramen noodles outside of my house was in my husband's town in Japan. There was a great shop in Toki-shi along Route 19 that served the most gloriously gigantic bowls of noodles. The first time we ate there, it was a painfully chilly, rainy Sunday night in November. The rain was pounding umbrellas with icy fury and we were both exhausted. We'd come back from Nagoya and with a long line at our regular Sunday night sushi joint, we decided to brave the vicious weather and try somewhere new.
Let me tell you, ramen is the perfect antidote to combat the bone chilling rain of an autumn storm. When your monster sized bowl arrives, you're immediately bathed in steam from the broth. On first bite, the noodles are so hot you almost burn your tongue, but you slurp them down anyway. And then, as you begin spooning the salty broth into your mouth, a warmth uncurls itself in your belly and begins to radiate throughout your limbs.
Frankenstein's monster could have been brought to life with ramen. If he had been, he probably would have been in a much better mood.
That first night, I had miso-butter ramen with corn, an egg, and bamboo shoots. And though I tried many other different varieties in my time there, I always returned to the comfort of miso ramen to warm myself.
I don't make ramen much for myself these days - only a handful of times for those chilly days in autumn and winter. The dehydrated stuff just doesn't do it for me. Luckily, there's a company in the GTA (Marufumi Foods) that makes fantastic fresh ramen and freezes it. Their stock base is a miso based paste, not a powder. If you can get hold of fresh or frozen ramen, you're working in a whole new ballpark of awesome.
Miso Ramen with Poached Egg and Spinach
(serves 1)
Ingredients
1 package ramen with seasoning mix (preferably miso)
1 tbsp white vinegar
1 egg
1 handful baby spinach leaves
shichimi, or chili-garlic paste to taste
Directions
1. Cook ramen according to package directions. Meanwhile, bring a pot with 1" water in it to a boil. Add vinegar and reduce heat to a gentle simmer. Crack egg into a small dish and slide into simmering water. Cook for 1-2 minutes or until your desired doneness.
2. Add spinach leaves to ramen and broth. Cook for 30 seconds, just until wilted. Ladle into a large bowl. Remove egg from poaching water with a slotted spoon and place on top of noodles. Sprinkle with shichimi to taste.
Friday, September 30, 2011
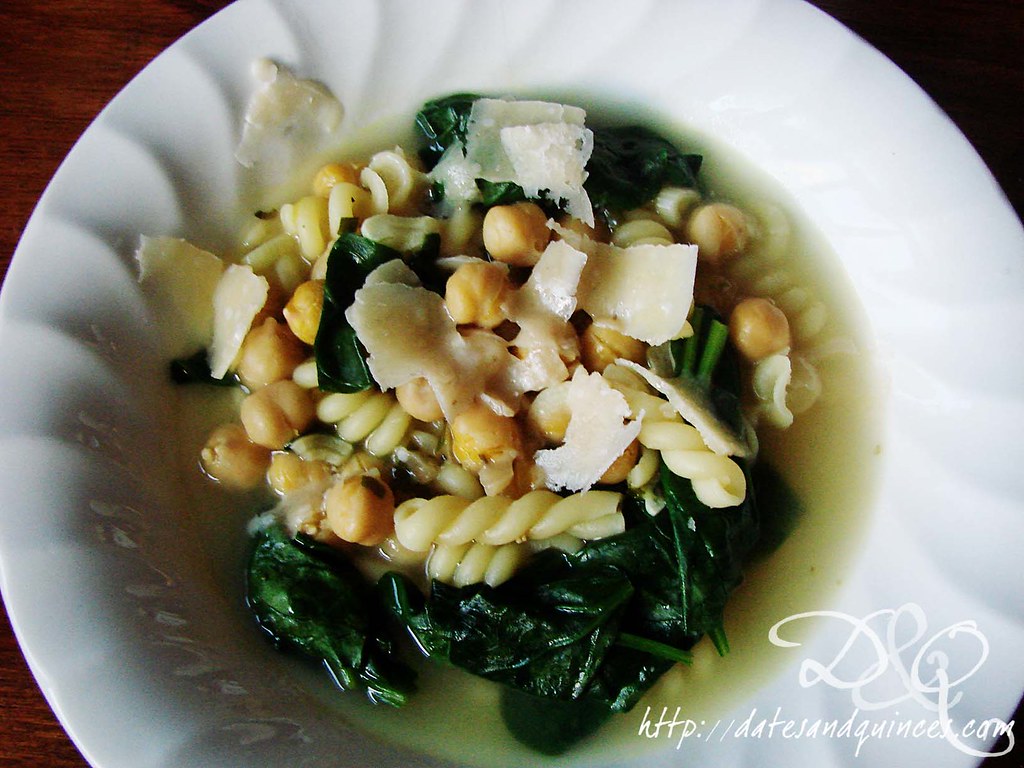
Cooking Light's Spinach & Chickpea Soup
All the credit for this recipe has to go to my husband, who whipped this up the other day while I was running late from work (workshop on IEP writing, if you must know). It's a really beautiful, easy dinner that I think will go into rotation as my comfort food on dreary, rainy days.
The lemon juice and zest keep the soup light and fresh, while the spinach adds colour and the pasta brings substance.
Plus, you've got to love anything that's ready in about 20 minutes!
Cooking Light's Spinach & Chickpea Soup
(source) serves 4
Ingredients
2 tsp canola oil
2 green onions, sliced
1 tsp dried oregano
4 cups vegetable or chicken stock
2 cups water
1 tbsp lemon zest
1 15oz can chickpeas, drained and rinsed
3/4 cup pasta of your choice
1 tbsp fresh lemon juice
5 oz baby spinach
½ tsp ground black pepper
shaved Parmesan
Directions
1. Heat canola oil in a large saucepan. Sauté onions and oregano for two minutes. Add in stock and water and bring to a boil. Add in zest, chickpeas and pasta, cover and continue boiling for 10 minutes. Test pasta for doneness. Stir in lemon juice, spinach and black pepper. Serve with Parmesan shaved on top.
The lemon juice and zest keep the soup light and fresh, while the spinach adds colour and the pasta brings substance.
Plus, you've got to love anything that's ready in about 20 minutes!
Cooking Light's Spinach & Chickpea Soup
(source) serves 4
Ingredients
2 tsp canola oil
2 green onions, sliced
1 tsp dried oregano
4 cups vegetable or chicken stock
2 cups water
1 tbsp lemon zest
1 15oz can chickpeas, drained and rinsed
3/4 cup pasta of your choice
1 tbsp fresh lemon juice
5 oz baby spinach
½ tsp ground black pepper
shaved Parmesan
Directions
1. Heat canola oil in a large saucepan. Sauté onions and oregano for two minutes. Add in stock and water and bring to a boil. Add in zest, chickpeas and pasta, cover and continue boiling for 10 minutes. Test pasta for doneness. Stir in lemon juice, spinach and black pepper. Serve with Parmesan shaved on top.
Main Ingredients:
chickpeas,
cooking light,
dinner,
lemon,
lunch,
quick and easy,
soup,
spinach,
vegetarian
Thursday, July 28, 2011
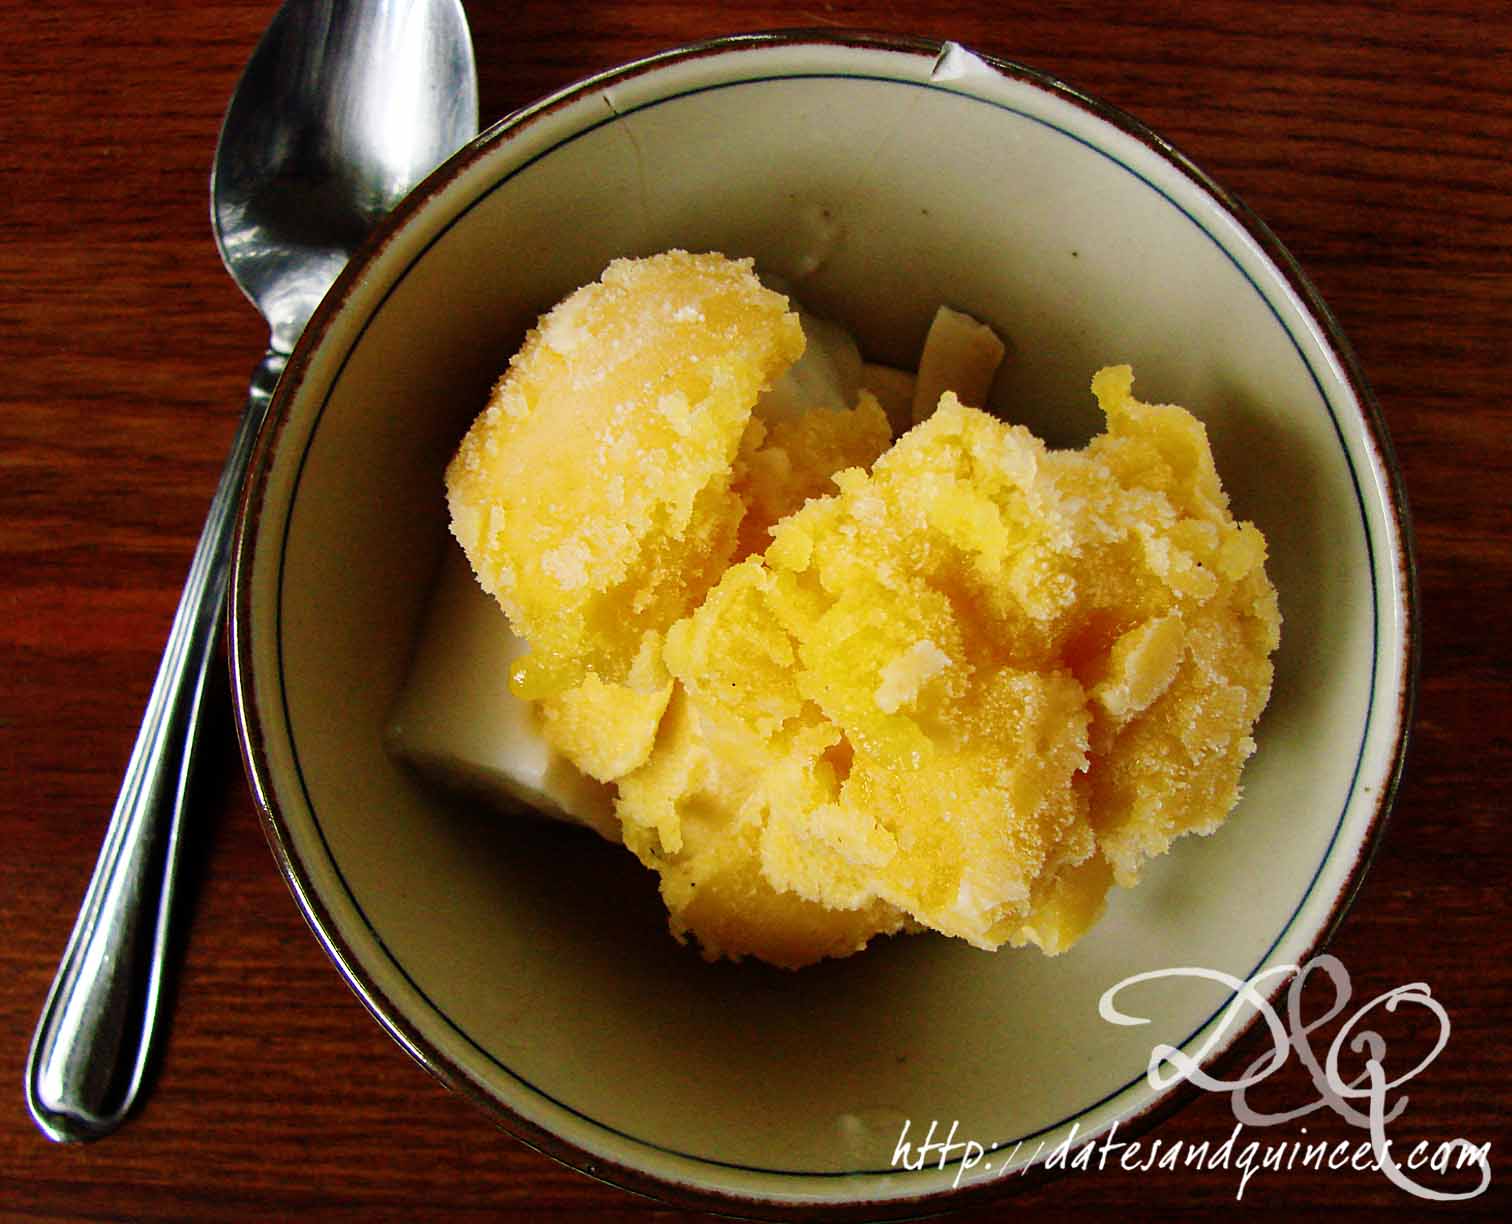
Passion Fruit Sorbet
Hello, hello, good morning all! We're flying off for Victoria tonight, so here's my last pre-Hawaii recipe post for my absolute all time favourite sorbet: passion fruit.
I just cannot get enough of this stuff! It's bright, tangy and sweet. It has a mere 3 ingredients and it's also the perfect foil for the rich and creamy coconut jelly I posted about yesterday.
Passion Fruit Sorbet
Ingredients
2 cups water
1 cup sugar
1½ cup passion fruit puree (often available frozen from Latin American grocery stores)
Directions
1. Heat water and sugar in a saucepan, stirring until sugar dissolves. Stir in passion fruit puree, remove from heat and let chill in the fridge.
2. When cool, place in ice cream maker and process according to manufacturer's directions.
Ta Dah! How's that for an easy, hands off dessert?
I'll probably be off for a few days, but can't wait to post about my experiences as a kitchen monkey at this weekend's wedding and all the deliciousness on Kauai and Maui!
I just cannot get enough of this stuff! It's bright, tangy and sweet. It has a mere 3 ingredients and it's also the perfect foil for the rich and creamy coconut jelly I posted about yesterday.
Passion Fruit Sorbet
Ingredients
2 cups water
1 cup sugar
1½ cup passion fruit puree (often available frozen from Latin American grocery stores)
Directions
1. Heat water and sugar in a saucepan, stirring until sugar dissolves. Stir in passion fruit puree, remove from heat and let chill in the fridge.
2. When cool, place in ice cream maker and process according to manufacturer's directions.
Ta Dah! How's that for an easy, hands off dessert?
I'll probably be off for a few days, but can't wait to post about my experiences as a kitchen monkey at this weekend's wedding and all the deliciousness on Kauai and Maui!
Main Ingredients:
dessert,
passion fruit,
quick and easy,
sorbet,
vegan
Tuesday, July 26, 2011
The Last to Catch On
Do you ever feel like you're the last person to catch on to a trend? I've been reading about people combining watermelon and feta to make a salad for years now, and only did it myself last night for the first time.
The contrast between the salty feta and the sweet watermelon is dynamite. I through in some chopped parsley, Hawaiian Haleakala sea salt (it's an earthy red), freshly ground black pepper and some olive oil. And voila! Done!
I can see using some mint in there as a great addition too.
The contrast between the salty feta and the sweet watermelon is dynamite. I through in some chopped parsley, Hawaiian Haleakala sea salt (it's an earthy red), freshly ground black pepper and some olive oil. And voila! Done!
I can see using some mint in there as a great addition too.
Main Ingredients:
feta,
parsley,
quick and easy,
salad,
vegetarian,
watermelon
Friday, July 15, 2011
Italian Chicken en Papillote (a non-recipe post)
One of the great things about having my mornings in class is I'm forced to get up at the same time as I do when I teach. Now, I know some of you are putting your hands up to say, what the heck? There's method in my madness, I promise.
When I have time off, I stay up late. And then I sleep in. And my sleep cycle gets pushed further and further out of whack.
I don't like it when my sleep schedule gets pushed out of whack.
Believe it or not, I like productive mornings. It's so nice to get everything out of the way right at the beginning!
Plus, it means I don't have to feel guilty for my daily afternoon naps.
It's all about having guilt free naps.
Yesterday, after a drama class filled with some interpretive dance on war/peace to Zoe Keating, I walked to the library for my annual summer library reading binge. I wasn't carrying any bags on me, so I only picked up a few books, one of which was the French Women Don't Get Fat cookbook.
This recipe (if you can call it that) isn't from the book, but was inspired by her several recipes using the en papillote technique. For those of you not familiar with en papillote, it means you take meat or fish and place it, along with other flavourful ingredients, in parchment paper packages which are then baked in the oven. This steams the meat inside, but also infuses it with whatever ingredients you've thrown in along with it.
I opted for chicken with lemons, parsley (although, if you have fresh rosemary, all the better), olives, sundried tomatoes and capers.
The brilliance of this recipe, is that there really isn't one. Use what you've got on hand; just keep it to no more than 2 tbsp of toppings, plus something beneath the chicken to infuse from below. Sautéed shallots or spinach would make a great base. A few cloves of garlic in there with some lemon and lots of black pepper? Delish!
And the bonus? No added oils!
The packages are made by creating a circle out of parchment and layering all the ingredients on one half of the circle.
You then fold the other side of the paper over to create a half moon shape. Fold the sides up along the edge of the circle so it looks like this:
Bake in the oven on a baking tray at 400º for about 30 minutes.
If you're into theatrics, give everyone at the table a pair of scissors and allow them to cut a cross into the top of the package and then tear it open. The big reveal is half the fun.
Do be careful of the steam though. There's a lot of it trapped in there!
When I have time off, I stay up late. And then I sleep in. And my sleep cycle gets pushed further and further out of whack.
I don't like it when my sleep schedule gets pushed out of whack.
Believe it or not, I like productive mornings. It's so nice to get everything out of the way right at the beginning!
Plus, it means I don't have to feel guilty for my daily afternoon naps.
It's all about having guilt free naps.
Yesterday, after a drama class filled with some interpretive dance on war/peace to Zoe Keating, I walked to the library for my annual summer library reading binge. I wasn't carrying any bags on me, so I only picked up a few books, one of which was the French Women Don't Get Fat cookbook.
This recipe (if you can call it that) isn't from the book, but was inspired by her several recipes using the en papillote technique. For those of you not familiar with en papillote, it means you take meat or fish and place it, along with other flavourful ingredients, in parchment paper packages which are then baked in the oven. This steams the meat inside, but also infuses it with whatever ingredients you've thrown in along with it.
I opted for chicken with lemons, parsley (although, if you have fresh rosemary, all the better), olives, sundried tomatoes and capers.
The brilliance of this recipe, is that there really isn't one. Use what you've got on hand; just keep it to no more than 2 tbsp of toppings, plus something beneath the chicken to infuse from below. Sautéed shallots or spinach would make a great base. A few cloves of garlic in there with some lemon and lots of black pepper? Delish!
And the bonus? No added oils!
The packages are made by creating a circle out of parchment and layering all the ingredients on one half of the circle.
You then fold the other side of the paper over to create a half moon shape. Fold the sides up along the edge of the circle so it looks like this:
Bake in the oven on a baking tray at 400º for about 30 minutes.
If you're into theatrics, give everyone at the table a pair of scissors and allow them to cut a cross into the top of the package and then tear it open. The big reveal is half the fun.
Do be careful of the steam though. There's a lot of it trapped in there!
Monday, July 11, 2011
Three Bean Salad with Corn and Red Peppers
Sometimes I think my mother and I are the only people on the planet who love bean salads. There's something so delightfully passé about them. I always associate them with the '80s... Does anyone else?
When I was in elementary school, we had several Canadian Living seasonal cooking magazines, and inevitably the summer ones had bean salads in them. Whenever the teachers had lunch & learn sessions at school, the library would be set up with tons of food with a mandatory gigantic bowl of bean salad. As a kid, I just assumed that they were making bean salads out of the Canadian Living magazines, because that was the logical assumption to make.
I'm all about the logic.
I'd lobby to bring back the bean salad into vogue. It's healthy, filling, fibre rich, and, when done right, colourful. Plus, it makes a quick and easy lunch to bring.
So, now, my go to bean salad recipe is based off a Canadian Living recipe: Red Barn Bean and Corn Salad. It serves 12 and keeps a decent amount of time in the fridge which especially important if you're, like me, not serving 12 people at once.
If you're alone in liking bean salads in your house, be prepared to be eating this for the better part of a week. It makes about 9 cups worth!
But, it's way better than those drenched salads from the supermarket, and you know you love it. So go ahead, grab a gigantic spoon and dig in.
Three Bean Salad with Corn and Red Peppers
(adapted from Canadian Living)
Ingredients
1 14oz can chickpeas, drained and rinsed
1 14oz can black beans, drained and rinsed
1 14oz can red kidney beans, drained and rinsed
½ cup finely chopped sweet onion
1 cup frozen corn, thawed
½ cup celery, chopped
1 red pepper, chopped
1 tbsp dried basil (you can use ¼ cup fresh, if you anticipate no leftovers)
¼ cup chopped fresh parsley
½ cup apple cider vinegar
3 tbsp olive oil
1 clove garlic, minced
1 tbsp Dijon mustard
1 tsp kosher salt
½ tsp freshly ground black pepper
Directions
1. Mix together first 9 ingredients, chickpeas through parsley in a large bowl. Toss well. In a measuring up, whisk together remaining ingredients. Pour over bean mixture, toss well and refrigerate for at least 1 hour to let flavours meld together.
How easy was that?
When I was in elementary school, we had several Canadian Living seasonal cooking magazines, and inevitably the summer ones had bean salads in them. Whenever the teachers had lunch & learn sessions at school, the library would be set up with tons of food with a mandatory gigantic bowl of bean salad. As a kid, I just assumed that they were making bean salads out of the Canadian Living magazines, because that was the logical assumption to make.
I'm all about the logic.
I'd lobby to bring back the bean salad into vogue. It's healthy, filling, fibre rich, and, when done right, colourful. Plus, it makes a quick and easy lunch to bring.
So, now, my go to bean salad recipe is based off a Canadian Living recipe: Red Barn Bean and Corn Salad. It serves 12 and keeps a decent amount of time in the fridge which especially important if you're, like me, not serving 12 people at once.
If you're alone in liking bean salads in your house, be prepared to be eating this for the better part of a week. It makes about 9 cups worth!
But, it's way better than those drenched salads from the supermarket, and you know you love it. So go ahead, grab a gigantic spoon and dig in.
Three Bean Salad with Corn and Red Peppers
(adapted from Canadian Living)
Ingredients
1 14oz can chickpeas, drained and rinsed
1 14oz can black beans, drained and rinsed
1 14oz can red kidney beans, drained and rinsed
½ cup finely chopped sweet onion
1 cup frozen corn, thawed
½ cup celery, chopped
1 red pepper, chopped
1 tbsp dried basil (you can use ¼ cup fresh, if you anticipate no leftovers)
¼ cup chopped fresh parsley
½ cup apple cider vinegar
3 tbsp olive oil
1 clove garlic, minced
1 tbsp Dijon mustard
1 tsp kosher salt
½ tsp freshly ground black pepper
Directions
1. Mix together first 9 ingredients, chickpeas through parsley in a large bowl. Toss well. In a measuring up, whisk together remaining ingredients. Pour over bean mixture, toss well and refrigerate for at least 1 hour to let flavours meld together.
How easy was that?
Thursday, July 07, 2011
Thai Pork Lettuce Wraps
A friend of mine posted this recipe on the now abandoned August Cooks blog, and I've really loved it for ages, though haven't made it since last summer.
Lime, sriracha, jalapeno, shallots, brown sugar, fish sauce... This recipe hits all the right notes, sweet, spicy, salty, sour. Amped up with some pickled carrots (leftover from a batch based on Gwyneth Paltrow's recipe) and cucumber, these wraps are pretty much heaven on a plate for me.
What I love most about it is how messy they are! Be prepared for dripping juices.
Thai Pork Lettuce Wraps
(adapted from August Cooks)
Ingredients
½ tbsp canola oil
1 lb ground pork
1 clove garlic, minced
1 medium shallot, minced
1 jalapeno, seeded and minced
juice of one lime
1½ tbsp fish sauce
1 tsp brown sugar
1 tsp sriracha
pickled carrots
sliced cucumber
washed, separated leaves boston or bibb lettuce (about 12-16)
handfuls of chopped fresh mint, cilantro and basil
Directions
1. Heat canola oil in a large skillet set over medium heat. Add pork, garlic, shallot and jalapeno. Cook, stirring occasionally, until pork is browned and fat is rendered. Drain fat from pan. Return to heat, reducing temperature to low while preparing the lime mixture.
2. Mix together lime juice, fish sauce, brown sugar and sriracha. Pour over pork. Return heat to medium and stir until liquid has mostly been absorbed. Remove skillet from element.
3. Using lettuce as a cup, place some carrots and cucumbers inside, then top with a couple tablespoons pork mixture. Sprinkle herbs over top, and repeat with remaining lettuce leaves and pork.
Serves 3-4.
Lime, sriracha, jalapeno, shallots, brown sugar, fish sauce... This recipe hits all the right notes, sweet, spicy, salty, sour. Amped up with some pickled carrots (leftover from a batch based on Gwyneth Paltrow's recipe) and cucumber, these wraps are pretty much heaven on a plate for me.
What I love most about it is how messy they are! Be prepared for dripping juices.
Thai Pork Lettuce Wraps
(adapted from August Cooks)
Ingredients
½ tbsp canola oil
1 lb ground pork
1 clove garlic, minced
1 medium shallot, minced
1 jalapeno, seeded and minced
juice of one lime
1½ tbsp fish sauce
1 tsp brown sugar
1 tsp sriracha
pickled carrots
sliced cucumber
washed, separated leaves boston or bibb lettuce (about 12-16)
handfuls of chopped fresh mint, cilantro and basil
Directions
1. Heat canola oil in a large skillet set over medium heat. Add pork, garlic, shallot and jalapeno. Cook, stirring occasionally, until pork is browned and fat is rendered. Drain fat from pan. Return to heat, reducing temperature to low while preparing the lime mixture.
2. Mix together lime juice, fish sauce, brown sugar and sriracha. Pour over pork. Return heat to medium and stir until liquid has mostly been absorbed. Remove skillet from element.
3. Using lettuce as a cup, place some carrots and cucumbers inside, then top with a couple tablespoons pork mixture. Sprinkle herbs over top, and repeat with remaining lettuce leaves and pork.
Serves 3-4.
Main Ingredients:
august cooks,
basil,
cilantro,
Fresh,
herbs,
lettuce,
mint,
pickled carrots,
pork,
quick and easy,
thai,
wraps
Monday, June 20, 2011
Cucumber and Radish Salad with Lemon Dressing
I'm so glad the most recent issue of Cooking Light arrived before the postal strike began! It has some great recipes in it.
After all the heavy food (read: fast and deep fried) I ate on the Ottawa-Montreal trip, I've been in serious need of lightening things up. I'm paying off the sins I indulged in at Frites Alors!
It's T-6 weeks until Hawaii, and I'd love love LOVE to drop those 10 pounds that I've struggling with the past 2 months. Plus, one of my students (who we're pretty sure has Aspergers) announced very loudly that I have a "fat ass".
And when even the Aspergers kid notices, you know you've got to take action.
So here I am. Taking some action. Even though I'm not a huge fan of either cucumbers OR radishes, something about this salad spoke to me.
I'm pretty sure it was saying: I'm what your body needs right now. Crunchy. Cold. Vibrant.
I really enjoyed this salad - some fresh dill in place of the parsley would be totally delicious and highly recommended. Plus, although I'm unabashedly trying to lose weight, this salad doesn't feel like deprivation. It feels like the antidote to a scorching summer day.
If you have a mandolin, be sure to whip it out for the radishes and cucumbers. That will make your life SO much easier.
Cucumber and Radish Salad with Lemon Dressing
(from Cooking Light)
Ingredients
½ cup thinly sliced radishes
2 cups thinly sliced cucumber
¼ orange pepper, finely chopped
¼ cup parsley, finely chopped
1 tsp lemon zest
1 tbsp lemon juice
1 tsp apple cider vinegar
½ tbsp olive oil
¼ tsp kosher salt
¼ tsp black pepper
Directions
1. Gently toss radishes, cucumber, pepper and parsley together in a large bowl. In a separate bowl, whisk together remaining ingredients. Pour over cucumber mixture and gently toss again. Let flavours meld in fridge for an hour.
Also, it's a tasty accompaniment for grilled steak, or as a side on some kind of Middle Eastern plate (baba ghanoush, hummus, pita, tabbouleh).
After all the heavy food (read: fast and deep fried) I ate on the Ottawa-Montreal trip, I've been in serious need of lightening things up. I'm paying off the sins I indulged in at Frites Alors!
It's T-6 weeks until Hawaii, and I'd love love LOVE to drop those 10 pounds that I've struggling with the past 2 months. Plus, one of my students (who we're pretty sure has Aspergers) announced very loudly that I have a "fat ass".
And when even the Aspergers kid notices, you know you've got to take action.
So here I am. Taking some action. Even though I'm not a huge fan of either cucumbers OR radishes, something about this salad spoke to me.
I'm pretty sure it was saying: I'm what your body needs right now. Crunchy. Cold. Vibrant.
I really enjoyed this salad - some fresh dill in place of the parsley would be totally delicious and highly recommended. Plus, although I'm unabashedly trying to lose weight, this salad doesn't feel like deprivation. It feels like the antidote to a scorching summer day.
If you have a mandolin, be sure to whip it out for the radishes and cucumbers. That will make your life SO much easier.
Cucumber and Radish Salad with Lemon Dressing
(from Cooking Light)
Ingredients
½ cup thinly sliced radishes
2 cups thinly sliced cucumber
¼ orange pepper, finely chopped
¼ cup parsley, finely chopped
1 tsp lemon zest
1 tbsp lemon juice
1 tsp apple cider vinegar
½ tbsp olive oil
¼ tsp kosher salt
¼ tsp black pepper
Directions
1. Gently toss radishes, cucumber, pepper and parsley together in a large bowl. In a separate bowl, whisk together remaining ingredients. Pour over cucumber mixture and gently toss again. Let flavours meld in fridge for an hour.
Also, it's a tasty accompaniment for grilled steak, or as a side on some kind of Middle Eastern plate (baba ghanoush, hummus, pita, tabbouleh).
Main Ingredients:
cooking light,
cucumber,
july 2011,
lemon,
quick and easy,
radishes,
salad,
summer,
vegan,
vegetarian
Saturday, June 04, 2011
A Smoky Chopped Salad for a Hot Day
Last week, the temperature in Toronto hit a brutal 40º C with the humidex.
Let me be clear on one thing: I am not one of those Canadians who sits around dreaming of the scorching summer sun. I like the heat; I hate the humidity.
Perhaps it's the fact that we have no outdoor space in our apartment (which means all cooking gets done inside), perhaps it's the lack of central air to cool ourselves off at night, perhaps it's the memory of the smell of the summer when the garbage collectors went on strike. Whatever the reason, I really, really dislike Toronto when the heat and humidity hits.
This is one of those recipes designed to embrace the flavour of the heat and humidity, but to avoid heating too much up in the kitchen.
The whole thing comes together really quickly, and you can keep any extra salad dressing in the fridge for 3 days.
Chicken & Chickpea Salad with Smoked Paprika Dressing
Ingredients
Dressing
2 tbsp apple cider vinegar
1 smashed clove garlic
1 tbsp olive oil
½ tsp kosher salt
¼ tsp freshly ground black pepper
½ tsp smoked paprika
½ tsp ancho chili powder
Salad
2 romaine hearts, washed, dried and chopped
2 cup mixed sprouts (pea, sunflower, radish, etc)
½ lb grilled boneless, skinless chicken thighs
½ 19 oz can chickpeas, rinsed
2 slices bacon, cooked and crumbled
2 oz blue cheese, crumbled
½ pint cherry tomatoes, halved
½ avocado, chopped
5-6 cremini mushrooms, sliced
optional: pickled jalapenos or green beans (I love Toorshi Hot and Savoury Green Beans)
Directions
1. Whisk together all dressing ingredients. Set aside and let sit for an hour so the garlic can infuse the dressing.
2. Toss together salad ingredients. Discard garlic clove and dress the salad. Serve on chilled plates.
That was dead easy, wasn't it?
Let me be clear on one thing: I am not one of those Canadians who sits around dreaming of the scorching summer sun. I like the heat; I hate the humidity.
Perhaps it's the fact that we have no outdoor space in our apartment (which means all cooking gets done inside), perhaps it's the lack of central air to cool ourselves off at night, perhaps it's the memory of the smell of the summer when the garbage collectors went on strike. Whatever the reason, I really, really dislike Toronto when the heat and humidity hits.
This is one of those recipes designed to embrace the flavour of the heat and humidity, but to avoid heating too much up in the kitchen.
The whole thing comes together really quickly, and you can keep any extra salad dressing in the fridge for 3 days.
Chicken & Chickpea Salad with Smoked Paprika Dressing
Ingredients
Dressing
2 tbsp apple cider vinegar
1 smashed clove garlic
1 tbsp olive oil
½ tsp kosher salt
¼ tsp freshly ground black pepper
½ tsp smoked paprika
½ tsp ancho chili powder
Salad
2 romaine hearts, washed, dried and chopped
2 cup mixed sprouts (pea, sunflower, radish, etc)
½ lb grilled boneless, skinless chicken thighs
½ 19 oz can chickpeas, rinsed
2 slices bacon, cooked and crumbled
2 oz blue cheese, crumbled
½ pint cherry tomatoes, halved
½ avocado, chopped
5-6 cremini mushrooms, sliced
optional: pickled jalapenos or green beans (I love Toorshi Hot and Savoury Green Beans)
Directions
1. Whisk together all dressing ingredients. Set aside and let sit for an hour so the garlic can infuse the dressing.
2. Toss together salad ingredients. Discard garlic clove and dress the salad. Serve on chilled plates.
That was dead easy, wasn't it?
Saturday, May 14, 2011
Chocolate Hazelnut Brownie Bites
I'm not going to lie, I'm pretty much madly in love with this recipe. The best, best, BEST thing about batter without eggs in it is you don't have to have your Mum's voice in the back of your head going "there're raw eggs in that! Don't eat it!"
So, when it tastes awesome when cooked too, that's just a win-win.
Chocolate Hazelnut Brownie Bites
(adapted from Oh She Glows)
Ingredients
1 cup oatmeal
½ + 1/3 cup flour (either whole wheat or all purpose)
1/3 cup cocoa powder, sifted
½ cup brown sugar
¼ tsp baking powder
¼ tsp baking soda
½ tsp kosher salt
1/3 cup almond milk (or any non-dairy milk)
2 tbsp maple syrup
1 tbsp hazelnut butter
1/3 cup coconut oil
1 tsp vanilla
¼ cup chopped toasted hazelnuts
¼ cup chopped dark chocolate (or chocolate chips)
Directions
1. Preheat oven to 350º.
2. In a large bowl, stir together first 8 ingredients (oatmeal through salt). In a separate bowl, mix together wet ingredients (milk through extract). Pour wet ingredients into dry and stir, just to combine. Stir in chopped hazelnuts and dark chocolate.
3. Divide batter into 20 balls (roll with your hands), and place on parchment lined baking sheets about 1" apart. Bake for 12 minutes. Do not overcook these! You want them to be nice and chewy.
4. Remove from pan and let cool on rack. Keeps in an airtight container for 3-4 days.
So, when it tastes awesome when cooked too, that's just a win-win.
Chocolate Hazelnut Brownie Bites
(adapted from Oh She Glows)
Ingredients
1 cup oatmeal
½ + 1/3 cup flour (either whole wheat or all purpose)
1/3 cup cocoa powder, sifted
½ cup brown sugar
¼ tsp baking powder
¼ tsp baking soda
½ tsp kosher salt
1/3 cup almond milk (or any non-dairy milk)
2 tbsp maple syrup
1 tbsp hazelnut butter
1/3 cup coconut oil
1 tsp vanilla
¼ cup chopped toasted hazelnuts
¼ cup chopped dark chocolate (or chocolate chips)
Directions
1. Preheat oven to 350º.
2. In a large bowl, stir together first 8 ingredients (oatmeal through salt). In a separate bowl, mix together wet ingredients (milk through extract). Pour wet ingredients into dry and stir, just to combine. Stir in chopped hazelnuts and dark chocolate.
3. Divide batter into 20 balls (roll with your hands), and place on parchment lined baking sheets about 1" apart. Bake for 12 minutes. Do not overcook these! You want them to be nice and chewy.
4. Remove from pan and let cool on rack. Keeps in an airtight container for 3-4 days.
Monday, May 09, 2011
Hamburgers with Spicy Kimchi Mayonnaise and Minted Slaw
Why have I not cooked out of the LCBO's magzine Food & Drink more often? Holy moly, there are some wicked recipes in there.
You know, the kind that make you go back for seconds, even though you're totally stuffed.
This is one such recipe.
I made 4 burgers and between my husband and myself we have no leftovers. I don't know if it was the Rowe Farms beef or the amazing slaw... whatever the case, I'm sad I didn't make a full recipe (one that serves 6), because, my god. I could SO go back for more.
For those of you unfamiliar with it, kimchi is a spicy Korean dish of fermented cabbage. It smells a little of old socks, in my humble opinion, but tastes amazing. I used to bbq it at yakiniku joints in Nakatsugawa.
For the record, these burgers call for a sturdy bun. I decided to make my own off an epicurious recipe that I'll be posting tomorrow.
Hamburgers with Kimchi Mayonnaise and Minted Slaw
(from LCBO Food & Drink Early Summer '11)
Ingredients
Burgers
1 lb lean ground beef (preferably grass fed, free range, if you can get it)
½ tsp sriracha
1 tbsp soy sauce
1 tsp minced fresh garlic
salt and pepper to taste (I only added pepper as the soy sauce had plenty of salt)
Kimchi Mayonnaise
¼ cup chopped kimchi
¼ cup mayonnaise
½ tbsp lemon juice
Minted Slaw
1 cup shredded romaine lettuce
½ cup julienned cucumber
¼ cup finely chopped green onions (1 green onion)
2 tbsp slivered mint
½ tbsp rice vingear
½ tbsp canola oil
½ tsp soy sauce
½ tsp sesame oil
¼ tsp grated ginger
Directions
1. Mix together burger ingredients in a large bowl. Divide into 4 and shape into 4 patties, each ½ inch thick. Set aside in fridge.
2. Stir together kimchi mayonnaise ingredients and set aside in fridge.
3. Heat a cast iron grill pan (or a bbq) over high heat. Grill burgers for 4-5 minutes on each side or until desired degree of doneness. Serve on sturdy burgers topped with mayonnaise and slaw.
3. Combine lettuce through mint in a small bowl. In a separate bowl, whisk together vinegar through ginger. Pour over lettuce mixture just before serving.
I've got to be honest, the May 2-4 weekend is coming up, and I think this is the perfect recipe to open cottage season!
You know, the kind that make you go back for seconds, even though you're totally stuffed.
This is one such recipe.
I made 4 burgers and between my husband and myself we have no leftovers. I don't know if it was the Rowe Farms beef or the amazing slaw... whatever the case, I'm sad I didn't make a full recipe (one that serves 6), because, my god. I could SO go back for more.
For those of you unfamiliar with it, kimchi is a spicy Korean dish of fermented cabbage. It smells a little of old socks, in my humble opinion, but tastes amazing. I used to bbq it at yakiniku joints in Nakatsugawa.
For the record, these burgers call for a sturdy bun. I decided to make my own off an epicurious recipe that I'll be posting tomorrow.
Hamburgers with Kimchi Mayonnaise and Minted Slaw
(from LCBO Food & Drink Early Summer '11)
Ingredients
Burgers
1 lb lean ground beef (preferably grass fed, free range, if you can get it)
½ tsp sriracha
1 tbsp soy sauce
1 tsp minced fresh garlic
salt and pepper to taste (I only added pepper as the soy sauce had plenty of salt)
Kimchi Mayonnaise
¼ cup chopped kimchi
¼ cup mayonnaise
½ tbsp lemon juice
Minted Slaw
1 cup shredded romaine lettuce
½ cup julienned cucumber
¼ cup finely chopped green onions (1 green onion)
2 tbsp slivered mint
½ tbsp rice vingear
½ tbsp canola oil
½ tsp soy sauce
½ tsp sesame oil
¼ tsp grated ginger
Directions
1. Mix together burger ingredients in a large bowl. Divide into 4 and shape into 4 patties, each ½ inch thick. Set aside in fridge.
2. Stir together kimchi mayonnaise ingredients and set aside in fridge.
3. Heat a cast iron grill pan (or a bbq) over high heat. Grill burgers for 4-5 minutes on each side or until desired degree of doneness. Serve on sturdy burgers topped with mayonnaise and slaw.
3. Combine lettuce through mint in a small bowl. In a separate bowl, whisk together vinegar through ginger. Pour over lettuce mixture just before serving.
I've got to be honest, the May 2-4 weekend is coming up, and I think this is the perfect recipe to open cottage season!
Saturday, April 30, 2011
Lemon-Almond Crunch Parfaits with Berries
This has been one of those weeks that feels like it just couldn't have ended soon enough! I haven't been online at all in the past few days - not even to respond to work emails. I'm swamped with after school clubs.
So, yes, I know I promised the appetizer recipe. But it's finally sunny out and I feel like celebrating with a dish that's bright and springy.
Whenever we have dessert with my parents and cousin, the dairy in the dessert recipes has to go, as my cousin has an allergy. Bring in, then, the edible oil product known as Cool Whip.
Let me be perfectly honest here: while under just about all circumstances, I would reject Cool Whip, this recipe was so good that, not only did I not mind about there being Cool Whip, I actually preferred it with it. It was lighter and brightly lemony.
Lemon-Almond Crunch Parfait with Berries
(adapted from Canadian Living)
Ingredients
Lemon Curd:
3 egg yolks 3 3egg yolkegg yolks
1 egg 1 1eggeggs
1/2 cup granulated sugar 1/2 1/2cup cup (125 mL) granulated sugar
1 tbsp granulated sugar 1 1tbsp tbspgranulated sugar
2 tsp finely grated lemon rind 2 2tsp (10 mL) finely grated lemon rind
1/2 cup lemon juice 1/2 1/2cup cupfresh (125 mL) lemon juice
1 pinch salt 1 1pinch pinchsalt
Almond Crunch:
1/4 cup all-purpose flour 1/4 1/4cup cupall-purpose flour
2 tbsp large-flake rolled oats 2 2tbsp tbsp(25 mL) large-flake rolled oats
1 tbsp packed brown sugar 1 1tbsp (15 mL) packed brown sugar
2 tbsp unsalted butter , cubed2 2tbsp tbsp(25 mL) unsalted butter, cubed
2 tbsp slivered almonds 2 2tbsp t (25 mL)slivered almonds
1. Almond Crunch: Preheat oven to 350º and line a baking sheet with parchment paper. In a large bowl, stir together flour, oats and brown sugar. Cut in butter until mixture is crumbly. Stir in almonds. Dump mixture onto baking sheet and bake for 12 minutes or until mixture is golden and crisp.
So, yes, I know I promised the appetizer recipe. But it's finally sunny out and I feel like celebrating with a dish that's bright and springy.
Whenever we have dessert with my parents and cousin, the dairy in the dessert recipes has to go, as my cousin has an allergy. Bring in, then, the edible oil product known as Cool Whip.
Let me be perfectly honest here: while under just about all circumstances, I would reject Cool Whip, this recipe was so good that, not only did I not mind about there being Cool Whip, I actually preferred it with it. It was lighter and brightly lemony.
Lemon-Almond Crunch Parfait with Berries
(adapted from Canadian Living)
Ingredients
3/4 3/4cup cupwhipping cream (or 1 tub light Cool Whip)
1 can (14 oz/398 mL) apricot halves in light syrup , drained and quartered1 pint raspberries, blackberries or a mixture of both, rinsed and thoroughly dried
Lemon Curd:
3 egg yolks 3 3egg yolkegg yolks
1 egg 1 1eggeggs
1/2 cup granulated sugar 1/2 1/2cup cup (125 mL) granulated sugar
1 tbsp granulated sugar 1 1tbsp tbspgranulated sugar
2 tsp finely grated lemon rind 2 2tsp (10 mL) finely grated lemon rind
1/2 cup lemon juice 1/2 1/2cup cupfresh (125 mL) lemon juice
1 pinch salt 1 1pinch pinchsalt
Almond Crunch:
1/4 cup all-purpose flour 1/4 1/4cup cupall-purpose flour
2 tbsp large-flake rolled oats 2 2tbsp tbsp(25 mL) large-flake rolled oats
1 tbsp packed brown sugar 1 1tbsp (15 mL) packed brown sugar
2 tbsp unsalted butter , cubed2 2tbsp tbsp(25 mL) unsalted butter, cubed
2 tbsp slivered almonds 2 2tbsp t (25 mL)slivered almonds
Directions
1. Almond Crunch: Preheat oven to 350º and line a baking sheet with parchment paper. In a large bowl, stir together flour, oats and brown sugar. Cut in butter until mixture is crumbly. Stir in almonds. Dump mixture onto baking sheet and bake for 12 minutes or until mixture is golden and crisp.
Do keep a close eye on it, because it will go from gorgeously brown to disastrously black in an instant.
2. Lemon Curd: In a heat proof bowl (you're going to be making a double boiler here, so choose your bowl appropriately), whisk together all lemon curd ingredients. Place over saucepan of simmering water and cook, whisking frequently, until mixture is thick enough to coat the back of a spoon. If you have an instant read thermometer, it should read 160ºF. Remove from heat and strain mixture through a fine mesh sieve into a clean bowl. Cover with plastic wrap, being sure to press wrap directly onto the surface of the curd. This will prevent a thick skin from forming.
3. To Assemble: Stir half the curd to break up. Mix in half the tub of Cool Whip. Stir to thoroughly incorporate. Gently fold in remaining half of the tub (alternatively, whip the cream and divide in half and proceed according to above directions).
Divide berries between 8 serving glasses. Top with lemon mixtures. Sprinkle with almond mixture. Serve with long handled spoons!
Tuesday, April 05, 2011
Maple Sponge Pudding
When 100 Mile Locavore posted about her maple syrup haul, I suddenly got a huge hankering for some sweet Canada-in-Spring flavour. Truthfully, maple doesn't make it much past the pancake stage in our kitchen, except with occasional forays out as a sugar replacement (see Chocolate Cherry Cookies).
But maple syrup has just such an interesting flavour. I'm totally inspired by the father of a friend who makes his own in spring - it really had the most unique, smokey flavour that commercial maple syrup lacks.
It's all about that small batch character, you know?
Two years ago, I took a group of ESL students to a local conversation area that taps its trees in spring, and bought some Toronto maple syrup. I admit to wondering how much city pollution affected this particular batch, because it was nothing to write home about.
While I might be dreaming of acres of land replete with sugar maples, the reality is that I'm probably never going to make my own syrup.
I'm okay with that, really.
I'm a fundamentally lazy person.
For now, I'll settle for my jug o'syrup that sitting in the back of my fridge. There's a lot less syrup in there right now after I whipped up this recipe in about 10 minutes time.
You've gotta love last minute desserts.
This recipe comes via Adventures in Dinner, who was kind enough to give me her grandmother's scone recipe the other week. I tweaked it the tiniest bit, but it turned out totally beautifully.
Most importantly, filled with maple goodness. Unsweetened whipped cream is an absolutely necessary accompaniment here.
Maple Sponge Pudding
(from Adventures in Dinner)
Ingredients
4 tbsp unsalted butter, divided
½ cup brown sugar
1 egg
1 tsp vanilla extract
1 cup flour
1½ tsp baking powder
½ tsp salt
½ cup milk
1½ cups maple syrup (use grade B or lower for a darker, more intense maple flavour)
3/4 cup water
Directions
1. Preheat oven to 350º.
2. Beat together 2 tbsp butter with brown sugar and egg. Mix in vanilla extract, then stir in flour, baking powder and salt. Pour batter into the base of a 8"x8" pan, or a very deep pie dish. Place dish on a foil lined baking tray (you do not want to end up cleaning burned maple syrup off the bottom of your oven).
3. Bring maple syrup, remaining 2 tbsp butter and water to a boil in a small saucepan. Pour over batter mixture and place into the oven. Let bake for 40-45 minutes, or until edges have caramelized and centre is set.
Serve with whipped cream or vanilla ice cream. Your best bet is to accompany it with something not too sweet. A lovely buttermilk sorbet would not go amiss here.
But maple syrup has just such an interesting flavour. I'm totally inspired by the father of a friend who makes his own in spring - it really had the most unique, smokey flavour that commercial maple syrup lacks.
It's all about that small batch character, you know?
Two years ago, I took a group of ESL students to a local conversation area that taps its trees in spring, and bought some Toronto maple syrup. I admit to wondering how much city pollution affected this particular batch, because it was nothing to write home about.
While I might be dreaming of acres of land replete with sugar maples, the reality is that I'm probably never going to make my own syrup.
I'm okay with that, really.
I'm a fundamentally lazy person.
For now, I'll settle for my jug o'syrup that sitting in the back of my fridge. There's a lot less syrup in there right now after I whipped up this recipe in about 10 minutes time.
You've gotta love last minute desserts.
This recipe comes via Adventures in Dinner, who was kind enough to give me her grandmother's scone recipe the other week. I tweaked it the tiniest bit, but it turned out totally beautifully.
Most importantly, filled with maple goodness. Unsweetened whipped cream is an absolutely necessary accompaniment here.
Maple Sponge Pudding
(from Adventures in Dinner)
Ingredients
4 tbsp unsalted butter, divided
½ cup brown sugar
1 egg
1 tsp vanilla extract
1 cup flour
1½ tsp baking powder
½ tsp salt
½ cup milk
1½ cups maple syrup (use grade B or lower for a darker, more intense maple flavour)
3/4 cup water
Directions
1. Preheat oven to 350º.
2. Beat together 2 tbsp butter with brown sugar and egg. Mix in vanilla extract, then stir in flour, baking powder and salt. Pour batter into the base of a 8"x8" pan, or a very deep pie dish. Place dish on a foil lined baking tray (you do not want to end up cleaning burned maple syrup off the bottom of your oven).
3. Bring maple syrup, remaining 2 tbsp butter and water to a boil in a small saucepan. Pour over batter mixture and place into the oven. Let bake for 40-45 minutes, or until edges have caramelized and centre is set.
Serve with whipped cream or vanilla ice cream. Your best bet is to accompany it with something not too sweet. A lovely buttermilk sorbet would not go amiss here.
Subscribe to:
Posts (Atom)