Showing posts with label jam. Show all posts

Saturday, February 11, 2012

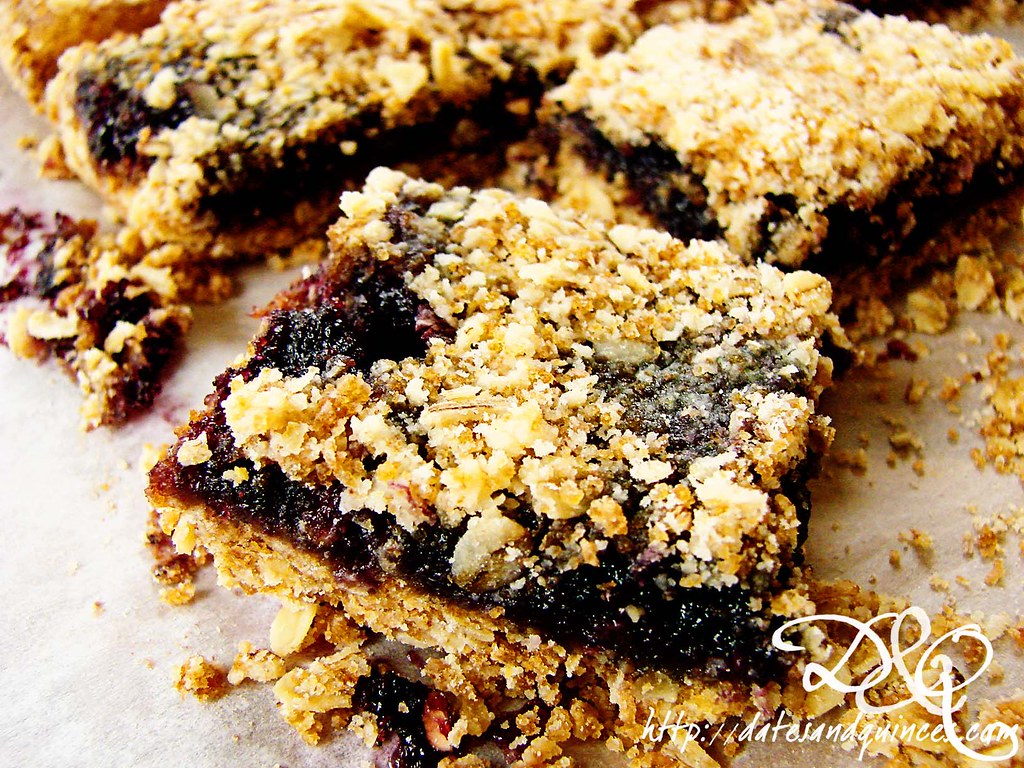
Jam Oat Bars

When I was, oh, I don't know, maybe 12 or 13, my mother had (and I believe she still does have) a Company's Coming Bars and Squares cookbook. There was one recipe in there that I love so much, that it was the first thing I knew how to make by heart - chocolate chip squares. They were so easy, I could throw them together on a week night for our lunches throughout the week.

This post isn't really about the chocolate chip squares. It IS about throwing together some bars for lunches mid-week, AFTER you've made dinner, you're exhausted and pregnant.

Expedient. That's the name of the game.

I'd like to think I've upped the health ante somewhat on your typical jam bar by using spelt flour (you could just as easily use all purpose or whole wheat) and gluten free oats. And, since all I have on my shelves is homemade jam, I used up what was left of a jar of my mother's Ginger, Pear & Crème de Cacao jam AND finally cracked into one of my jars of elderberry jam.

In the interest of honesty, let me admit that the elderberry jam scared me. When I made it, I was totally turned off by the smell. But, as it turns out, if you let the jam sit for the better part of 6 months, you're in for a decadent treat. This is up there with blackcurrant jelly in terms of rich berry flavours.

Which is a big relief, given how much effort I put into making the stuff.

Jam Oat Bars

Ingredients

1 3/4 cups flour (spelt, whole wheat, all purpose, or a mixture)
1 cup packed brown sugar
¼ tsp salt
½ tsp baking soda
3/4 cups chilled unsalted butter (use earth balance if you want to make this vegan), cut into chunks
½ tsp vanilla extract
1½ cups GF oats
1½ cups jam

Directions

1. Preheat oven to 350º. Line a 9"x13" baking ban with parchment paper, ensuring that paper extends over the sides of pan. This will make it easy to remove the bars.

2. In a food processor, pulse together, flour, sugar, salt and baking soda. Add in chilled butter and vanilla, pulsing until small granules are formed. Add in oats and pulse twice. You want some of the oats to be in small pieces and others left whole.

3. Put 3/4 of the flour-oat mixture into the baking pan, patting down to firm. Spread jam over base. If you're using two flavours of jam, spread half on one side and half on the other. Sprinkle with remaining flour-oat mixture. Bake for 20-25 minutes, or until jam is bubbly.

4. Remove from oven and let cool completely in pan on a rack. Makes about 28 pieces, but you decide how much jammy goodness you need in a serving!

Wednesday, August 24, 2011

Preserve Week: Nigel Slater's Elderberry Jelly-Jam

I mentioned last week that my husband, at my request for interesting fruit, brought home some elderberries.

The first thought that popped into my head was:


My second thought was: what the heck am I going to do with elderberries?

So I googled just that. There were recipes for syrups and a couple for pies, but I knew I wasn't particularly interested in making either of those.

Elderberries aren't exactly the most popular fruit out there.

I removed myself to the kitchen and pulled Nigel Slater's Tender II off my shelf. He had two options for me: a sauce for venison or a jelly-jam that could later be put into a Jam Roly-Poly.

Now, I've never had a roly-poly, but I like the sound of a jam filled rolled cake (like a swiss roll), which seems to pretty much describe what a roly-poly is. The cake was traditionally steamed in a shirt sleeve (we're talking back in the 19th century here), which earned it the title Dead Man's Arm.

That's certainly a less appealing name.

So, if making the jelly-jam meant I could have cake at a later date, I knew I was in.


I should clarify one thing: Nigel calls this a jelly-jam because, after straining the berries over night as one does to make jelly, you have the option of incorporating some of the berries back into the jelly. So, it's like this beautiful combination of the two.

Oh! And before I forget: a warning.

Elderberries don't smell the prettiest. I think they smell rather of wet hay. Monty Python was definitely on to something!

Elderberry Jelly-Jam

(from Nigel Slater's Tender II)
makes 3 cups

Ingredients

750 grams elderberries (weight should be berries already removed from stems)
600 ml water
400 grams tart apples (I used Granny Smith, but if you have access to crab apples, even better), halved and left uncored and unpeeled
750 grams granulated sugar

Directions

1. Place elderberries, apples and water in a large dutch oven. Bring to a boil over medium high heat and simmer for 20 minutes, until apples are tender. Remove from heat and then place mixture in a jelly bag to drip over night. Don't squeeze the bag or its contents, as you'll end up with a cloudy jelly.

draining through a jelly bag
2. The next day, pour the collected juices into a dutch oven along with the sugar. If you would like fruit in your jelly, add in some of the berries from the jelly bag. Discard the rest. Bring mixture back to a boil and boil hard for 10-15 minutes, or until jelly reaches its setting point.

3. Pour into sterilized jars and process in boiling water for 10 minutes.

Tuesday, August 23, 2011

Preserve Week: Shiro Plum Jam

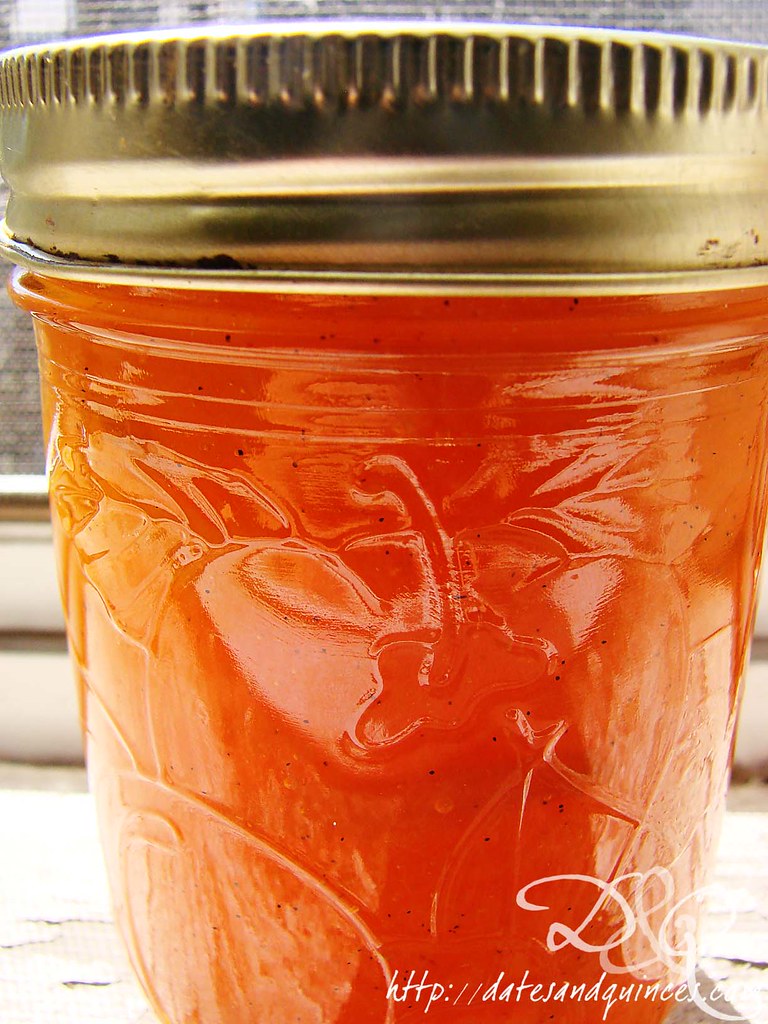
I cannot express to you how ridiculously excited I am about this recipe. After I'd finished making it, I was sending an email to my Mum while licking the spoon I had used to stir the jam. It's tangy and vibrant, and the vanilla bean seeds just make the whole thing so insanely delicious.

You can tell a jam recipe tastes delicious when you lick the plate rest your spoon was sitting on.

Not that I did that.

Cough. Cough. Ahem.

I'm sorry. Something was stuck in my throat there.


This recipe was very lightly adapted what looks like an abandoned blog: Toast. It's a shame really, because the jam turned out beautifully. Check out that amazing orange colour!


Shiro Plum Jam

makes 3 cups jam

Ingredients

2 lbs shiro plums, stoned, but not peeled
2 cups sugar
3 tbsp fresh lemon juice
½ large, plump vanilla bean


Directions

1. Toss plums in a large, non-reactive container with sugar and lemon juice. Let sit for one hour. After, place contents in a dutch oven. Bring to a boil. Boil for one minute then return plum mixture to the container. Place a piece of parchment paper directly on the surface of the plum mixture and place in the fridge overnight.

2. Process canning jars accordingly.

3. Place plum mixture in a large dutch oven. Scrape vanilla bean seeds from pod and stir into mixture. Throw the pods in as well, because a little extra hit of vanilla can never go amiss! Bring mixture to a boil and continue boiling, stirring constantly and skimming off any foam, until jam hits its setting point.

Have we talked about the setting point yet? The setting point is the point at which the jam promises, once cooled, to set to a firmer consistency.

I'm old school and do it the way my mother and I have done it for the better part of 25 years. I like to place a plate in the freezer to chill it. When I think the jam might be ready, I pull the plate out, and put a little dollop of jam on, and put it back in the freezer for 1 minute. You know the jam is ready when it wrinkles when you drag your finger through it.

If you're new school though, pull out your candy thermometer - it'll hit 220ºF.

If the jam is done, proceed to the next step. If not, keep boiling away. I think my jam took a good 20 minutes of boiling... however, I am working on the worst stove known to man (totally inefficient burners), so use your own judgment.

4. Place jam in sterilized jars and process in boiling water for 10 minutes. Remove, let cool and store.

Can I just say, this jam would be killer in thumbprint cookies. Or in cheesecake.

Tuesday, February 22, 2011

Coconut Thumbrint Cookies with Mango-Ginger-Lime Jam

Last week, my friend Lindsay sent me a couple of jars of her preserves: a raisin chutney (yum! I have a cheese platter calling its name) and a mango-lime-ginger jam of her own creation.


Now, I love tropical flavours, and I adore mango, so I was super excited to try it out.

And, it was delicious. As always.

But, if you're simply eating your preserves on toast, you're really missing out on half the fun of a jar of great jam. I was in a baking mood and knew that I wanted something tropical but easy. Thumbprints seemed to be the way to go.

Seriously, I think this recipe came together in about 10 minutes.


Coconut Thumbprint Cookies with Mango Lime Ginger Jam

Ingredients

½ cup unsalted butter
½ cup sugar
1 tsp vanilla
1 egg yolk
1¼ cups all purpose flour
¼ tsp salt
1 egg white, lightly beaten
1¼ cups flaked coconut (I used unsweetened)
¼ cup jam

Directions

1. Preheat oven to 300º. Line a baking sheet with parchment paper or a silpat baking mat.

2. Cream together butter and sugar. Once light and fluffy, add in vanilla and egg yolk. Blend. Then add in flour, mixing until combined.


3. Roll the dough into 20 balls and place on baking sheet. These cookies won't spread too much, so you don't need too much room between them.


4. Place beaten egg white in one shallow dish and coconut into another. Working with one ball at a time, roll dough first into egg white, then into coconut. Place each back onto the baking sheet.


Once all balls are covered with coconut, make an indent in the centre of each, using your thumb (hence the name thumbprint cookies). This little well will be where you put the jam.


5. Spoon ¼-½ tsp jam into the well of each cookie. Be careful not to overfill the centres; you don't want the jam to leak out all over the cookie sheet. It has a tendency to burn then.


Take a moment to admire all those cookies with jewel-like toppings. You're a genius!


6. Bake in oven for about 25 minutes, or until just lightly golden and firm to the touch. Because we have a temperamental oven, I started keeping a close eye on mine at about the 20 minute mark and they were finished at 27 minutes. Remove to rack and let cool.


Serve with tea and try not to eat too many at once!

Monday, February 14, 2011

You should have this for breakfast this weekend

Happy Valentine's Day everyone! Remember, keeping it loved up isn't just for February 14th; nothing says love like long, leisurely weekend breakfast with vanilla and jammy flavours.

We've already established that, as a general rule, pancakes aren't my thing due to severe childhood trauma. Thankfully, this doesn't extend to all pancakesque creations. Like the Dutch Baby Pancake, crepes are still on the table. Maybe it's because my Mum was always in charge of making the crepes. Maybe it's because I don't have 'Nam style flashbacks to equally frozen and burned food. Whatever the reason, I love crepes.

When I was a kid, crepes were always known in our house as Roll-Ups. We always had them rolled up with sugar and lemon juice. They weren't fancy, but they were definitely my favourite breakfast item going.


While my Mum's recipe is my favourite, when I went looking for it this morning, it was buried somewhere in the recesses of my cookbook shelf and otherwise unfindable.
It was too early for me to commit to a thorough search.

So, I opted to try out a new version (one that didn't require chilling overnight) from Martha Stewart.

They were dessert crepes... but really... Dessert. Breakfast. They're all the same thing.

Aren't they? Yeah, you know you're with me.

Hunk o' Smoked goodness
You top that off with some maple smoked Rowe Farms bacon? Well, my friend, you know you're going to have a great day when you start off with the breakfast of champions.

I'll award bonus points to all of you who either:
a) fill the crepes with your Mother-in-Law's amazing jam (a soft-set floral plum here!)

or 

b) fill the crepes with a preserve bought from the amazing Uncanny Preserves (I've saved a jar of Blackcurrant jam for just this occasion)

or

c) fill the crepes with whatever locally produced preserve as tickles your fancy

But, for the record, this recipe is best with soft berry flavours. A raspberry or blackberry preserve would be an excellent choice.
Vanilla Dessert Breakfast Crepes

(adapted from Martha Stewart)

Ingredients

1/2 cup all-purpose flour
Pinch of salt
2 large eggs
1 large egg yolk
1 1/4 cups milk
1 1/2 - 2 teaspoons pure vanilla extract
4 tbsp unsalted butter

Directions
In a medium bowl, sift together flour and salt. Whisk in eggs, egg yolk, and about 1 tablespoon milk, forming a smooth batter with a pastelike consistency. Add remaining milk and 1 teaspoon vanilla; mix until no lumps remain. 

Melt 4 tablespoons butter in a nonstick skillet, and stir into the batter; leave a film of butter in the skillet. Let the batter rest at room temperature about 30 minutes.

Heat oven to warm. Over medium-low heat, warm the skillet thoroughly. Stir batter, and carefully ladle about 1/4 cup batter into skillet. Rotate skillet so batter spreads out and thinly coats the bottom and edges of the skillet. Return skillet to heat, and cook crepe until edges turn golden brown and lacy, and start to pull away from the skillet, about 2 minutes. 

Using a knife or an offset spatula, carefully turn crepe over; cook other side until just golden, 30 to 40 seconds. Slide the crepe onto a heat-proof plate. Repeat with the remaining batter, stirring it before making another crepe. Stack cooked crepes on top of one another.


Delicious and highly recommended!

Thursday, October 14, 2010

Uncanny Preserves

A friend from my university days has her own Preserving business, and let me tell you, her products are killer. I scored a super sweet jar of chocolate raspberry jam (amongst other purchases) this summer that is HEAVEN on toast.

Peach Rum Butter on toast. Glorious!
If you love preserves and supporting local farmers, check out her website  Uncanny Preserves and peruse her current fall selection. Seriously, you can't go wrong with anything she has! She also has a super sweet blog too.
Related Posts Plugin for WordPress, Blogger...