Thanksgiving has long since come and gone for us here in Canadaland, and usually, I'm not much of a pumpkin enthusiast outside of that holiday. But, toward the end of October, my husband's parents and brother made the leap across the pond from England, and it seemed like a good idea to have a Thanksgiving dinner with them.
As they'd never tried pumpkin as a dessert ingredient before, I opted to forgo the pumpkin pie (honestly, I think it's an acquired taste) and did my pumpkin angel food cake with salted cinnamon caramel instead. But, this left me with half a can of leftover pumpkin puree, and, like I said, I'm not much of a pumpkin enthusiast.
The story could have ended with the leftover puree in the green bin, but I feel guilty every time I throw ingredients away! So, I was determined to find some use for the pumpkin, and preferably something easy that I could do while Audrey was napping.
After perusing several recipes, I settled on making a batch of spice infused pumpkin ice cream. And, what better use for ice cream than putting it into sandwich form?
I adapted a Cooking Light recipe for my purposes. You can choose to use low and non-fat dairy products here, or you can do what I did and fatten the thing up. Or go half and half and use what you've got on hand.
Whatever you choose, it's going to be totally delicious.
Pumpkin Spice Ice Cream
Adapted from Cooking Light
Ingredients
1½ cups milk, divided
2 tbsp dark brown sugar
2 large egg yolks
1 (14 oz) can sweetened condensed milk
1 tsp vanilla extract
¼ tsp ground nutmeg
1/8 tsp ground ginger
1/8 tsp ground cinnamon
pinch salt
1 cup canned pumpkin
1 tbsp bourbon
1 cup sour cream
Directions
1. Combine 1 cup of the milk with the brown sugar in a saucepan and heat until 180º, or until tiny bubbles form around the edges. Do NOT bring to a boil. Remove from heat.
2. Place egg yolks in a bowl and whisk lightly. Slowly add hot milk mixture to egg yolks, whisking constantly. Return mixture to pan and cook, stirring constantly, over medium heat until mixture thickens enough to coat the back of a spoon. Remove your newly made custard from heat and strain through a fine mesh sieve into a medium bowl. Discard any solids left behind in the sieve.
3. In a medium bowl, mix together the remaining ½ cup of milk, the sweetened condensed milk, the vanilla, nutmeg, ginger, cinnamon and salt. Stir in pumpkin and then gradually whisk in the custard. Cover and chill for at least 8 hours to allow the flavours to come together.
4. Combine ½ cup of the pumpkin custard mixture with the sour cream. Add back into the chilled pumpkin mixture and stir well until combined. Pour into the canister of an ice cream machine and freeze according to manufacturer's instructions.
5. Once finished, spoon ice cream into a freezer safe container and freeze 1 hour or until firm.
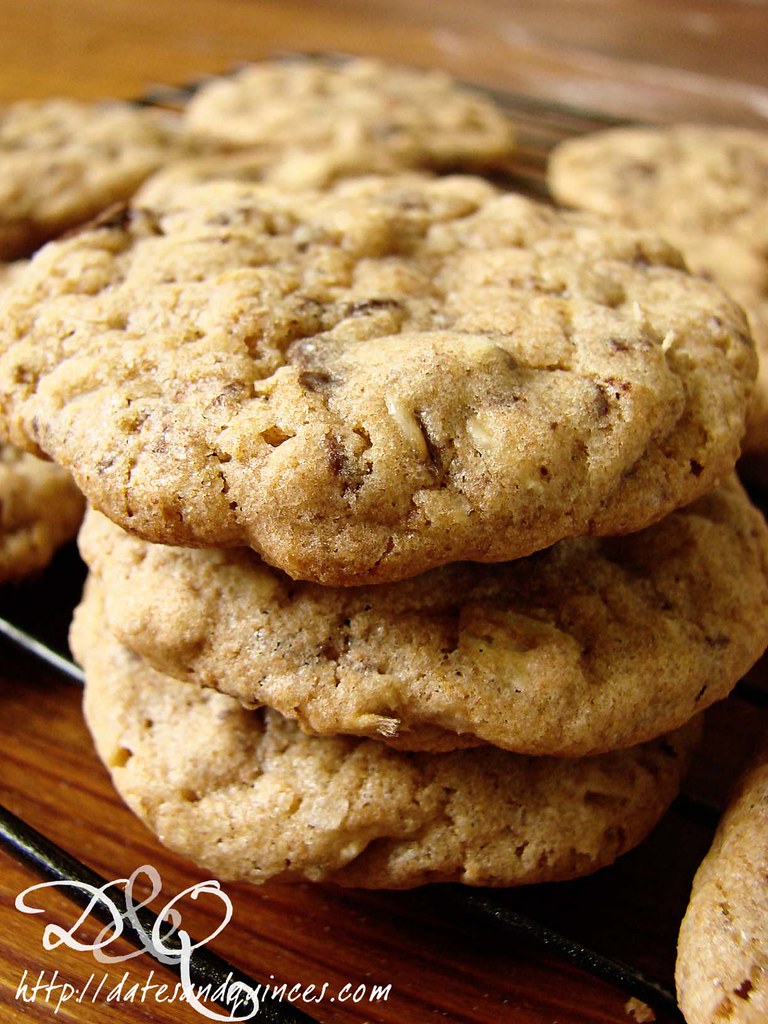
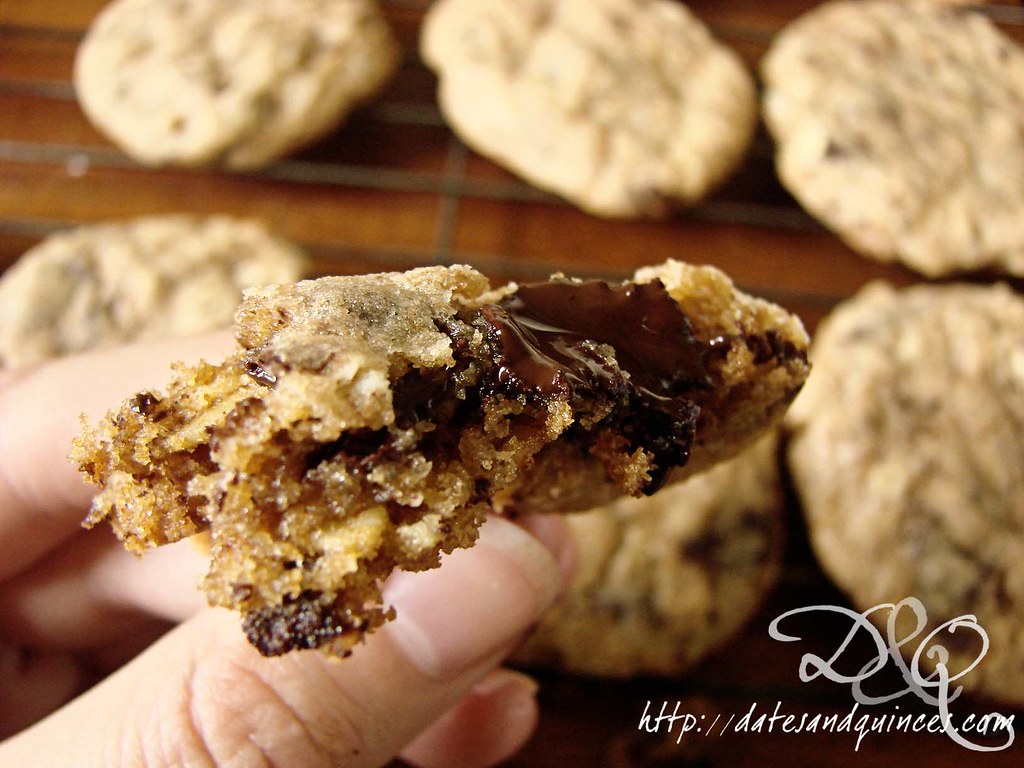
So that's the hard part! The easy part is assembling the sandwiches. I used oatmeal cookies and sandwiched a couple tablespoons of the ice cream (which I'd softened on the counter for 30 minutes) in the middle. Soooo good! If you have soft oatmeal cookies, I think those would be the best option. I was lazy and just bought some boxed crisp oatmeal cookies.
Showing posts with label dessert. Show all posts
Monday, November 12, 2012
Sunday, March 04, 2012
Vanilla Glazed Donuts
It's amazing how your eating habits change when you're pregnant. At least, I'm amazed at my reversion back to my 14-17 year old tastes. I was reading somewhere that a lot of women seek out food that remind them of their childhood, which would totally explain why I've had macaroni and cheese every Sunday for lunch for the past month. Today, I even threw hot dogs (albeit organic ones made with ecologically responsibly raised beef) in.
Between my morning cravings for fruit (I went through 3 grapefruit yesterday) and my dinner time cravings for something that includes Frank's Red Hot Sauce (pregnant women must keep them in business), I've found what I'm making in the kitchen to all be the less than healthy stuff.
It's weird putting on this much weight but not having that much of it go to my hips (although, I noted a double chin in action today... commence the high pitch whine now). I'm scared that, as I reached the halfway mark on Friday that July is going to come around and that I'll have put on way more than I ought to have.
Of course, that doesn't stop me from making desserts. Nor does that stop me from eating them.
Yes, they're donuts.
Yes, they're vanilla glazed.
Yes, they're delicious.
And yes, I started making them at 8 pm one night because I HAD to have them.
But, BUT (and I say this before you roll your eyes and start passing judgment), they're
a) baked
and
b) contain 1 tbsp of butter divided between 12 donuts.
So there. Not (as) terrible for me.
At least they wouldn't be if I hadn't already eaten 2 today. I can't even promise you that there's an end in sight.
Click here for the recipe. I suggest using more than a pinch of nutmeg, and adding a teaspoon of vanilla to the dough when you're mixing in the egg. I'm planning on attempting a chocolate mint version of these over March Break (next week! wheee!).
Also on the March Break to make list: Meyer Lemon and Rose Marmalade and about a million DIY things for our guest room/eventual baby room. Who wants to bet I get none of that accomplished?
Between my morning cravings for fruit (I went through 3 grapefruit yesterday) and my dinner time cravings for something that includes Frank's Red Hot Sauce (pregnant women must keep them in business), I've found what I'm making in the kitchen to all be the less than healthy stuff.
It's weird putting on this much weight but not having that much of it go to my hips (although, I noted a double chin in action today... commence the high pitch whine now). I'm scared that, as I reached the halfway mark on Friday that July is going to come around and that I'll have put on way more than I ought to have.
Of course, that doesn't stop me from making desserts. Nor does that stop me from eating them.
Yes, they're donuts.
Yes, they're vanilla glazed.
Yes, they're delicious.
And yes, I started making them at 8 pm one night because I HAD to have them.
But, BUT (and I say this before you roll your eyes and start passing judgment), they're
a) baked
and
b) contain 1 tbsp of butter divided between 12 donuts.
So there. Not (as) terrible for me.
At least they wouldn't be if I hadn't already eaten 2 today. I can't even promise you that there's an end in sight.
Click here for the recipe. I suggest using more than a pinch of nutmeg, and adding a teaspoon of vanilla to the dough when you're mixing in the egg. I'm planning on attempting a chocolate mint version of these over March Break (next week! wheee!).
Also on the March Break to make list: Meyer Lemon and Rose Marmalade and about a million DIY things for our guest room/eventual baby room. Who wants to bet I get none of that accomplished?
Tuesday, February 14, 2012
Cinnamon Sugar Donut Muffins
Does anything say love more than the warmth of cinnamon and sugar?
Need I say more?
Flavoured with vanilla and nutmeg and rolled in cinnamon sugar, these donuts are the perfect fluffy antidote to a bad work day. Best of all, they take less than 30 minutes in total. In the interest of full disclosure, I made these as a vegan treat, but it's easily done non-vegan too.
Cinnamon Sugar Donut Muffins
(from C'est La Vegan)
Ingredients
3/4 cup granulated sugar
2 tsp baking powder
1½ cups all purpose flour
¼ tsp salt
heaped ¼ tsp ground nutmeg
1 flax egg (1 tbsp ground flax mixed with 3 tbsp water OR 1 egg)
3/4 cup milk (non-dairy or dairy)
¼ cup canola oil (or melted coconut oil)
1½ tsp vanilla extract
2 tsbp earth balance (or butter)
1/3 cup granulated sugar
1 tsp ground cinnamon
Directions
1. Preheat oven to 350º. Grease or spray a standard 12 cup muffin tin with cooking spray.
2. In a small bowl, whisk together dry ingredients (sugar through nutmeg). In a large bowl, stir together wet ingredients (flax egg through vanilla extract). Stir dry ingredients into wet. Spoon into muffin tin, filling each about 2/3 full. Bake for 18-21 minutes until they spring back when touched lightly.
3. Meanwhile, melt earth balance and stir together sugar and cinnamon a dish. Brush warm muffins with earth balance, then roll in cinnamon sugar mixture. Let cool on rack.
Need I say more?
Flavoured with vanilla and nutmeg and rolled in cinnamon sugar, these donuts are the perfect fluffy antidote to a bad work day. Best of all, they take less than 30 minutes in total. In the interest of full disclosure, I made these as a vegan treat, but it's easily done non-vegan too.
Cinnamon Sugar Donut Muffins
(from C'est La Vegan)
Ingredients
3/4 cup granulated sugar
2 tsp baking powder
1½ cups all purpose flour
¼ tsp salt
heaped ¼ tsp ground nutmeg
1 flax egg (1 tbsp ground flax mixed with 3 tbsp water OR 1 egg)
3/4 cup milk (non-dairy or dairy)
¼ cup canola oil (or melted coconut oil)
1½ tsp vanilla extract
2 tsbp earth balance (or butter)
1/3 cup granulated sugar
1 tsp ground cinnamon
Directions
1. Preheat oven to 350º. Grease or spray a standard 12 cup muffin tin with cooking spray.
2. In a small bowl, whisk together dry ingredients (sugar through nutmeg). In a large bowl, stir together wet ingredients (flax egg through vanilla extract). Stir dry ingredients into wet. Spoon into muffin tin, filling each about 2/3 full. Bake for 18-21 minutes until they spring back when touched lightly.
3. Meanwhile, melt earth balance and stir together sugar and cinnamon a dish. Brush warm muffins with earth balance, then roll in cinnamon sugar mixture. Let cool on rack.
Saturday, February 11, 2012
Jam Oat Bars
When I was, oh, I don't know, maybe 12 or 13, my mother had (and I believe she still does have) a Company's Coming Bars and Squares cookbook. There was one recipe in there that I love so much, that it was the first thing I knew how to make by heart - chocolate chip squares. They were so easy, I could throw them together on a week night for our lunches throughout the week.
This post isn't really about the chocolate chip squares. It IS about throwing together some bars for lunches mid-week, AFTER you've made dinner, you're exhausted and pregnant.
Expedient. That's the name of the game.
I'd like to think I've upped the health ante somewhat on your typical jam bar by using spelt flour (you could just as easily use all purpose or whole wheat) and gluten free oats. And, since all I have on my shelves is homemade jam, I used up what was left of a jar of my mother's Ginger, Pear & Crème de Cacao jam AND finally cracked into one of my jars of elderberry jam.
In the interest of honesty, let me admit that the elderberry jam scared me. When I made it, I was totally turned off by the smell. But, as it turns out, if you let the jam sit for the better part of 6 months, you're in for a decadent treat. This is up there with blackcurrant jelly in terms of rich berry flavours.
Which is a big relief, given how much effort I put into making the stuff.
Jam Oat Bars
Ingredients
1 3/4 cups flour (spelt, whole wheat, all purpose, or a mixture)
1 cup packed brown sugar
¼ tsp salt
½ tsp baking soda
3/4 cups chilled unsalted butter (use earth balance if you want to make this vegan), cut into chunks
½ tsp vanilla extract
1½ cups GF oats
1½ cups jam
Directions
1. Preheat oven to 350º. Line a 9"x13" baking ban with parchment paper, ensuring that paper extends over the sides of pan. This will make it easy to remove the bars.
2. In a food processor, pulse together, flour, sugar, salt and baking soda. Add in chilled butter and vanilla, pulsing until small granules are formed. Add in oats and pulse twice. You want some of the oats to be in small pieces and others left whole.
3. Put 3/4 of the flour-oat mixture into the baking pan, patting down to firm. Spread jam over base. If you're using two flavours of jam, spread half on one side and half on the other. Sprinkle with remaining flour-oat mixture. Bake for 20-25 minutes, or until jam is bubbly.
4. Remove from oven and let cool completely in pan on a rack. Makes about 28 pieces, but you decide how much jammy goodness you need in a serving!
This post isn't really about the chocolate chip squares. It IS about throwing together some bars for lunches mid-week, AFTER you've made dinner, you're exhausted and pregnant.
Expedient. That's the name of the game.
I'd like to think I've upped the health ante somewhat on your typical jam bar by using spelt flour (you could just as easily use all purpose or whole wheat) and gluten free oats. And, since all I have on my shelves is homemade jam, I used up what was left of a jar of my mother's Ginger, Pear & Crème de Cacao jam AND finally cracked into one of my jars of elderberry jam.
In the interest of honesty, let me admit that the elderberry jam scared me. When I made it, I was totally turned off by the smell. But, as it turns out, if you let the jam sit for the better part of 6 months, you're in for a decadent treat. This is up there with blackcurrant jelly in terms of rich berry flavours.
Which is a big relief, given how much effort I put into making the stuff.
Jam Oat Bars
Ingredients
1 3/4 cups flour (spelt, whole wheat, all purpose, or a mixture)
1 cup packed brown sugar
¼ tsp salt
½ tsp baking soda
3/4 cups chilled unsalted butter (use earth balance if you want to make this vegan), cut into chunks
½ tsp vanilla extract
1½ cups GF oats
1½ cups jam
Directions
1. Preheat oven to 350º. Line a 9"x13" baking ban with parchment paper, ensuring that paper extends over the sides of pan. This will make it easy to remove the bars.
2. In a food processor, pulse together, flour, sugar, salt and baking soda. Add in chilled butter and vanilla, pulsing until small granules are formed. Add in oats and pulse twice. You want some of the oats to be in small pieces and others left whole.
3. Put 3/4 of the flour-oat mixture into the baking pan, patting down to firm. Spread jam over base. If you're using two flavours of jam, spread half on one side and half on the other. Sprinkle with remaining flour-oat mixture. Bake for 20-25 minutes, or until jam is bubbly.
4. Remove from oven and let cool completely in pan on a rack. Makes about 28 pieces, but you decide how much jammy goodness you need in a serving!
Main Ingredients:
bars,
dessert,
elderberry,
gluten free,
jam,
oats,
pears,
quick and easy,
weeknight
Monday, October 17, 2011
Pumpkin Biscotti with White Chocolate and Ginger
As the leaves fall, this autumn is becoming busier and busier for me. Not only is my infinite pile of marking getting larger by the minute, but my Wednesday & Saturday drama classes have begun (I'm taking my specialist in drama right now), leaving me with less and less time for baking and cooking and, by extension, blogging. So, fair warning, the prolific 5-6 posts a week is definitely going down to 2-3.
It's exhausting. We also had our school's curriculum night last week, so I feel like I've barely seen our apartment since returning from the cottage last Monday.
Our apartment.
We've been living here for just over 4 years now. It was built back in the 1800's as one of the original landowners mansions in Toronto, served as a convent for a while and was transformed again into a 5 apartment unit back in the '70s. When my husband (then-boyfriend) and I did a scouting trip to Toronto back in '07, we spent the first day of our trip looking at soulless concrete highrises off of Yonge.
I was going to be a student at University of Toronto, while my husband had yet to find employment. And although we had the money saved up for rent, no one in any of those soulless, cramped spaces would rent to us.
It was easily one of the most depressing, spirit-destroying days I have ever spent in this city.
But, like most things in life, what originally seemed like disaster turned into a great blessing (also see: moving to Japan, getting into teacher's college, having my first LTO finish early, getting bumped from my high school to my current school), we were SO lucky that no one in those buildings wanted us.
On day two, we stepped back out into the smoggy world of Toronto, and had an early morning appointment for a place in the Annex. For the first time in more than 24 hours, we were walking down tree-lined streets. I felt as though I could breathe again. And then, we were at a huge house. It was set back off the street on a green grassy lawn, with bright, wide windows. And when we stepped inside, we loved it instantly. It felt like home. Those same windows, viewed from the inside, reminded me of the windows in my grandparents' house in Victoria. We signed for it on the spot. Our landlady liked and trusted us enough to rent to us.
We've been really, really happy here. But, as we've grown busier and older (read: have more stuff), we've outgrown our space. At some point in the nearish future, we'd like to have an addition to our family. So, we've known for a while that we'll have to give up this space.
I've been scouring the MLS site for more than a year now. All I can say is that the Toronto real estate market depresses me. The reality is we cannot afford to buy a place that allows us to have the lifestyle we want to live (pedestrian friendly). More to the point, we're not interested in raising a family here. I desperately want to get back to Ottawa within the next 5 years.
So buying can't be an option right now. And the reality of having to move into a lesser quality apartment was looming in front of us.
Then: magic once again. Our next door neighbours on our floor decided that they would be moving out, meaning their 2 bedroom + solarium + wood burning fireplace 1500 sq ft space was up for grabs.
We grabbed it. I'm excited to say we'll be moving the shortest move in the history of moves (approximately 5 feet from our door to theirs) to a flat that is simply spectacular. I couldn't be happier! I intend to get a Christmas tree this year as we'll suddenly have space for it!
This brings us all the way (via the long, windy route) to today's recipe! It's here I made because we're hoping that tonight will be the last showing of our apartment. I hope to entice some awesome new neighbours into the space, who will love it as much as we have (and as much as the tenant before us, who was here 7 years)! And nothing says love me quite as much as the scent of cinnamon, chocolate and pumpkin, right?
I hope you're all warm and cozy in your home tonight!
Pumpkin Biscotti with White Chocolate and Ginger
(adapted from Chatelaine)
Ingredients
2½ cups all purpose flour
½ cup granulated sugar
½ cup packed brown sugar
1½ tsp baking powder
1½ tsp cinnamon
¼ tsp ground cloves
¼ tsp grated nutmeg
¼ tsp salt
¼ cup minced crystalized ginger
2 eggs
½ cup canned pumpkin puree
½ cup unsalted butter, melted
1 tsp vanilla extract
½ cup white chocolate chips
Directions
1. Preheat oven to 300º. Line a large baking sheet with parchment paper or a silpat mat.
2. In a large bowl, stir together flour, sugars, baking powder, cinnamon, cloves, nutmeg, salt and crystallized ginger. In a separate bowl, stir together eggs, pumpkin puree, melted butter and vanilla. Pour wet ingredients into dry and mix until almost combined.
3. Stir in white chocolate chips, until evenly distributed. Divide dough in half. Gently form each half into a log shape, about 15" long and place on prepared baking sheet. Bake in oven for 30 minutes.
4. Remove tray from oven. Reduce temperature to 275º. Let logs of dough sit for 5 minutes. Carefully remove one log from the pan, and, using a serrated knife, slice diagonally into ½" slices. Place, with cut side down back on baking sheet. Repeat with the second log of dough.
5. Return biscotti to oven to bake for an additional 35 minutes, or until dried and crispy. Let cool on rack.
You could glaze these with the spice glaze from the pumpkin scones, if desired.
It's exhausting. We also had our school's curriculum night last week, so I feel like I've barely seen our apartment since returning from the cottage last Monday.
Our apartment.
We've been living here for just over 4 years now. It was built back in the 1800's as one of the original landowners mansions in Toronto, served as a convent for a while and was transformed again into a 5 apartment unit back in the '70s. When my husband (then-boyfriend) and I did a scouting trip to Toronto back in '07, we spent the first day of our trip looking at soulless concrete highrises off of Yonge.
I was going to be a student at University of Toronto, while my husband had yet to find employment. And although we had the money saved up for rent, no one in any of those soulless, cramped spaces would rent to us.
It was easily one of the most depressing, spirit-destroying days I have ever spent in this city.
But, like most things in life, what originally seemed like disaster turned into a great blessing (also see: moving to Japan, getting into teacher's college, having my first LTO finish early, getting bumped from my high school to my current school), we were SO lucky that no one in those buildings wanted us.
On day two, we stepped back out into the smoggy world of Toronto, and had an early morning appointment for a place in the Annex. For the first time in more than 24 hours, we were walking down tree-lined streets. I felt as though I could breathe again. And then, we were at a huge house. It was set back off the street on a green grassy lawn, with bright, wide windows. And when we stepped inside, we loved it instantly. It felt like home. Those same windows, viewed from the inside, reminded me of the windows in my grandparents' house in Victoria. We signed for it on the spot. Our landlady liked and trusted us enough to rent to us.
We've been really, really happy here. But, as we've grown busier and older (read: have more stuff), we've outgrown our space. At some point in the nearish future, we'd like to have an addition to our family. So, we've known for a while that we'll have to give up this space.
I've been scouring the MLS site for more than a year now. All I can say is that the Toronto real estate market depresses me. The reality is we cannot afford to buy a place that allows us to have the lifestyle we want to live (pedestrian friendly). More to the point, we're not interested in raising a family here. I desperately want to get back to Ottawa within the next 5 years.
So buying can't be an option right now. And the reality of having to move into a lesser quality apartment was looming in front of us.
Then: magic once again. Our next door neighbours on our floor decided that they would be moving out, meaning their 2 bedroom + solarium + wood burning fireplace 1500 sq ft space was up for grabs.
We grabbed it. I'm excited to say we'll be moving the shortest move in the history of moves (approximately 5 feet from our door to theirs) to a flat that is simply spectacular. I couldn't be happier! I intend to get a Christmas tree this year as we'll suddenly have space for it!
This brings us all the way (via the long, windy route) to today's recipe! It's here I made because we're hoping that tonight will be the last showing of our apartment. I hope to entice some awesome new neighbours into the space, who will love it as much as we have (and as much as the tenant before us, who was here 7 years)! And nothing says love me quite as much as the scent of cinnamon, chocolate and pumpkin, right?
I hope you're all warm and cozy in your home tonight!
Pumpkin Biscotti with White Chocolate and Ginger
(adapted from Chatelaine)
Ingredients
2½ cups all purpose flour
½ cup granulated sugar
½ cup packed brown sugar
1½ tsp baking powder
1½ tsp cinnamon
¼ tsp ground cloves
¼ tsp grated nutmeg
¼ tsp salt
¼ cup minced crystalized ginger
2 eggs
½ cup canned pumpkin puree
½ cup unsalted butter, melted
1 tsp vanilla extract
½ cup white chocolate chips
Directions
1. Preheat oven to 300º. Line a large baking sheet with parchment paper or a silpat mat.
2. In a large bowl, stir together flour, sugars, baking powder, cinnamon, cloves, nutmeg, salt and crystallized ginger. In a separate bowl, stir together eggs, pumpkin puree, melted butter and vanilla. Pour wet ingredients into dry and mix until almost combined.
3. Stir in white chocolate chips, until evenly distributed. Divide dough in half. Gently form each half into a log shape, about 15" long and place on prepared baking sheet. Bake in oven for 30 minutes.
4. Remove tray from oven. Reduce temperature to 275º. Let logs of dough sit for 5 minutes. Carefully remove one log from the pan, and, using a serrated knife, slice diagonally into ½" slices. Place, with cut side down back on baking sheet. Repeat with the second log of dough.
5. Return biscotti to oven to bake for an additional 35 minutes, or until dried and crispy. Let cool on rack.
You could glaze these with the spice glaze from the pumpkin scones, if desired.
Monday, October 03, 2011
Pumpkin Scones with Spiced Glaze
Last Monday, I was running early for a doctor's appointment, so I decided to hop off the subway and stop off for a coffee at Starbucks. Of course, as soon as I got in the line, the rumbling in my stomach reminded me that I had eaten my lunch (quiche) for breakfast at 9:45 that morning as I'd forgotten to pack breakfast.
It was 2 pm, and I was really hungry. In honour of the fact that it had recently become autumn, I bought myself a pumpkin scone, settled into a cushy seat with a new magazine and sipped my chai tea latte.
I regretted the scone immediately. The icing was far too sweet, and it was painfully dry. It felt like it was absorbing all the moisture from my mouth as I was eating it.
Frustrated (and still hungry), post appointment, my husband and I went grocery shopping and I bought several tins of pumpkin. By God, I was going to prove that I could make a better pumpkin scone than Starbucks.
And this is it. I brought the first batch in to work to share with my coworkers (positive reviews all around), much to my husband's chagrin. So, I whipped up another batch this past weekend.
With the use of a food processor, this recipe comes together in minutes.
Pumpkin Scones with Spiced Glaze
(lightly adapted from The Shoebox Kitchen)
Ingredients
2 cups all purpose flour
¼ cup brown sugar
3 tbsp granulated sugar
1 tbsp baking powder
½ tsp cinnamon
½ tsp nutmeg
¼ tsp ginger
¼ tsp ground cloves
pinch salt
1/3 cup unsalted butter, chilled, and cut into ½" cubes
½ cup pumpkin puree
3 tbsp milk
1 large egg
glazes
1 cup icing sugar, divided
2 tbsp milk, divided
1/8 tsp cinnamon
pinch each ginger, cloves, nutmeg
Directions
1. Preheat oven to 375º. In the bowl of a food processor, pulse together flour, sugars, baking powder, cinnamon, nutmeg, ginger, cloves and salt. Add butter, pulsing until you have small, pea sized clumps.
2. In a separate bowl, whisk together pumpkin, milk and egg. With motor running, pour pumpkin mixture through tube, pulsing just until mixture comes together and forms a ball.
3. Transfer dough to a lightly floured surface and shape into a rectangle, about 1" thick. Divide vertically into 4 rectangles, then divide those rectangles in half horizontally to form 8 squares. Cut each square diagonally to create 16 triangles.
4. Place on a parchment or silpat lined baking sheet and bake for 15-17 minutes, or until lightly golden on the bottom. Let cool on a rack.
5. Whisk together ½ cup icing sugar with 1 tbsp milk. Brush over tops of cooled scones. Let dry for 15 minutes. In a small plastic bag, massage together remaining icing sugar with 1 tbsp milk and the spices. Cut the corner of the bag off to create a piping bag, and pipe the spiced glaze over top of the regular glaze. Let harden for 1 hour before transferring to an air tight container.
It was 2 pm, and I was really hungry. In honour of the fact that it had recently become autumn, I bought myself a pumpkin scone, settled into a cushy seat with a new magazine and sipped my chai tea latte.
I regretted the scone immediately. The icing was far too sweet, and it was painfully dry. It felt like it was absorbing all the moisture from my mouth as I was eating it.
Frustrated (and still hungry), post appointment, my husband and I went grocery shopping and I bought several tins of pumpkin. By God, I was going to prove that I could make a better pumpkin scone than Starbucks.
And this is it. I brought the first batch in to work to share with my coworkers (positive reviews all around), much to my husband's chagrin. So, I whipped up another batch this past weekend.
With the use of a food processor, this recipe comes together in minutes.
Pumpkin Scones with Spiced Glaze
(lightly adapted from The Shoebox Kitchen)
Ingredients
2 cups all purpose flour
¼ cup brown sugar
3 tbsp granulated sugar
1 tbsp baking powder
½ tsp cinnamon
½ tsp nutmeg
¼ tsp ginger
¼ tsp ground cloves
pinch salt
1/3 cup unsalted butter, chilled, and cut into ½" cubes
½ cup pumpkin puree
3 tbsp milk
1 large egg
glazes
1 cup icing sugar, divided
2 tbsp milk, divided
1/8 tsp cinnamon
pinch each ginger, cloves, nutmeg
Directions
1. Preheat oven to 375º. In the bowl of a food processor, pulse together flour, sugars, baking powder, cinnamon, nutmeg, ginger, cloves and salt. Add butter, pulsing until you have small, pea sized clumps.
2. In a separate bowl, whisk together pumpkin, milk and egg. With motor running, pour pumpkin mixture through tube, pulsing just until mixture comes together and forms a ball.
3. Transfer dough to a lightly floured surface and shape into a rectangle, about 1" thick. Divide vertically into 4 rectangles, then divide those rectangles in half horizontally to form 8 squares. Cut each square diagonally to create 16 triangles.
4. Place on a parchment or silpat lined baking sheet and bake for 15-17 minutes, or until lightly golden on the bottom. Let cool on a rack.
5. Whisk together ½ cup icing sugar with 1 tbsp milk. Brush over tops of cooled scones. Let dry for 15 minutes. In a small plastic bag, massage together remaining icing sugar with 1 tbsp milk and the spices. Cut the corner of the bag off to create a piping bag, and pipe the spiced glaze over top of the regular glaze. Let harden for 1 hour before transferring to an air tight container.
Thursday, September 22, 2011
Cheesecake-in-a-Jar with Blueberry Curd
In celebration of my brother's birthday the other week, we opted to make cheesecakes in jam jars and topped them with a really gorgeous blueberry curd.
I won't even pretend that this was even vaguley a creation of mine - I simply halved the recipe and replaced the blackberries with blueberries... so head on over to Use Real Butter for the real deal.
Saturday, September 17, 2011
Spelt and Oat Chocolate Chunk Cookies
Most people combat the onset of a cold with vitamin C, chicken noodle soup or a rigorous routine of Cold FX. But, I'm heading into week 3 of the school year (only 185 days left to go), and that means that I'm looking for some real comfort food.
And that means chocolate chip cookies. Or, because I like going big, chocolate chunk cookies.
As someone who worked in a Belgian chocolate shop for 4 years, I firmly believe that chocolate has the ability to heal all illness.
Or at least make you forget that you're sick for the 30 seconds it takes to eat one of these cookies.
NOM.
See? You're feeling better just by looking at these cookies.
Spelt and Oat Chocolate Chunk Cookies
(adapted from So Good and Tasty)
makes 2 dozen
Ingredients
½ cup granulated sugar
½ cup packed brown sugar
1/3 cup butter, softened
1 egg
1 tsp vanilla extract
½ tsp baking soda
1¼ cups spelt flour
½ tsp kosher salt
½ cup (heaping) coarsely chopped good quality chocolate (about 80 grams or 3 oz)
½ cup oats (not instant)
optional ad-ins: 1 tbsp grated orange zest, 2 tbsp minced crystallized ginger, ¼ cup chopped nuts
Directions
1. Preheat oven to 300º. Line a large baking sheet with parchment or a silpat mat.
2. Cream together butter with sugars. Beat in egg and vanilla extract. In a separate bowl, mix together baking soda, spelt flour and salt. Mix dry ingredients into wet. Stir in chocolate chunks, oats and any optional ingredients.
3. Drop by tablespoons onto baking sheet, at least 1" apart. Bake for 12-15 minutes or until edges are lightly browned. Remove baking sheet from oven and let cookies cool on sheet for 2-3 minutes before transferring to a cooling rack.
Thin, chewy and oh-so-delicious. Plus, the spelt flour adds a nice nutty undertone.
And that means chocolate chip cookies. Or, because I like going big, chocolate chunk cookies.
As someone who worked in a Belgian chocolate shop for 4 years, I firmly believe that chocolate has the ability to heal all illness.
Or at least make you forget that you're sick for the 30 seconds it takes to eat one of these cookies.
NOM.
See? You're feeling better just by looking at these cookies.
Spelt and Oat Chocolate Chunk Cookies
(adapted from So Good and Tasty)
makes 2 dozen
Ingredients
½ cup granulated sugar
½ cup packed brown sugar
1/3 cup butter, softened
1 egg
1 tsp vanilla extract
½ tsp baking soda
1¼ cups spelt flour
½ tsp kosher salt
½ cup (heaping) coarsely chopped good quality chocolate (about 80 grams or 3 oz)
½ cup oats (not instant)
optional ad-ins: 1 tbsp grated orange zest, 2 tbsp minced crystallized ginger, ¼ cup chopped nuts
Directions
1. Preheat oven to 300º. Line a large baking sheet with parchment or a silpat mat.
2. Cream together butter with sugars. Beat in egg and vanilla extract. In a separate bowl, mix together baking soda, spelt flour and salt. Mix dry ingredients into wet. Stir in chocolate chunks, oats and any optional ingredients.
3. Drop by tablespoons onto baking sheet, at least 1" apart. Bake for 12-15 minutes or until edges are lightly browned. Remove baking sheet from oven and let cookies cool on sheet for 2-3 minutes before transferring to a cooling rack.
Thin, chewy and oh-so-delicious. Plus, the spelt flour adds a nice nutty undertone.
Saturday, September 10, 2011
Grilled Peach Tiramisu with White Chocolate
I feel like I'm peaking my head out from under the large rock I've been hiding behind for the past two weeks. In retrospect, I should have known that the first week back at school would be a total gong show. All the sun, sea and surf must have fried my brain, because I remained blissfully in a fog about how little sleep I would get and how much stress I would be under.
Have I mentioned that I have to teach grade seven math this year?
I haven't been in a math classroom since my OAC finite class back in 97/98.
Sigh.
Those poor children.
So, I'm still dreaming of the summer, the cottage and kayaking. With the temperatures still hovering at a blissfully warm 23º during the day, a day out on the water would be just what this stressed out teacher could use right now.
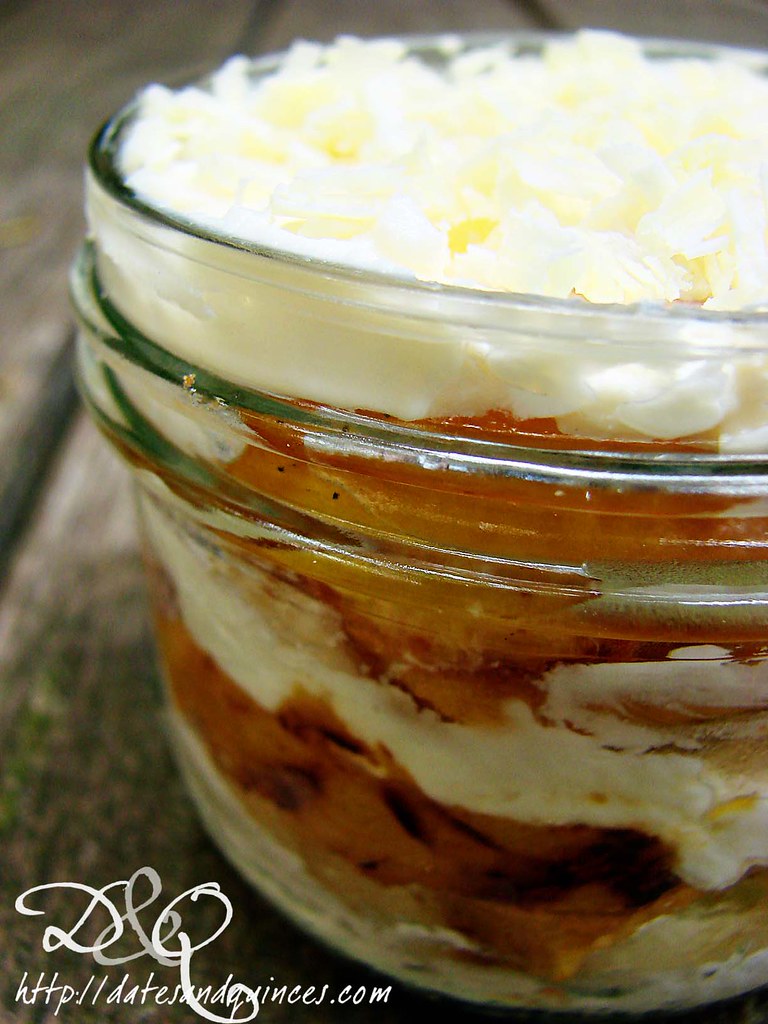
Or, perhaps, one of these:
I'm not usually a huge tiramisu fan. I find the flavours and texture a little too soft for my liking sometimes. But this one has the smokiness from the grill combined with the sweetness of the peaches and the softness of the mascarpone. The whole thing is lightened up with yogurt in place of whipped cream and made adult by a generous inclusion of amaretto.
Grilled Peach Tiramisu
(serves 6)
Ingredients
4 large, peeled peaches, cut in half (it's best to use slightly under ripe ones here)
½ tbsp canola oil
1 cup mascarpone cheese
2 cups full fat yogurt, drained in a cheesecloth lined strainer for at least 1 hour
1½ tsp vanilla extract
5 tbsp granulated sugar, divided
12 lady finger cookies, cut in half horizontally
1/3 cup amaretto liqueur
3 oz white chocolate, shaved
Directions
1. Heat a grill over medium high heat. Grease bars well. Brush peaches with canola oil and place on grill. Grill for approximately 2 minutes per side, or until peaches are tender and have grill marks in places. Remove from heat and thinly slice. Set aside.
2. Beat together mascarpone, yogurt, vanilla and 3 tbsp sugar. Set aside.
3. Whisk together amaretto and remaining 2 tbsp sugar until sugar is dissolved.
4. To assemble each tiramisu: Place a little of the mascarpone mixture in the bottom of a 1 cup mason jars. Top with a few peaches slices. Sprinkle with a bit of white chocolate. Dunk 2 lady finger halves in amaretto and place on top of white chocolate. Repeat layers once more. Top the whole thing with a final layer of mascarpone and white chocolate shavings. Repeat with remaining 5 mason jars. Let sit in the fridge, covered, for at least 2 hours, and up to 6.
Have I mentioned that I have to teach grade seven math this year?
I haven't been in a math classroom since my OAC finite class back in 97/98.
Sigh.
Those poor children.
So, I'm still dreaming of the summer, the cottage and kayaking. With the temperatures still hovering at a blissfully warm 23º during the day, a day out on the water would be just what this stressed out teacher could use right now.
Or, perhaps, one of these:
I'm not usually a huge tiramisu fan. I find the flavours and texture a little too soft for my liking sometimes. But this one has the smokiness from the grill combined with the sweetness of the peaches and the softness of the mascarpone. The whole thing is lightened up with yogurt in place of whipped cream and made adult by a generous inclusion of amaretto.
Grilled Peach Tiramisu
(serves 6)
Ingredients
4 large, peeled peaches, cut in half (it's best to use slightly under ripe ones here)
½ tbsp canola oil
1 cup mascarpone cheese
2 cups full fat yogurt, drained in a cheesecloth lined strainer for at least 1 hour
1½ tsp vanilla extract
5 tbsp granulated sugar, divided
12 lady finger cookies, cut in half horizontally
1/3 cup amaretto liqueur
3 oz white chocolate, shaved
Directions
1. Heat a grill over medium high heat. Grease bars well. Brush peaches with canola oil and place on grill. Grill for approximately 2 minutes per side, or until peaches are tender and have grill marks in places. Remove from heat and thinly slice. Set aside.
2. Beat together mascarpone, yogurt, vanilla and 3 tbsp sugar. Set aside.
3. Whisk together amaretto and remaining 2 tbsp sugar until sugar is dissolved.
4. To assemble each tiramisu: Place a little of the mascarpone mixture in the bottom of a 1 cup mason jars. Top with a few peaches slices. Sprinkle with a bit of white chocolate. Dunk 2 lady finger halves in amaretto and place on top of white chocolate. Repeat layers once more. Top the whole thing with a final layer of mascarpone and white chocolate shavings. Repeat with remaining 5 mason jars. Let sit in the fridge, covered, for at least 2 hours, and up to 6.
Friday, August 19, 2011
Plum-a-palooza: A Small Plum Cake for Four
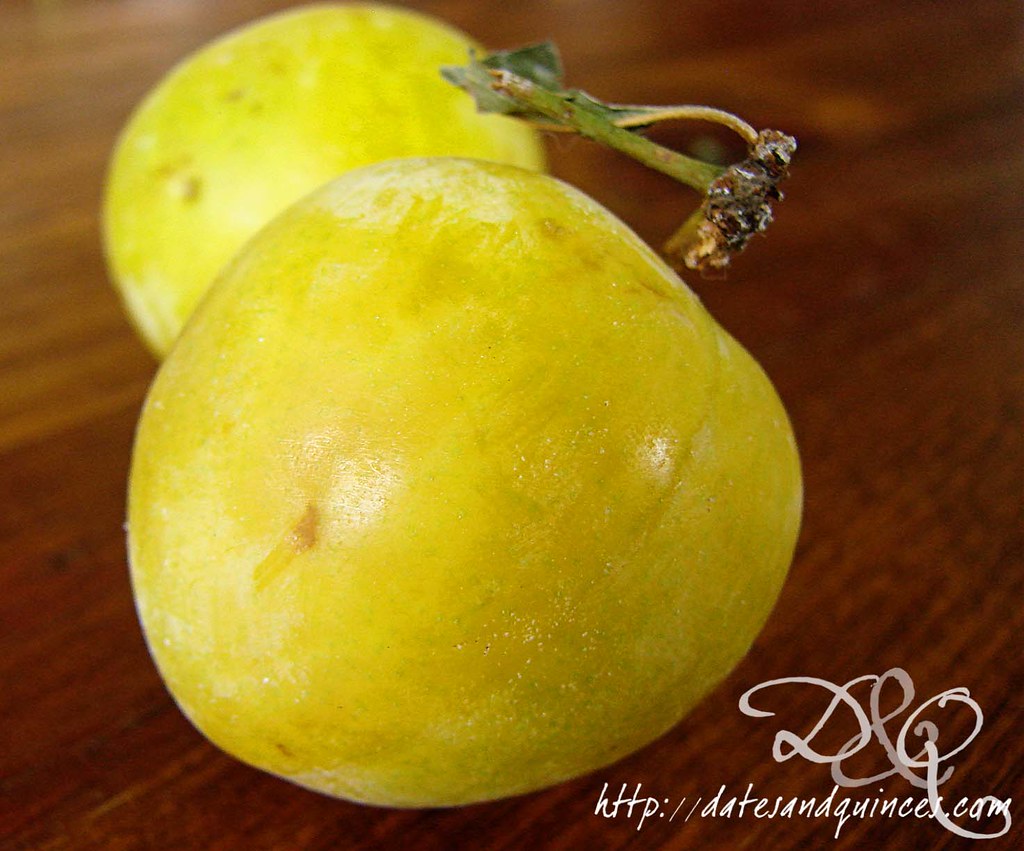
At the farmer's market this week, my husband picked up a few pounds of shiro plums. The shiro plum is a Japanese variety and isn't white, as the name might lead you to believe, but yellow.
Shiro plums are sweet and bright, but also happen to be clingstone, which may deter you if segmenting clingstone fruits annoys you.
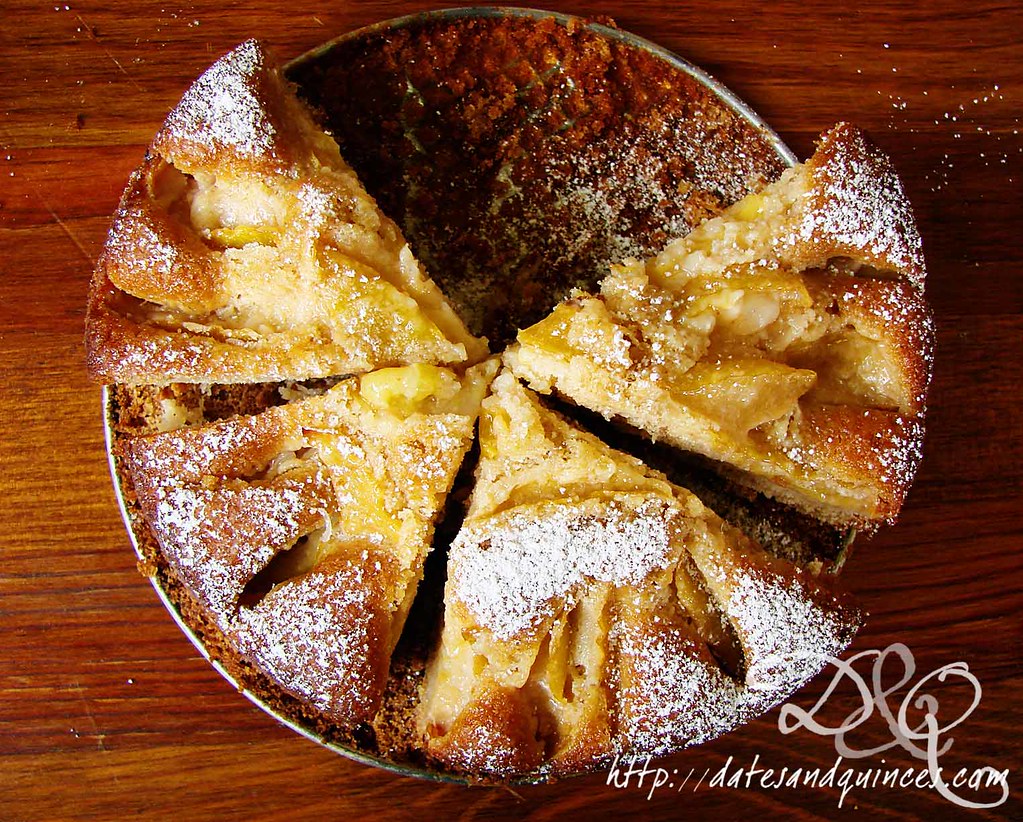
Truth be told, although I had asked him to pick up some interesting fruit, I wasn't really sure what I was going to do with 4lbs of these plums. In the end, I opted to make a small plum cake and to use the rest of the fruit in a jam (which I've started and is currently sitting in my fridge waiting for a flavour infusion tomorrow - vanilla? star anise? cardamon? I definitely want the vanilla... but I can't decide what, if anything, else to put in).
Plum Cake
(adapted from Martha Stewart)
Ingredients
¼ cup + 2 tbsp butter, at room temperature
½ cup all purpose flour
¼ cup spelt flour (you can use all purpose instead)
¼ tsp baking soda
generous pinch kosher salt
¼ cup packed brown sugar
¼ cup granulated sugar
1 egg + 1 egg white
½ tsp vanilla extract
zest of one lemon
1/3 cup plain yogurt
4 plums, halved, pitted and cut into 6-8 slices
Directions
1. Preheat oven to 375º. Generously butter and flour a small, 6" springform pan. Set aside.
2. In a small bowl, sift together flours, baking soda and salt.
3. In the bowl of a mixer (or, using a hand mixer), cream together butter. Gradually add in sugars. Once mixture is light and fluffy, add in whole egg then the egg white. Once this is incorporated, add in vanilla, lemon zest and yogurt.
4. Add flour mixture to wet ingredients in 2 batches, making sure each batch is incorporated before adding the next one. Pour batter into prepared pan. Smooth.
5. Arrange plum slices over the top of the batter. Place in oven for 30 minutes. Remove, loosely tent with foil and return to oven for an additional 35 minutes. Cake is done when a skewer inserted into centre comes out clean.
Let cool on rack on counter. Cake is best eaten the day it was made! Might I recommend some ice cream, whipped cream or a sifting of icing sugar?
You may have noticed in the picture that I've cut the cake into more than four slices... we weren't particularly hungry, so smaller was the way to go!
Shiro plums are sweet and bright, but also happen to be clingstone, which may deter you if segmenting clingstone fruits annoys you.
Truth be told, although I had asked him to pick up some interesting fruit, I wasn't really sure what I was going to do with 4lbs of these plums. In the end, I opted to make a small plum cake and to use the rest of the fruit in a jam (which I've started and is currently sitting in my fridge waiting for a flavour infusion tomorrow - vanilla? star anise? cardamon? I definitely want the vanilla... but I can't decide what, if anything, else to put in).
Plum Cake
(adapted from Martha Stewart)
Ingredients
¼ cup + 2 tbsp butter, at room temperature
½ cup all purpose flour
¼ cup spelt flour (you can use all purpose instead)
¼ tsp baking soda
generous pinch kosher salt
¼ cup packed brown sugar
¼ cup granulated sugar
1 egg + 1 egg white
½ tsp vanilla extract
zest of one lemon
1/3 cup plain yogurt
4 plums, halved, pitted and cut into 6-8 slices
Directions
1. Preheat oven to 375º. Generously butter and flour a small, 6" springform pan. Set aside.
2. In a small bowl, sift together flours, baking soda and salt.
3. In the bowl of a mixer (or, using a hand mixer), cream together butter. Gradually add in sugars. Once mixture is light and fluffy, add in whole egg then the egg white. Once this is incorporated, add in vanilla, lemon zest and yogurt.
4. Add flour mixture to wet ingredients in 2 batches, making sure each batch is incorporated before adding the next one. Pour batter into prepared pan. Smooth.
5. Arrange plum slices over the top of the batter. Place in oven for 30 minutes. Remove, loosely tent with foil and return to oven for an additional 35 minutes. Cake is done when a skewer inserted into centre comes out clean.
Let cool on rack on counter. Cake is best eaten the day it was made! Might I recommend some ice cream, whipped cream or a sifting of icing sugar?
You may have noticed in the picture that I've cut the cake into more than four slices... we weren't particularly hungry, so smaller was the way to go!
Main Ingredients:
cake,
dessert,
martha stewart,
plums,
shiro plums,
summer
Thursday, July 28, 2011
Passion Fruit Sorbet
Hello, hello, good morning all! We're flying off for Victoria tonight, so here's my last pre-Hawaii recipe post for my absolute all time favourite sorbet: passion fruit.
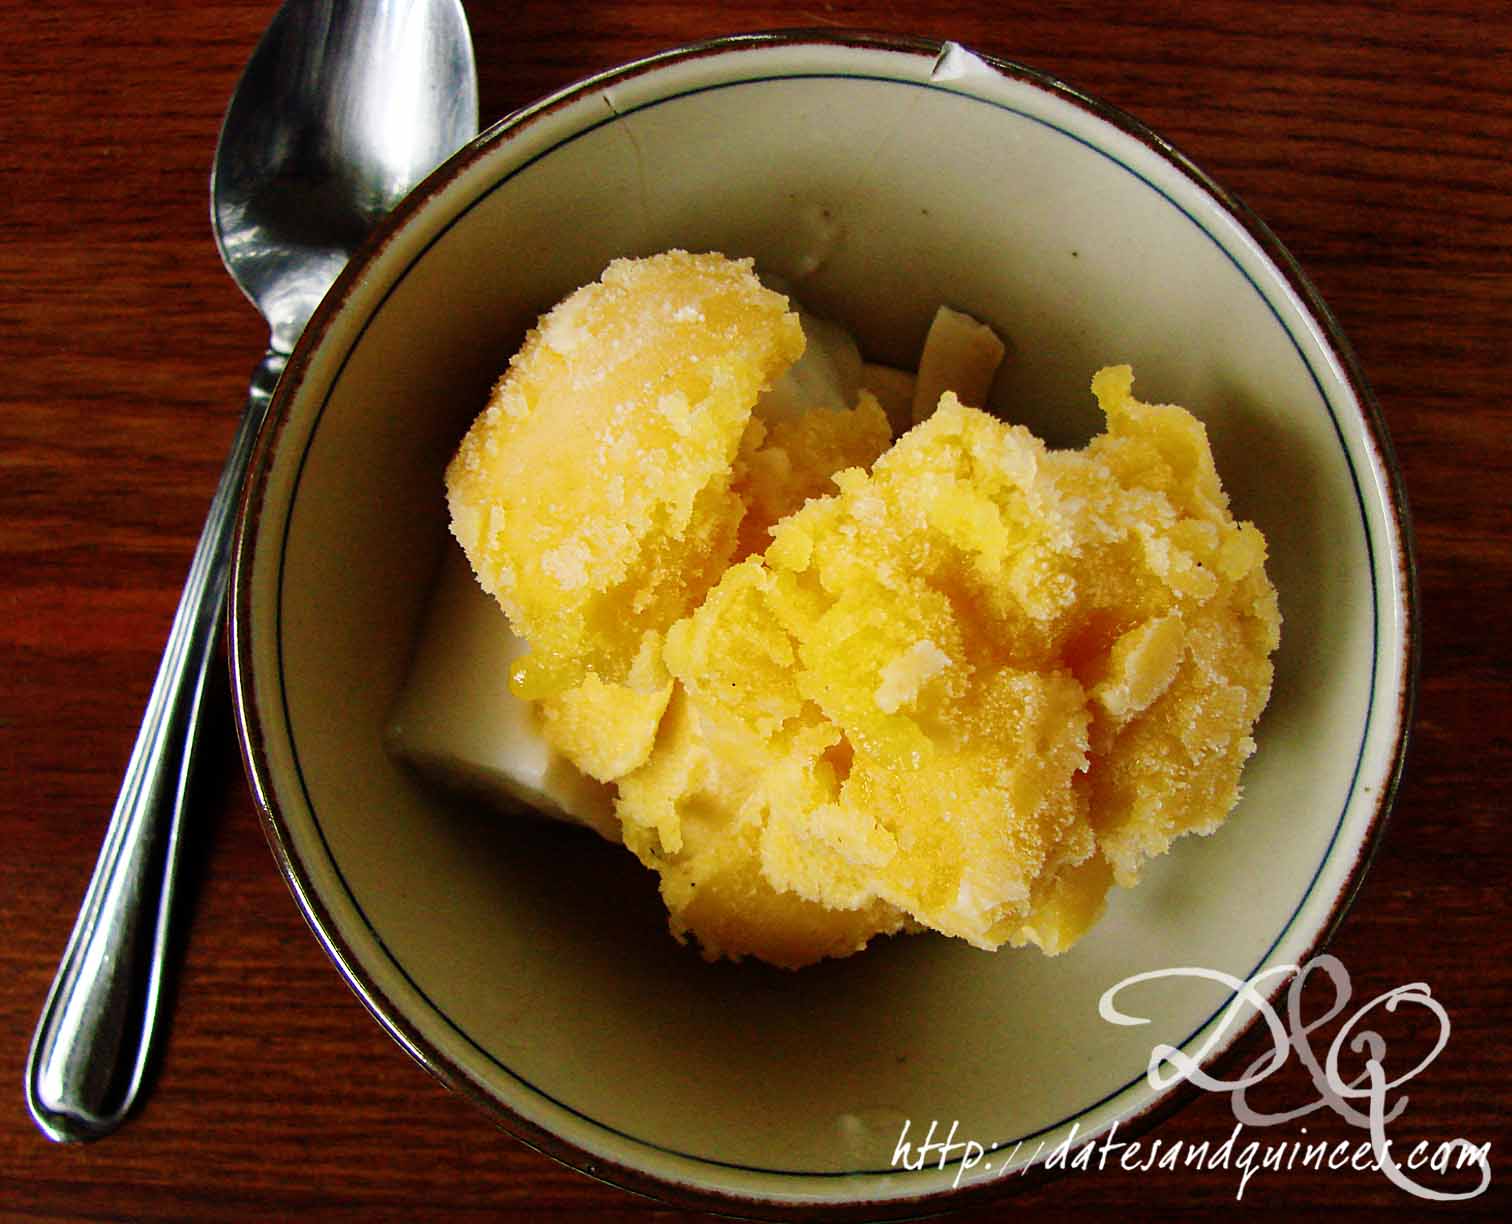
I just cannot get enough of this stuff! It's bright, tangy and sweet. It has a mere 3 ingredients and it's also the perfect foil for the rich and creamy coconut jelly I posted about yesterday.
Passion Fruit Sorbet
Ingredients
2 cups water
1 cup sugar
1½ cup passion fruit puree (often available frozen from Latin American grocery stores)
Directions
1. Heat water and sugar in a saucepan, stirring until sugar dissolves. Stir in passion fruit puree, remove from heat and let chill in the fridge.
2. When cool, place in ice cream maker and process according to manufacturer's directions.
Ta Dah! How's that for an easy, hands off dessert?
I'll probably be off for a few days, but can't wait to post about my experiences as a kitchen monkey at this weekend's wedding and all the deliciousness on Kauai and Maui!
I just cannot get enough of this stuff! It's bright, tangy and sweet. It has a mere 3 ingredients and it's also the perfect foil for the rich and creamy coconut jelly I posted about yesterday.
Passion Fruit Sorbet
Ingredients
2 cups water
1 cup sugar
1½ cup passion fruit puree (often available frozen from Latin American grocery stores)
Directions
1. Heat water and sugar in a saucepan, stirring until sugar dissolves. Stir in passion fruit puree, remove from heat and let chill in the fridge.
2. When cool, place in ice cream maker and process according to manufacturer's directions.
Ta Dah! How's that for an easy, hands off dessert?
I'll probably be off for a few days, but can't wait to post about my experiences as a kitchen monkey at this weekend's wedding and all the deliciousness on Kauai and Maui!
Main Ingredients:
dessert,
passion fruit,
quick and easy,
sorbet,
vegan
Wednesday, July 27, 2011
Rich and Creamy Coconut Jelly Squares
Oh, I can taste the tropics just on the horizon. In a week from today, I'll be enjoying the lush green forests and dramatic coasts of Kauai.
And hopefully, I'll be enjoying some coconut based deliciousness along the way! This recipe is made using agar agar, meaning it's suitable for vegetarians and vegans.
It also uses creamed coconut - which you should not confuse with coconut cream! Creamed coconut is the unsweetened, dried flesh of the coconut ground into a paste and then formed into solid blocks (coconut cream, on the other hand, is a liquid.) It adds an intense coconut flavour to dishes and means you don't have to use any coconut extract to amp up that delicious flavour.
Coconut Jelly Squares
Ingredients
1½ cups full fat coconut milk
3/4 cups water, divided
¼ cup creamed coconut (not to be confused with coconut cream)
3/4 cup sugar
4 heaping tsp agar agar powder
Directions
1. In a medium saucepan, whisk together coconut milk, ½ cup water, creamed coconut, sugar and heat until just simmering.
2. In a separate, small saucepan, bring remaining ¼ cup water to a boil. Sprinkle with agar agar powder and let boil for 3-4 minutes, until agar agar is dissolved. Pour mixture into coconut mixture, stir well to combine and simmer for 3-4 more minutes.
3. Rinse a 5"x9" loaf pan with water. Pour coconut mixture into loaf pan and refrigerate for at least 1 hour, or until set. Cut into 1" squares and serve with toasted coconut or your favourite tropical sorbet.
And hopefully, I'll be enjoying some coconut based deliciousness along the way! This recipe is made using agar agar, meaning it's suitable for vegetarians and vegans.
It also uses creamed coconut - which you should not confuse with coconut cream! Creamed coconut is the unsweetened, dried flesh of the coconut ground into a paste and then formed into solid blocks (coconut cream, on the other hand, is a liquid.) It adds an intense coconut flavour to dishes and means you don't have to use any coconut extract to amp up that delicious flavour.
Coconut Jelly Squares
Ingredients
1½ cups full fat coconut milk
3/4 cups water, divided
¼ cup creamed coconut (not to be confused with coconut cream)
3/4 cup sugar
4 heaping tsp agar agar powder
Directions
1. In a medium saucepan, whisk together coconut milk, ½ cup water, creamed coconut, sugar and heat until just simmering.
2. In a separate, small saucepan, bring remaining ¼ cup water to a boil. Sprinkle with agar agar powder and let boil for 3-4 minutes, until agar agar is dissolved. Pour mixture into coconut mixture, stir well to combine and simmer for 3-4 more minutes.
3. Rinse a 5"x9" loaf pan with water. Pour coconut mixture into loaf pan and refrigerate for at least 1 hour, or until set. Cut into 1" squares and serve with toasted coconut or your favourite tropical sorbet.
Main Ingredients:
agar agar,
coconut,
coconut milk,
dessert,
Hawaii,
jellies,
jelly,
vegan,
vegetarian
Tuesday, July 19, 2011
Sweet Cherry & Brown Sugar Panna Cotta
My desire for all things smooth and creamy is a reaction to the unbearable heat we're having right now. Today it feels like 42ºC with the humidex. And, while I'm enthuiastically looking forward to the heat and humidity of Hawaii, that's a far more gentle humidity than the smog filled reek of Toronto.
Thanks to Phil's heroic efforts last year to get us an air conditioner (He seriously got the last one available in the downtown core), our top floor apartment is relatively cool at 26º. And while this spells good news for our ability to sleep at night, it does mean that our electricity bill is skyrocketing as I write this.
So, as I turn up the thermostat on the a/c one more degree (how high can we go before it's no longer bearable in the bedroom?), I find myself craving the cool and the creamy.
This panna cotta is so smooth, you'll never believe there's no cream in it. Just look at those gorgeous white tops:
This is a very gently set panna cotta - and the cherry gelatin is very gently set.
Wobbly, I believe is the word to describe it.
You can, of course, attempt to unmold it from its glass or ramekin, but I quite like serving it as it is, inside a glass vessel. You're forced to dig down to the bottom for the cherry layer, and I'm a sucker for treasure hunting.
Sweet Cherry & Brown Sugar Panna Cotta
(inspired by this recipe from epicurious)
serves 4 as a small dessert or 2 very generously
Ingredients
for cherry layer
½ tsp gelatin
½ cup cherry juice
½ tbsp lemon juice
½ cup pitted, quartered sweet cherries
½ tbsp amaretto (optional)
for yogurt layer
1 tsp gelatin
½ cup 1-2% milk
¼ cup packed brown sugar
1 cup thickened yogurt (see step 1)
½ tsp vanilla
1/8 tsp salt
Directions
1. Place ¼ cup cherry juice in a small saucepan. Sprinkle with ½ tsp gelatin. Allow gelatin to soften for 5 minutes. Heat juice/gelatin mixture and stir, until gelatin is dissolved. Remove from heat and stir in remaining cherry layer ingredients. Divide mixture evenly between ramekins/glasses/whatever you're serving these in. Place in the freezer for 30 minutes to set up.
2. Clean small saucepan. There's no sense in getting another one dirty! Pour in ¼ cup milk and sprinkle with 1 tsp gelatin.Allow to sit for 5 minutes so gelatin can soften. Heat over medium heat, stirring gently, until gelatin is completely dissolved. Remove from heat and stir in remaining yogurt layer ingredients. Remove glasses from freezer. Gently pour some of the yogurt mixture over top of the cherry mixture. It's important to do this gently, as the cherries will not totally have set yet. Repeat with remaining glasses. Place in the fridge to set, at least 4 hours before serving.
And guess what, made with 4% yogurt, this recipe still clocks in at a lowly 220 calories per serving, based on 2 servings per recipe. That makes this beach goer very, very happy!
Thanks to Phil's heroic efforts last year to get us an air conditioner (He seriously got the last one available in the downtown core), our top floor apartment is relatively cool at 26º. And while this spells good news for our ability to sleep at night, it does mean that our electricity bill is skyrocketing as I write this.
So, as I turn up the thermostat on the a/c one more degree (how high can we go before it's no longer bearable in the bedroom?), I find myself craving the cool and the creamy.
This panna cotta is so smooth, you'll never believe there's no cream in it. Just look at those gorgeous white tops:
This is a very gently set panna cotta - and the cherry gelatin is very gently set.
Wobbly, I believe is the word to describe it.
You can, of course, attempt to unmold it from its glass or ramekin, but I quite like serving it as it is, inside a glass vessel. You're forced to dig down to the bottom for the cherry layer, and I'm a sucker for treasure hunting.
Sweet Cherry & Brown Sugar Panna Cotta
(inspired by this recipe from epicurious)
serves 4 as a small dessert or 2 very generously
Ingredients
for cherry layer
½ tsp gelatin
½ cup cherry juice
½ tbsp lemon juice
½ cup pitted, quartered sweet cherries
½ tbsp amaretto (optional)
for yogurt layer
1 tsp gelatin
½ cup 1-2% milk
¼ cup packed brown sugar
1 cup thickened yogurt (see step 1)
½ tsp vanilla
1/8 tsp salt
Directions
1. Place ¼ cup cherry juice in a small saucepan. Sprinkle with ½ tsp gelatin. Allow gelatin to soften for 5 minutes. Heat juice/gelatin mixture and stir, until gelatin is dissolved. Remove from heat and stir in remaining cherry layer ingredients. Divide mixture evenly between ramekins/glasses/whatever you're serving these in. Place in the freezer for 30 minutes to set up.
2. Clean small saucepan. There's no sense in getting another one dirty! Pour in ¼ cup milk and sprinkle with 1 tsp gelatin.Allow to sit for 5 minutes so gelatin can soften. Heat over medium heat, stirring gently, until gelatin is completely dissolved. Remove from heat and stir in remaining yogurt layer ingredients. Remove glasses from freezer. Gently pour some of the yogurt mixture over top of the cherry mixture. It's important to do this gently, as the cherries will not totally have set yet. Repeat with remaining glasses. Place in the fridge to set, at least 4 hours before serving.
And guess what, made with 4% yogurt, this recipe still clocks in at a lowly 220 calories per serving, based on 2 servings per recipe. That makes this beach goer very, very happy!
Main Ingredients:
brown sugar,
cherries,
chilled,
cool,
dessert,
panna cotta,
summer,
sweet cherry,
yogurt
Sunday, July 17, 2011
Dark Chocolate Parfaits with Mango & Passion Fruit
With our vacation to Kauai and Maui less than two weeks away, my husband and I have been talking nonstop about what we're going to do... and, in my case, where we're going to eat!
You've gotta have priorities.
I've already picked out Josselin's Tapas Bar as one of the places I'd like to hit up, along with Merriman's (the Maui one, I think) and the Haili'imale General Store (who catered our wedding). I'm determined to hit up as many of restaurants belonging to the twelve original pioneers of Hawaiian regional cuisine as possible. On previous trips, we've gone to Roy's and Alan Wong's (whose five course tasting menu left me breathless and incredibly stuffed - but how could I NOT finish the butter poached lobster?) and I've been blown away each time.
Can you tell I'm dreaming tropical right now? I'm also dreaming luxury, as we'll be spending some time at the Hyatt. And when I think luxury, I think chocolate.
But I'm prepping for a whole lot of time in my swim suit, so it can't be too luxurious.
Out goes the cream, in comes the yogurt!
For dinner on Saturday night, I pulled together some dark chocolate parfaits with mango and passion fruit. It took me very little hands on time - really, most of it was waiting for the yogurt to drain. You could use just about any fruit with this. Those raspberries that are in season right now would be killer! And if you're into white or milk chocolate, I say go ahead and switch it up!
Chocolate, Mango and Passion Fruit Parfaits
(serves 2)
Ingredients
1 cup 3-4% plain yogurt (don't use one that has all sorts of thickeners in it - go organic/natural - I use Saugeen)
2 tbsp milk
1½ oz good quality dark chocolate, chopped
1 mango, finely diced
2½ tsp passion fruit purée, divided (optional)
Directions
1. Line a fine mesh strainer with several layers (I used 3) of paper towel and pour yogurt on top. Set on top of a bowl and place in the fridge to drain for several hours, or until yogurt is the consistency of cream cheese. You can speed the process along by twisting the paper towel up to form a pouch and gently squeezing the excess liquid out. Discard liquid and place thickened yogurt into a bowl.
2. Place milk in a microwave safe container. Heat until hot. Add in chocolate and stir until melted. Set aside until cooled, then mix into yogurt. Add in 1½ tsp passion fruit purée. Set in fridge for at least 15 minutes, or up to 6 hours.
3. Toss mango with remaining passion fruit puree. In two glasses, layer mango with yogurt mixture. You should have enough for 2 layers of each.
You'll never notice the absence of whipping cream!
You've gotta have priorities.
I've already picked out Josselin's Tapas Bar as one of the places I'd like to hit up, along with Merriman's (the Maui one, I think) and the Haili'imale General Store (who catered our wedding). I'm determined to hit up as many of restaurants belonging to the twelve original pioneers of Hawaiian regional cuisine as possible. On previous trips, we've gone to Roy's and Alan Wong's (whose five course tasting menu left me breathless and incredibly stuffed - but how could I NOT finish the butter poached lobster?) and I've been blown away each time.
Can you tell I'm dreaming tropical right now? I'm also dreaming luxury, as we'll be spending some time at the Hyatt. And when I think luxury, I think chocolate.
But I'm prepping for a whole lot of time in my swim suit, so it can't be too luxurious.
Out goes the cream, in comes the yogurt!
For dinner on Saturday night, I pulled together some dark chocolate parfaits with mango and passion fruit. It took me very little hands on time - really, most of it was waiting for the yogurt to drain. You could use just about any fruit with this. Those raspberries that are in season right now would be killer! And if you're into white or milk chocolate, I say go ahead and switch it up!
Chocolate, Mango and Passion Fruit Parfaits
(serves 2)
Ingredients
1 cup 3-4% plain yogurt (don't use one that has all sorts of thickeners in it - go organic/natural - I use Saugeen)
2 tbsp milk
1½ oz good quality dark chocolate, chopped
1 mango, finely diced
2½ tsp passion fruit purée, divided (optional)
Directions
1. Line a fine mesh strainer with several layers (I used 3) of paper towel and pour yogurt on top. Set on top of a bowl and place in the fridge to drain for several hours, or until yogurt is the consistency of cream cheese. You can speed the process along by twisting the paper towel up to form a pouch and gently squeezing the excess liquid out. Discard liquid and place thickened yogurt into a bowl.
2. Place milk in a microwave safe container. Heat until hot. Add in chocolate and stir until melted. Set aside until cooled, then mix into yogurt. Add in 1½ tsp passion fruit purée. Set in fridge for at least 15 minutes, or up to 6 hours.
3. Toss mango with remaining passion fruit puree. In two glasses, layer mango with yogurt mixture. You should have enough for 2 layers of each.
You'll never notice the absence of whipping cream!
Main Ingredients:
5 ingredients,
chocolate,
dessert,
easy,
Hawaii,
mango,
parfait,
passion fruit,
tropical,
yogurt
Saturday, July 16, 2011
Vanilla Rice Pudding with Raspberry Coulis
My little brother went through a period where he was obsessed with rice pudding. There was constantly a container of Kozy Shack in the fridge.
And when I say container, I mean Costco sized vat.
Basically, the entire fridge consisted of Kozy Shack. The rest of us were forced to live off the land and forage for food. It was a hard existence, but we learned to fend for ourselves in the wilderness of Andrew Haydon Park.
Okay. That might be antotal slight exaggeration.
For the record, I think Kozy Shack is gross, but I do love a creamy, well made rice pudding, which this, another French Women Don't Get Fat inspired recipe is.
Use your best risotto rice for this, stir frequently and you'll get something amazing.
Vanilla Rice Pudding with Raspberry Coulis
(adapted from French Women Don't Get Fat)
serves 2
Ingredients
1½ cup raspberries, divided
1/3 cup granulated sugar, divided
1/3 cup short grain rice (2¼ oz)
2 cups 1% or 2% milk (don't use skim)
½ tsp vanilla extract
1 egg yolk
1 tbsp unsalted butter
Directions
1. In a bowl, toss together 1 cup raspberries with 1 tablespoon sugar. Set aside in the fridge to macerate.
2. Bring a medium pot of water to a boil. Add rice and cook for 2 minutes in boiling water. Drain and set aside.
3. Bring milk to a boil in a heavy saucepan. Stir in rice, remaining sugar and vanilla. Reduce heat and cook gently for 30 minutes, stirring frequently. Taste the rice to see if it's finished. If it is to your liking, remove pot from heat and stir in egg yolk. This will turn your pudding into a vanilla masterpiece. Add the butter and stir until melted. Set aside to cool.
4. Take berries out of the fridge and stir in a ½ tablespoon water. Toss, then press berries through a fine mesh sieve to create a coulis. You could replace the water with cassis for added oomph!
5. Layer coulis and rice pudding in clear glasses or serving dishes. Top with reserved berries.
And when I say container, I mean Costco sized vat.
Basically, the entire fridge consisted of Kozy Shack. The rest of us were forced to live off the land and forage for food. It was a hard existence, but we learned to fend for ourselves in the wilderness of Andrew Haydon Park.
Okay. That might be an
For the record, I think Kozy Shack is gross, but I do love a creamy, well made rice pudding, which this, another French Women Don't Get Fat inspired recipe is.
Use your best risotto rice for this, stir frequently and you'll get something amazing.
Vanilla Rice Pudding with Raspberry Coulis
(adapted from French Women Don't Get Fat)
serves 2
Ingredients
1½ cup raspberries, divided
1/3 cup granulated sugar, divided
1/3 cup short grain rice (2¼ oz)
2 cups 1% or 2% milk (don't use skim)
½ tsp vanilla extract
1 egg yolk
1 tbsp unsalted butter
Directions
1. In a bowl, toss together 1 cup raspberries with 1 tablespoon sugar. Set aside in the fridge to macerate.
2. Bring a medium pot of water to a boil. Add rice and cook for 2 minutes in boiling water. Drain and set aside.
3. Bring milk to a boil in a heavy saucepan. Stir in rice, remaining sugar and vanilla. Reduce heat and cook gently for 30 minutes, stirring frequently. Taste the rice to see if it's finished. If it is to your liking, remove pot from heat and stir in egg yolk. This will turn your pudding into a vanilla masterpiece. Add the butter and stir until melted. Set aside to cool.
4. Take berries out of the fridge and stir in a ½ tablespoon water. Toss, then press berries through a fine mesh sieve to create a coulis. You could replace the water with cassis for added oomph!
5. Layer coulis and rice pudding in clear glasses or serving dishes. Top with reserved berries.
Friday, July 01, 2011
Vanilla Honey & Yogurt Pound Cake
Is there anything more lovely than strawberries for Canada Day? The two were clearly, clearly meant for each other.
And the fact that they're local strawberries picked up at yesterday's farmer's market? Yes please! Better than this would be strawberries we'd picked ourselves at a local farm, but that's hard to come by in downtown Toronto.
Did you pick strawberries with your family when you were young? I remember it was always a highlight of early summer. We'd be freshly off school and my mum would take my brother and I to the fields. I can remember the intense heat of the sun and the squish of the occasional fallen berry beneath my sandals.
And the taste of a freshly picked strawberry eaten in the field? There is so better tasting strawberry.
I know my brother would agree. When he was little, he'd eat himself practically to sickness on the berries. Let's just say more seemed to make it into his mouth than into his basket.
Strawberry thievery. The most delicious of all illicit fruit theft.
Let's go back to the cake, which I posted a picture of, but haven't talked about at all. Tthis isn't a true pound cake - there's no pound of sugar/flour/butter going on. But, for lack of a better word, to describe it, I'm going to go with pound cake. You bake it in a loaf pan and it looks like a pound cake.
And, I'm just not one of those people who gets wrapped up in semantics.
Anyway, it's got a great crumb and a lovely, subtle vanilla and honey flavour. Perfect for showing off strawberries or whatever toppings you might have on hand.
Vanilla Honey & Yogurt Pound Cake
Ingredients
1½ cups all purpose flour
2 tsp baking powder
¼ tsp salt
1 cup whole milk yogurt
3 eggs
3/4 cup granulated sugar
4 tbsp wildflower honey, divided
1 tsp vanilla extract
1/3 cup canola oil (or any other neutral flavoured oil)
Directions
1. Preheat oven to 350º. Grease a 9"x5" loaf pan with cooking spray and set aside.
2. In a large bowl, sift together flour, baking powder and salt. Set aside.
3. In a separate bowl, whisk together yogurt, eggs, sugar, 3 tbsp honey, vanilla and oil. Once combined, pour into dry ingredients. Stir just until combined. Pour into prepared pan and bake in over for 45-50 minutes, or until a cake tester (I use a chopstick) comes out clean.
4. Drizzle remaining tablespoon of honey on the still warm cake. This will create a totally delicious crust.
Serve with fresh local strawberries!
EDIT: I take it back. Don't serve it with local strawberries. I mean, they're delicious, but even better? Uncanny Preserves's Cherries in Almond Syrup.
Holy sweet Jesus.
It's amazing.
It's a thing of beauty. Look at the way that syrup is soaking the cake. DROOOOOOOOOOOOOL.
No... uhm... I wasn't licking the syrup off my fingers. Nor did I stick them back in the jar.
Pshaw.
How dare you insinuate as much.
Okay. Maybe. Maybe it happened.
Anyway, hop on over to Uncanny and try to get yourself a jar of these bad boys. They're outstanding. PERFECT with the cake.
And the fact that they're local strawberries picked up at yesterday's farmer's market? Yes please! Better than this would be strawberries we'd picked ourselves at a local farm, but that's hard to come by in downtown Toronto.
Did you pick strawberries with your family when you were young? I remember it was always a highlight of early summer. We'd be freshly off school and my mum would take my brother and I to the fields. I can remember the intense heat of the sun and the squish of the occasional fallen berry beneath my sandals.
And the taste of a freshly picked strawberry eaten in the field? There is so better tasting strawberry.
I know my brother would agree. When he was little, he'd eat himself practically to sickness on the berries. Let's just say more seemed to make it into his mouth than into his basket.
Strawberry thievery. The most delicious of all illicit fruit theft.
Let's go back to the cake, which I posted a picture of, but haven't talked about at all. Tthis isn't a true pound cake - there's no pound of sugar/flour/butter going on. But, for lack of a better word, to describe it, I'm going to go with pound cake. You bake it in a loaf pan and it looks like a pound cake.
And, I'm just not one of those people who gets wrapped up in semantics.
Anyway, it's got a great crumb and a lovely, subtle vanilla and honey flavour. Perfect for showing off strawberries or whatever toppings you might have on hand.
Vanilla Honey & Yogurt Pound Cake
Ingredients
1½ cups all purpose flour
2 tsp baking powder
¼ tsp salt
1 cup whole milk yogurt
3 eggs
3/4 cup granulated sugar
4 tbsp wildflower honey, divided
1 tsp vanilla extract
1/3 cup canola oil (or any other neutral flavoured oil)
Directions
1. Preheat oven to 350º. Grease a 9"x5" loaf pan with cooking spray and set aside.
2. In a large bowl, sift together flour, baking powder and salt. Set aside.
3. In a separate bowl, whisk together yogurt, eggs, sugar, 3 tbsp honey, vanilla and oil. Once combined, pour into dry ingredients. Stir just until combined. Pour into prepared pan and bake in over for 45-50 minutes, or until a cake tester (I use a chopstick) comes out clean.
4. Drizzle remaining tablespoon of honey on the still warm cake. This will create a totally delicious crust.
Serve with fresh local strawberries!
EDIT: I take it back. Don't serve it with local strawberries. I mean, they're delicious, but even better? Uncanny Preserves's Cherries in Almond Syrup.
Holy sweet Jesus.
It's amazing.
It's a thing of beauty. Look at the way that syrup is soaking the cake. DROOOOOOOOOOOOOL.
No... uhm... I wasn't licking the syrup off my fingers. Nor did I stick them back in the jar.
Pshaw.
How dare you insinuate as much.
Okay. Maybe. Maybe it happened.
Anyway, hop on over to Uncanny and try to get yourself a jar of these bad boys. They're outstanding. PERFECT with the cake.
Monday, June 27, 2011
Finding Victory in Disaster
I'm beginning to think rhubarb hates me. Every single recipe I've tried with it this year has not turned out the way I'd anticipated.
First there was the rhubarb & custard ice cream which just tasted weird (I never did get around to fixing that recipe).
Then I had the rhubarb-strawberry mochi.
And today? Oh man. I learned a valuable lesson in baking: custard fillings do not belong in galette shapes.
Why? Because the egg custard will puff up, knocking down the sides of your beautiful pastry and run all over the baking sheets. And you'll end up with galettes that look like flat pancakes with the tiniest little bit of custard still stuck to them and rhubarb that hasn't broken down into anything.
Like this:
*Sob*
It's such an obvious mistake. I just want to hit my head on the wall for even thinking that I could pull this off. This was a recipe that clearly needed to be baked in a tart mold... the egg custard just expands so much!
When I pulled these out of the oven, I almost cried. Nothing. Just... nothing has been going right for me there lately! But, because I hate wasting things, I decided to finish baking them and to NOT toss them immediately into the garbage.
And, therein lies the victory. When I stood in the kitchen, surveying the results of the recipe, my husband and I decided to split a tart. As I bit into it, it felt as though a shining halo of light from God himself was glowing 'round the tart.
The pastry is the finest I have ever made. It was delicious - crisp and flaky. And the filling (that didn't leak onto the pan) was actually really, really good. My husband and I stared at each other for a moment.
"These," he pronounced slowly, making sure no crumb escaped him, "are really, really delicious."
So, there you have it. Perhaps I should call them Ugly Duckling Rhubarb Custard Tarts.
Now, I know that a good blogger wouldn't post a less than perfect picture, but I'm out of rhubarb and I'm not a believer in wasting food (and time) just so I can post a picture of tarts in the correct shape.
This attitude is precisely why I'll never be a professional chef. I'm okay with that.
So, if you try this, just make sure you use tart pans.
The pastry makes double what you need, so wrap up half the chilled dough and put it in the freezer for another day.
Rhubarb Custard Tarts
(adapted from the Harrow Fair Cookbook)
Makes 6 tarts
Ingredients
For Pastry
2¼ cups all purpose flour
1 tsp fine sea salt
1 cup chilled butter, cut into cubes
1 large egg
2 tsp white vinegar
ice cold water
For filling
½ cup granulated sugar
1½ tbsp all purpose flour
scant ¼ tsp freshly ground nutmeg
pinch sea salt
1 large egg, lightly beaten
1½ cups sliced rhubarb (½" pieces)
Directions
1. For pastry: Place flour and salt together in food processor. Add in butter and pulse just until crumbs are about the size of peas. Beat the egg and the vinegar together in a measuring up. Add enough of the ice water to equal ½ cup of liquid. Pour liquid over dough and pulse just until the dough comes together. Turn dough onto counter. Divide in half and place each on a sheet of plastic wrap. Shape into a flat disk and wrap up with plastic. Chill for at least an hour in the fridge before rolling out. (Place the other half of the dough in the freezer.)
2. Preheat the oven to 375º.
3. Combine together the sugar, flour, nutmeg and salt in a large mixing bowl. Add in the egg and mix well. Stir in the rhubarb and set aside.
4. Roll out the pastry to fit 6 fluted 3-4" tart moulds. Spoon filling on top of pastry.
5. Bake for 20 minutes. Reduce oven temperature to 325º and bake for an additional 30-40 minutes, or until custard is set and the crust is golden brown.
6. Remove from heat and let cool to room temperature.
Any leftover tarts should be kept in the refrigerator for up to 3 days.
First there was the rhubarb & custard ice cream which just tasted weird (I never did get around to fixing that recipe).
Then I had the rhubarb-strawberry mochi.
And today? Oh man. I learned a valuable lesson in baking: custard fillings do not belong in galette shapes.
Why? Because the egg custard will puff up, knocking down the sides of your beautiful pastry and run all over the baking sheets. And you'll end up with galettes that look like flat pancakes with the tiniest little bit of custard still stuck to them and rhubarb that hasn't broken down into anything.
Like this:
*Sob*
It's such an obvious mistake. I just want to hit my head on the wall for even thinking that I could pull this off. This was a recipe that clearly needed to be baked in a tart mold... the egg custard just expands so much!
When I pulled these out of the oven, I almost cried. Nothing. Just... nothing has been going right for me there lately! But, because I hate wasting things, I decided to finish baking them and to NOT toss them immediately into the garbage.
And, therein lies the victory. When I stood in the kitchen, surveying the results of the recipe, my husband and I decided to split a tart. As I bit into it, it felt as though a shining halo of light from God himself was glowing 'round the tart.
The pastry is the finest I have ever made. It was delicious - crisp and flaky. And the filling (that didn't leak onto the pan) was actually really, really good. My husband and I stared at each other for a moment.
"These," he pronounced slowly, making sure no crumb escaped him, "are really, really delicious."
So, there you have it. Perhaps I should call them Ugly Duckling Rhubarb Custard Tarts.
Now, I know that a good blogger wouldn't post a less than perfect picture, but I'm out of rhubarb and I'm not a believer in wasting food (and time) just so I can post a picture of tarts in the correct shape.
This attitude is precisely why I'll never be a professional chef. I'm okay with that.
So, if you try this, just make sure you use tart pans.
The pastry makes double what you need, so wrap up half the chilled dough and put it in the freezer for another day.
Rhubarb Custard Tarts
(adapted from the Harrow Fair Cookbook)
Makes 6 tarts
Ingredients
For Pastry
2¼ cups all purpose flour
1 tsp fine sea salt
1 cup chilled butter, cut into cubes
1 large egg
2 tsp white vinegar
ice cold water
For filling
½ cup granulated sugar
1½ tbsp all purpose flour
scant ¼ tsp freshly ground nutmeg
pinch sea salt
1 large egg, lightly beaten
1½ cups sliced rhubarb (½" pieces)
Directions
1. For pastry: Place flour and salt together in food processor. Add in butter and pulse just until crumbs are about the size of peas. Beat the egg and the vinegar together in a measuring up. Add enough of the ice water to equal ½ cup of liquid. Pour liquid over dough and pulse just until the dough comes together. Turn dough onto counter. Divide in half and place each on a sheet of plastic wrap. Shape into a flat disk and wrap up with plastic. Chill for at least an hour in the fridge before rolling out. (Place the other half of the dough in the freezer.)
2. Preheat the oven to 375º.
3. Combine together the sugar, flour, nutmeg and salt in a large mixing bowl. Add in the egg and mix well. Stir in the rhubarb and set aside.
4. Roll out the pastry to fit 6 fluted 3-4" tart moulds. Spoon filling on top of pastry.
5. Bake for 20 minutes. Reduce oven temperature to 325º and bake for an additional 30-40 minutes, or until custard is set and the crust is golden brown.
6. Remove from heat and let cool to room temperature.
Any leftover tarts should be kept in the refrigerator for up to 3 days.
Sunday, June 19, 2011
Coconut Cream Tart with Chocolate Macadamia Nut Crust
Oh my lord. When I was poking over Sweet and Crumbly earlier last week, we got to talking about restaurants on Kauai. Geni had just come back, and I'll be heading out in 5 weeks time.
She posted a picture of some seriously delicious looking Haupia Pie, and I got to wondering about doing some kind of riff off the chocolate-coconut-macadamia nut pie, except making it vegan.
It was a challenge I was SUPER excited about tackling.
I whipped up a simple coconut custard and poured it into a macadamia-coconut version of the hazelnut crust I did a few weeks ago. My intention was to make this a frozen tart, but after tt set up in the freezer for a couple of hours, the night was coming to an end. So, it was whipped out early and was quickly inhaled by three of us during the end of Bachelorette.
YUM.
Coconut Cream Tart with Chocolate Macadamia Nut Crust
Ingredients
for filling
1 cup almond or soy milk
1 cup coconut milk
½ cup granulated sugar
¼ cup cornstarch
½ tsp kosher salt
1 tsp vanilla extract
¼ tsp coconut extract
1 ripe banana
1 oz grated chocolate
¼ cup flaked coconut
for crust
½ cup macadamia nuts
¼ cup flaked unsweetened coconut
¼ cup oats
2 tbsp cocoa powder
1 tbsp coconut oil
2 tbsp maple syrup
1 tsp vanilla extract
Directions
1. For filling: In a measuring cup, whisk together almond and coconut milks. Set aside. In a saucepan set over medium heat, whisk together sugar, cornstarch and salt. Add in coconut milk mixture and cook, stirring constantly, until mixture coats the back of a spoon. Stir in vanilla and coconut extracts. Pour into a bowl and cover with plastic wrap. Press the plastic directly onto the custard, so it does not form a skin. Set in fridge to chill. Mixture will continue to thicken as it cools.
2. For crust: Heat oven to 350º. Spread macadamia nuts, coconut and oats on a baking sheet. Toast for 5 or so minutes, or until just beginning to colour. Place nuts, coconut and oats in a food processor and pulse 2-3 times, just to break up the mixture. Add in the remaining crust ingredients and pulse until mixture is crumbly. Pat into a greased, parchment lined 6" springform pan. Be sure to form a rim up the wall of the pan to keep the custard in. Set aside in freezer to chill for 30 minutes.
3. To assemble: Remove crust from freezer. Slice banana thinly and place directly on top of crust. Pour custard over bananas. Sprinkle with grated chocolate and flaked coconut. Place back in freezer for 1-2 hours, until just beginning to freeze. Serve with additional grated chocolate if desired.
She posted a picture of some seriously delicious looking Haupia Pie, and I got to wondering about doing some kind of riff off the chocolate-coconut-macadamia nut pie, except making it vegan.
It was a challenge I was SUPER excited about tackling.
I whipped up a simple coconut custard and poured it into a macadamia-coconut version of the hazelnut crust I did a few weeks ago. My intention was to make this a frozen tart, but after tt set up in the freezer for a couple of hours, the night was coming to an end. So, it was whipped out early and was quickly inhaled by three of us during the end of Bachelorette.
YUM.
Coconut Cream Tart with Chocolate Macadamia Nut Crust
Ingredients
for filling
1 cup almond or soy milk
1 cup coconut milk
½ cup granulated sugar
¼ cup cornstarch
½ tsp kosher salt
1 tsp vanilla extract
¼ tsp coconut extract
1 ripe banana
1 oz grated chocolate
¼ cup flaked coconut
for crust
½ cup macadamia nuts
¼ cup flaked unsweetened coconut
¼ cup oats
2 tbsp cocoa powder
1 tbsp coconut oil
2 tbsp maple syrup
1 tsp vanilla extract
Directions
1. For filling: In a measuring cup, whisk together almond and coconut milks. Set aside. In a saucepan set over medium heat, whisk together sugar, cornstarch and salt. Add in coconut milk mixture and cook, stirring constantly, until mixture coats the back of a spoon. Stir in vanilla and coconut extracts. Pour into a bowl and cover with plastic wrap. Press the plastic directly onto the custard, so it does not form a skin. Set in fridge to chill. Mixture will continue to thicken as it cools.
2. For crust: Heat oven to 350º. Spread macadamia nuts, coconut and oats on a baking sheet. Toast for 5 or so minutes, or until just beginning to colour. Place nuts, coconut and oats in a food processor and pulse 2-3 times, just to break up the mixture. Add in the remaining crust ingredients and pulse until mixture is crumbly. Pat into a greased, parchment lined 6" springform pan. Be sure to form a rim up the wall of the pan to keep the custard in. Set aside in freezer to chill for 30 minutes.
3. To assemble: Remove crust from freezer. Slice banana thinly and place directly on top of crust. Pour custard over bananas. Sprinkle with grated chocolate and flaked coconut. Place back in freezer for 1-2 hours, until just beginning to freeze. Serve with additional grated chocolate if desired.
Main Ingredients:
banana,
chocolate,
coconut,
coconut milk,
cream,
dessert,
macadamia nut,
tart,
vegan
Friday, June 10, 2011
Cooking with Leftover Ingredients
First off, let me say thank you to all who commented here, on my facebook account or on my message boards wishing me good luck with the interview. My name was put forward as the candidate they want, but we're still waiting on approval from the school board. So right now, we're in a holding pattern.
I can deal with a holding pattern for a little while.
A little while.
Now, this recipe relates to impatience.
You know those days when you buy an ingredient but the recipe only calls for some of it, so you end up with some left over that has to be used RIGHT NOW or else it'll go bad.
I had that experience earlier this week with half an avocado. I don't even remember what I used my first half for. But the second half? Oh, yum.
Now, I won't blame you if you run screaming in the other direction right now, but before you do, let me assure you that this is delicious dessert. It has four ounces of the finest dark chocolate, and crushed hazelnuts and hazelnut butter.
With me so far?
It also has... uhm... half an avocado.
What? You couldn't read that? That's okay, just drool over this picture and never you mind what it said.
Frosty, nutty, and deeply, deeply chocolatey. It's an all round winner.
And frankly, if the avocado (yes, avocado) weirds you out too much, replace it with two small bananas.
Dark Chocolate Hazelnut Torte
(inspired by Oh She Glows)
Ingredients
Crust
1 cup whole hazelnuts, toasted and skinned
2 tbsp cocoa powder
1 tbsp coconut oil
2 tbsp maple syrup
1 tsp vanilla extract
Mousse
½ large avocado, pitted and flesh scooped out or 2 small bananas, peeled
3 tbsp soy milk (or other non-dairy milk)
1/3 cup maple syrup
1 tbsp hazelnut butter
1 tbsp cornstarch
1/8 tsp kosher salt
1 tsp vanilla extract
3 tbsp cocoa powder
4 oz dark chocolate, chopped and melted
Directions
1. Line the base of a small 5-6" springform pan with parchment paper. In a food processor, pulse the hazelnuts together with cocoa powder, until crumbly. Add in oil, maple syrup and vanilla extract. Pour into springform pan and pat in place to create a crust.
2. To make mousse, add all ingredients except melted chocolate to a cleaned food processor bowl. Process until totally smooth and creamy. Add in melted chocolate and process again. Pour mousse onto crust, smoothing the top.
3. Freeze for at least 2 hours to set up. Allow to sit on the counter for 5 minutes before cutting and serving.
Makes 6 small but totally decadent pieces.
I can deal with a holding pattern for a little while.
A little while.
Now, this recipe relates to impatience.
You know those days when you buy an ingredient but the recipe only calls for some of it, so you end up with some left over that has to be used RIGHT NOW or else it'll go bad.
I had that experience earlier this week with half an avocado. I don't even remember what I used my first half for. But the second half? Oh, yum.
Now, I won't blame you if you run screaming in the other direction right now, but before you do, let me assure you that this is delicious dessert. It has four ounces of the finest dark chocolate, and crushed hazelnuts and hazelnut butter.
With me so far?
It also has... uhm... half an avocado.
What? You couldn't read that? That's okay, just drool over this picture and never you mind what it said.
Frosty, nutty, and deeply, deeply chocolatey. It's an all round winner.
And frankly, if the avocado (yes, avocado) weirds you out too much, replace it with two small bananas.
Dark Chocolate Hazelnut Torte
(inspired by Oh She Glows)
Ingredients
Crust
1 cup whole hazelnuts, toasted and skinned
2 tbsp cocoa powder
1 tbsp coconut oil
2 tbsp maple syrup
1 tsp vanilla extract
Mousse
½ large avocado, pitted and flesh scooped out or 2 small bananas, peeled
3 tbsp soy milk (or other non-dairy milk)
1/3 cup maple syrup
1 tbsp hazelnut butter
1 tbsp cornstarch
1/8 tsp kosher salt
1 tsp vanilla extract
3 tbsp cocoa powder
4 oz dark chocolate, chopped and melted
Directions
1. Line the base of a small 5-6" springform pan with parchment paper. In a food processor, pulse the hazelnuts together with cocoa powder, until crumbly. Add in oil, maple syrup and vanilla extract. Pour into springform pan and pat in place to create a crust.
2. To make mousse, add all ingredients except melted chocolate to a cleaned food processor bowl. Process until totally smooth and creamy. Add in melted chocolate and process again. Pour mousse onto crust, smoothing the top.
3. Freeze for at least 2 hours to set up. Allow to sit on the counter for 5 minutes before cutting and serving.
Makes 6 small but totally decadent pieces.
Monday, May 16, 2011
Cherry Coca-Cola Cupcakes
Last time I made cupcakes for our school's bake sale for Free the Children, I made Oreo cupcakes, and they were awesome.
This time, I decided to make Cherry Coca Cola Cupcakes. They feel totally retro - like something you might eat if you lived in Pleasantville. Can't you just see the cupcake all in black and white, except with the bright red cherry?
I won't lie to you guys, they're pretty tasty. And I'm a dedicated Coca-Cola hater... so you know they've got to be good.
Just like the last batch of cupcakes, these ones came courtesy of Annie's Eats. I made two batches and a few adjustments to the original recipe - mostly adjusting amount of cherries and the glaze proportions(Yes, there's a glaze under that pillow of whipped cream) and the method.
I think it would be fun to try a batch with Coke and a batch with Pepsi and see if there's a difference.
Cherry Coca-Cola Cupcakes
(from Annie's Eats)
Ingredients
1½ cups all purpose flour
3 tbsp cocoa powder, sifted
½ tsp baking soda
¼ tsp salt
3/4 cup Coca-Cola
½ cup buttermilk
¼ tsp maraschino cherry juice
2 tsp vanilla
3/4 cup granulated sugar
½ cup unsalted butter
1 large egg
16 maraschino cherries (in juice/syrup, not candied), halved
Glaze
1 cup icing sugar
¼ cup Coca Cola
To serve: whipped cream & maraschino cherry halves.
Directions
1. Preheat oven to 375º. Line a 12 cup muffin pan with liners.
2. In a medium bowl, mix together flour through salt. Set aside. In a large measuring cup, mix together buttermilk, Coca-Cola, cherry juice and vanilla.
3. Cream together butter and sugar (either using your stand mixer or in a large bowl using a hand held mixer) until light and fluffy. Add in dry and wet ingredients, alternating between the two, beginning and ending with the dry (so, add ¼ of the dry ingredients followed by 1/3 of the wet).
4. Fill each muffin cup about ½ full. You will have batter left in the bowl. Place three maraschino cherry halves in the batter each muffin cup, pushing down slightly. Top with additional batter, until it reaches the 2/3 - 3/4 mark.
5. Bake in oven for 22 minutes. Cupcakes are done when tops spring back when touched lightly. Let cool in pan for 5 minutes before transferring to rack to finish cooling.
6. While cupcakes are cooling, mix together the glaze ingredients. Pour 1 tbsp over each muffin, spreading to coat with the back of a spoon.
7. Just before serving, top with whipped cream and a cherry half.
This time, I decided to make Cherry Coca Cola Cupcakes. They feel totally retro - like something you might eat if you lived in Pleasantville. Can't you just see the cupcake all in black and white, except with the bright red cherry?
I won't lie to you guys, they're pretty tasty. And I'm a dedicated Coca-Cola hater... so you know they've got to be good.
Just like the last batch of cupcakes, these ones came courtesy of Annie's Eats. I made two batches and a few adjustments to the original recipe - mostly adjusting amount of cherries and the glaze proportions(Yes, there's a glaze under that pillow of whipped cream) and the method.
I think it would be fun to try a batch with Coke and a batch with Pepsi and see if there's a difference.
Cherry Coca-Cola Cupcakes
(from Annie's Eats)
Ingredients
1½ cups all purpose flour
3 tbsp cocoa powder, sifted
½ tsp baking soda
¼ tsp salt
3/4 cup Coca-Cola
½ cup buttermilk
¼ tsp maraschino cherry juice
2 tsp vanilla
3/4 cup granulated sugar
½ cup unsalted butter
1 large egg
16 maraschino cherries (in juice/syrup, not candied), halved
Glaze
1 cup icing sugar
¼ cup Coca Cola
To serve: whipped cream & maraschino cherry halves.
Directions
1. Preheat oven to 375º. Line a 12 cup muffin pan with liners.
2. In a medium bowl, mix together flour through salt. Set aside. In a large measuring cup, mix together buttermilk, Coca-Cola, cherry juice and vanilla.
3. Cream together butter and sugar (either using your stand mixer or in a large bowl using a hand held mixer) until light and fluffy. Add in dry and wet ingredients, alternating between the two, beginning and ending with the dry (so, add ¼ of the dry ingredients followed by 1/3 of the wet).
4. Fill each muffin cup about ½ full. You will have batter left in the bowl. Place three maraschino cherry halves in the batter each muffin cup, pushing down slightly. Top with additional batter, until it reaches the 2/3 - 3/4 mark.
5. Bake in oven for 22 minutes. Cupcakes are done when tops spring back when touched lightly. Let cool in pan for 5 minutes before transferring to rack to finish cooling.
6. While cupcakes are cooling, mix together the glaze ingredients. Pour 1 tbsp over each muffin, spreading to coat with the back of a spoon.
7. Just before serving, top with whipped cream and a cherry half.
Main Ingredients:
annie's eats,
cherries,
chocolate,
Coca-Cola,
cupcakes,
dessert,
retro,
whipped cream
Subscribe to:
Posts (Atom)