This recipe was inspired by a Cooking Light recipe that called for farro, watermelon and peas. I was intrigued by the combination, but wanted to make the salad a more substantial meal and balance it out with more salty and tangy flavours.
Quinoa and Cannellini Bean Salad with Watermelon, Peas & Feta
(inspired by Cooking Light)
serves 6
Ingredients
1 cup quinoa
1½ cups water
1 cup freshly shelled peas
1½ cups diced seedless watermelon
1 can cannellini beans, drained and rinsed
½ cup minced parsley
¼ cup shredded mint
1/3 cup crumbled feta
2 tbsp lemon juice
1 tbsp olive oil
½ tsp kosher salt
¼ tsp freshly ground black pepper
Directions
1. Rinse quinoa in a fine mesh strainer, rubbing grains between fingers to remove any residue. Place in a large pot with the water, bring to a boil, then reduce heat, cover and simmer for 15 minutes. Stir in the peas in the last two minutes of cooking time, and replace lid. If peas are not bright green and tender after two minutes, let cook for a minute longer. Remove from heat, drain any excess water off and rinse under cold water.
2. Place quinoa mixture in a large bowl. Toss with watermelon, cannellini beans, parsley, mint and feta.
3. Whisk together dressing ingredients (lemon juice through pepper) in a separate bowl. Pour over quinoa, toss again and serve.
Showing posts with label beans. Show all posts
Friday, July 22, 2011
Monday, July 11, 2011
Three Bean Salad with Corn and Red Peppers
Sometimes I think my mother and I are the only people on the planet who love bean salads. There's something so delightfully passé about them. I always associate them with the '80s... Does anyone else?
When I was in elementary school, we had several Canadian Living seasonal cooking magazines, and inevitably the summer ones had bean salads in them. Whenever the teachers had lunch & learn sessions at school, the library would be set up with tons of food with a mandatory gigantic bowl of bean salad. As a kid, I just assumed that they were making bean salads out of the Canadian Living magazines, because that was the logical assumption to make.
I'm all about the logic.
I'd lobby to bring back the bean salad into vogue. It's healthy, filling, fibre rich, and, when done right, colourful. Plus, it makes a quick and easy lunch to bring.
So, now, my go to bean salad recipe is based off a Canadian Living recipe: Red Barn Bean and Corn Salad. It serves 12 and keeps a decent amount of time in the fridge which especially important if you're, like me, not serving 12 people at once.
If you're alone in liking bean salads in your house, be prepared to be eating this for the better part of a week. It makes about 9 cups worth!
But, it's way better than those drenched salads from the supermarket, and you know you love it. So go ahead, grab a gigantic spoon and dig in.
Three Bean Salad with Corn and Red Peppers
(adapted from Canadian Living)
Ingredients
1 14oz can chickpeas, drained and rinsed
1 14oz can black beans, drained and rinsed
1 14oz can red kidney beans, drained and rinsed
½ cup finely chopped sweet onion
1 cup frozen corn, thawed
½ cup celery, chopped
1 red pepper, chopped
1 tbsp dried basil (you can use ¼ cup fresh, if you anticipate no leftovers)
¼ cup chopped fresh parsley
½ cup apple cider vinegar
3 tbsp olive oil
1 clove garlic, minced
1 tbsp Dijon mustard
1 tsp kosher salt
½ tsp freshly ground black pepper
Directions
1. Mix together first 9 ingredients, chickpeas through parsley in a large bowl. Toss well. In a measuring up, whisk together remaining ingredients. Pour over bean mixture, toss well and refrigerate for at least 1 hour to let flavours meld together.
How easy was that?
When I was in elementary school, we had several Canadian Living seasonal cooking magazines, and inevitably the summer ones had bean salads in them. Whenever the teachers had lunch & learn sessions at school, the library would be set up with tons of food with a mandatory gigantic bowl of bean salad. As a kid, I just assumed that they were making bean salads out of the Canadian Living magazines, because that was the logical assumption to make.
I'm all about the logic.
I'd lobby to bring back the bean salad into vogue. It's healthy, filling, fibre rich, and, when done right, colourful. Plus, it makes a quick and easy lunch to bring.
So, now, my go to bean salad recipe is based off a Canadian Living recipe: Red Barn Bean and Corn Salad. It serves 12 and keeps a decent amount of time in the fridge which especially important if you're, like me, not serving 12 people at once.
If you're alone in liking bean salads in your house, be prepared to be eating this for the better part of a week. It makes about 9 cups worth!
But, it's way better than those drenched salads from the supermarket, and you know you love it. So go ahead, grab a gigantic spoon and dig in.
Three Bean Salad with Corn and Red Peppers
(adapted from Canadian Living)
Ingredients
1 14oz can chickpeas, drained and rinsed
1 14oz can black beans, drained and rinsed
1 14oz can red kidney beans, drained and rinsed
½ cup finely chopped sweet onion
1 cup frozen corn, thawed
½ cup celery, chopped
1 red pepper, chopped
1 tbsp dried basil (you can use ¼ cup fresh, if you anticipate no leftovers)
¼ cup chopped fresh parsley
½ cup apple cider vinegar
3 tbsp olive oil
1 clove garlic, minced
1 tbsp Dijon mustard
1 tsp kosher salt
½ tsp freshly ground black pepper
Directions
1. Mix together first 9 ingredients, chickpeas through parsley in a large bowl. Toss well. In a measuring up, whisk together remaining ingredients. Pour over bean mixture, toss well and refrigerate for at least 1 hour to let flavours meld together.
How easy was that?
Tuesday, March 15, 2011
A Bright and Springy Flageolet Salad
I have no idea what the weather has been like near you lately, but for us here in Toronto, it's felt like winter is just dragging its feet on the way out the door. Last weekend, the rain put me into a continuous funk that I didn't get out of until I was met by the sunshine today.
It probably helped that I got to get up at 9:30 as well. Usually I'm up 3 hours earlier.
I had great dinner plans with a friend for tonight that totally fell through in the wake of her work deadlines, so I found myself scrambling for something to make for dinner. I'd gone grocery shopping earlier in the day, but most of my meals had been bought with dark and dreary weather in mind, not the lemon sunshine and azure skies kind of day like we had.
Over the winter months, my cooking incorporates a lot of legumes. I love how hearty and stick-to-your-ribedness they are. I also love how much using them reduces our meat consumption and (by extension) our grocery bill. But, legumes aren't just for those pork rich casseroles, they also make great foils for bright flavours like lemon, capers and parsley.
300 grams (about 2/3 of a pound) dried flageolet beans,
broken ones picked over and discarded
1 lemon, scrubbed and cut in half
1 whole head of garlic, cut in half horizontally
1 stalk celery, cut into 4 inch hunks
3 bay leaves
kosher salt
4 tbsp capers, rinsed
2 cloves garlic, minced
2 tbsp olive oil
3 tbsp canola oil
1 tbsp fresh lemon juice
a palmful of parsley leaves (20-30), coarsely chopped
4-5 mint leaves, coarsely chopped
salt and pepper to taste
Directions
1. Place dried beans in a non-reactive container. Cover with cold water and let sit overnight. Beans will swell in size.
2. Drain beans from their soaking liquid and place in a large non reactive pot with lemon halves, garlic halves, bay leaves and celery.
DO NOT add salt at this point. Doing so will toughen the skins of the beans. Cover with plenty of water and bring to a boil over high heat. Once boiling, reduce heat and cook, continuing to boil gently for 35-60 minutes (cooking time will depend on the freshness of your beans). Once beans are almost tender (45 minutes for me), add salt to cooking liquid. Continue to cook until completely tender.
3. In a food processor, pulse too mix together capers and garlic. Slowly add in oil, pouring through tube. Continue pulsing to add in lemon juice, parsley and mint. The mixture will resemble sludge, but you're actually aiming for that!
4. Remove celery, whole garlic, lemon halves and bay leaves from beans. You may also need to fish out some garlic skins. Drain beans and place in a large, non reactive bowl. Pour dressing mixture and toss gently to combine.
This salad needs a least a half hour to let the flavours combine and take the edge off the dried garlic. Feel free to let it mellow overnight. Be sure to leave it on the counter for at least a ½ hour before eating so the olive oil is in its liquid state.
It probably helped that I got to get up at 9:30 as well. Usually I'm up 3 hours earlier.
I had great dinner plans with a friend for tonight that totally fell through in the wake of her work deadlines, so I found myself scrambling for something to make for dinner. I'd gone grocery shopping earlier in the day, but most of my meals had been bought with dark and dreary weather in mind, not the lemon sunshine and azure skies kind of day like we had.
Over the winter months, my cooking incorporates a lot of legumes. I love how hearty and stick-to-your-ribedness they are. I also love how much using them reduces our meat consumption and (by extension) our grocery bill. But, legumes aren't just for those pork rich casseroles, they also make great foils for bright flavours like lemon, capers and parsley.
Flageolet Salad with Lemons and Capers
(adapted from Nigel Slater's Real Food)
Ingredients
300 grams (about 2/3 of a pound) dried flageolet beans,
broken ones picked over and discarded
1 lemon, scrubbed and cut in half
1 whole head of garlic, cut in half horizontally
1 stalk celery, cut into 4 inch hunks
3 bay leaves
kosher salt
4 tbsp capers, rinsed
2 cloves garlic, minced
2 tbsp olive oil
3 tbsp canola oil
1 tbsp fresh lemon juice
a palmful of parsley leaves (20-30), coarsely chopped
4-5 mint leaves, coarsely chopped
salt and pepper to taste
Directions
1. Place dried beans in a non-reactive container. Cover with cold water and let sit overnight. Beans will swell in size.
2. Drain beans from their soaking liquid and place in a large non reactive pot with lemon halves, garlic halves, bay leaves and celery.
DO NOT add salt at this point. Doing so will toughen the skins of the beans. Cover with plenty of water and bring to a boil over high heat. Once boiling, reduce heat and cook, continuing to boil gently for 35-60 minutes (cooking time will depend on the freshness of your beans). Once beans are almost tender (45 minutes for me), add salt to cooking liquid. Continue to cook until completely tender.
3. In a food processor, pulse too mix together capers and garlic. Slowly add in oil, pouring through tube. Continue pulsing to add in lemon juice, parsley and mint. The mixture will resemble sludge, but you're actually aiming for that!
4. Remove celery, whole garlic, lemon halves and bay leaves from beans. You may also need to fish out some garlic skins. Drain beans and place in a large, non reactive bowl. Pour dressing mixture and toss gently to combine.
This salad needs a least a half hour to let the flavours combine and take the edge off the dried garlic. Feel free to let it mellow overnight. Be sure to leave it on the counter for at least a ½ hour before eating so the olive oil is in its liquid state.
Wednesday, March 09, 2011
When your cooking doesn't look as pretty as the picture...
Sometimes, I wish I was one of those bloggers who had the ability (and the equipment) to take amazing food photographs.
Heck, I'd settle for decent ones.
But, as I do most of my cooking in the evening (and, I'm not about to stop that any time soon), I work under artificial light. And artificial light is not photograph friendly.
And no, I'm not about to build a light box any time soon. That kind of nonsense would just take up too much room in our apartment, but I'll confess to a twinge of jealousy for those people who do have the room and inclination to undertake a blogging project like that.
So, I'm always in awe of what other bloggers can do. So many have the art of food styling down... and, as we all know, we eat with our eyes first.
Most of the time, I tell myself that the photos don't matter, that the food tastes great and that's the most important thing. But, every once and a while, I'll cook something that looks so far removed from its original source that I'm embarrassed to share it.
First off, go check out the lovely blog Indian Simmer here and here.
Don't worry, I'll still be here when you come back.
You done? See how she makes very simple, homey things look amazing?
Alright, here's how those two recipes turned out for me.
Mmm. Brown sludge with a side of mustardy-brown... erm... bits. Nowhere nearly as attractive.
And that's where I get really frustrated, because all three recipes found on this plate were delicious, in spite of the picture. Today, I'm going to share one of the three recipes with you. Stay tuned tomorrow for one other recipe, and please trust me when I ask you to try this out.
Indian Lentil and Bean Simmer
(heavily adapted from Indian Simmer)
Ingredients
3/4 cup dried cranberry beans
2 cups red lentils
2-3 tbsp French lentils (they don't fall apart)
1 tsp tumeric
10 peppercorns
4 whole cloves
½ tsp salt
2 tbsp vegetable oil
2 bay leaves
1 onion, chopped
4 cloves of garlic, crushed and minced
1 inch ginger, grated or finely chopped
1 tbsp tomato paste
2 tsp hot curry powder (more if you like it spicy)
1 tbsp coriander powder
2/3 cup whole fat coconut milk
salt to taste
palmful of cilantro leaves, chopped (optional)
Directions
1. Soak the cranberry beans over night. You'll watch them grow (like magic!) over that time frame. See?
2. Place beans in a pot of cold water. Bring to boil over high heat, reduce and simmer for about 45 minutes, or until beans are just tender. They don't need to be completely cooked, as you'll be adding them to the lentils in the next step. Drain and set aside. You'll notice that the beans have changed once again! The colour changes drastically.
3. Rinse lentils and add to a large pot (and I do mean large), add in beans. Cover mixture with water (water level should be about an inch above lentil/bean mixture) - this is between 6-8 cups. Add the tumeric, salt, peppercorns and cloves. Heat over high until boiling, then reduce heat and simmer until tender, thick and lentils have fallen apart. This will take about an hour, and you want to make sure the consistency isn't watery!
4. In a frying pan, heat oil over medium-low heat. Add bay leaves and onions to oil and sauté until onion is translucent. Stir in garlic and ginger and continue sautéing until everything is golden. Add tomato paste, curry powder and coriander. Stir in coconut milk.
5. Pour onion mixture into lentil mixture, add additional salt to taste. I added close to another teaspoon. Garnish with chopped cilantro leaves.
Heck, I'd settle for decent ones.
But, as I do most of my cooking in the evening (and, I'm not about to stop that any time soon), I work under artificial light. And artificial light is not photograph friendly.
And no, I'm not about to build a light box any time soon. That kind of nonsense would just take up too much room in our apartment, but I'll confess to a twinge of jealousy for those people who do have the room and inclination to undertake a blogging project like that.
So, I'm always in awe of what other bloggers can do. So many have the art of food styling down... and, as we all know, we eat with our eyes first.
Most of the time, I tell myself that the photos don't matter, that the food tastes great and that's the most important thing. But, every once and a while, I'll cook something that looks so far removed from its original source that I'm embarrassed to share it.
First off, go check out the lovely blog Indian Simmer here and here.
Don't worry, I'll still be here when you come back.
You done? See how she makes very simple, homey things look amazing?
Alright, here's how those two recipes turned out for me.
Mmm. Brown sludge with a side of mustardy-brown... erm... bits. Nowhere nearly as attractive.
And that's where I get really frustrated, because all three recipes found on this plate were delicious, in spite of the picture. Today, I'm going to share one of the three recipes with you. Stay tuned tomorrow for one other recipe, and please trust me when I ask you to try this out.
Indian Lentil and Bean Simmer
(heavily adapted from Indian Simmer)
Ingredients
3/4 cup dried cranberry beans
2 cups red lentils
2-3 tbsp French lentils (they don't fall apart)
1 tsp tumeric
10 peppercorns
4 whole cloves
½ tsp salt
2 tbsp vegetable oil
2 bay leaves
1 onion, chopped
4 cloves of garlic, crushed and minced
1 inch ginger, grated or finely chopped
1 tbsp tomato paste
2 tsp hot curry powder (more if you like it spicy)
1 tbsp coriander powder
2/3 cup whole fat coconut milk
salt to taste
palmful of cilantro leaves, chopped (optional)
Directions
1. Soak the cranberry beans over night. You'll watch them grow (like magic!) over that time frame. See?
2. Place beans in a pot of cold water. Bring to boil over high heat, reduce and simmer for about 45 minutes, or until beans are just tender. They don't need to be completely cooked, as you'll be adding them to the lentils in the next step. Drain and set aside. You'll notice that the beans have changed once again! The colour changes drastically.
![]() |
| It's disappointing to lose that pretty colour, isn't it? |
4. In a frying pan, heat oil over medium-low heat. Add bay leaves and onions to oil and sauté until onion is translucent. Stir in garlic and ginger and continue sautéing until everything is golden. Add tomato paste, curry powder and coriander. Stir in coconut milk.
5. Pour onion mixture into lentil mixture, add additional salt to taste. I added close to another teaspoon. Garnish with chopped cilantro leaves.
Wednesday, February 23, 2011
Slow Cooked Baked Beans
If you happen to have a few hours on your hands to let the oven work it's magic, and you're in the clutches of a winter storm, I have just the antidote: baked beans.
Now, to be clear, these aren't your canned Heinz variety. And, while I'm sure they'd be very good on toast, they're even better paired with a spicy sausage, cornbread and some coleslaw. Yes, the flavour profile is the same (molasses, tomato, bacon) as those canned, but these taste infinite better and the consistency of the bean is toothsome and not mushy at all, because you'll be using dried beans.
Wait a minute, I can practically hear you saying through my computer screen, did you say dried beans? Don't beans require soaking time?
Good news, my friends, use a small bean (I used navy beans) and you can just dump them in to the pot. The great advantage to this is they cook in the flavoured liquid, which means they're infused inside and out with sweet, smoky goodness.
I adapted this recipe from a vegetarian version by Mark Bittman. He uses konbu (seaweed) to tenderize the beans and add some of that earthy flavour that the traditional version gets from bacon.
Since I had the bacon (and since it was the good stuff), I decided to use it. I mean, I have the konbu too... but in a competition of bacon vs seaweed, I'm going to declare bacon the winner.
You know what the best part of this is? It's just so darned simple. There are very, very few ingredients.
Few ingredients = easy prep. And we all love easy prep, don't we? Once this is in the oven, there's very little left for you to do other than to stir it and check on the water levels.
Baked Beans
(adapted from Mark Bittman's How to Cook Everything Vegetarian)
Ingredients
½ lb slab bacon, chopped
½ -1 tbsp canola oil
2 medium onions, chopped
¼ cup tomato paste
6 cups water
¼ cup molasses
2 tsp mustard powder
1 lb small dried beans (like navy)
2 tsp salt
pepper to taste
(optional: a minced chipotle in adobo sauce, or replace with molasses with maple syrup and throw a chopped apple in)
Directions
1. Preheat oven to 300º.
2.. In a dutch oven placed over medium heat, cook bacon until fat is rendered, about 7 minutes. Remove bacon with a slotted spoon and set aside. Add enough canola oil to the fat in the pan to make 3 tbsp oil total. It's possible you won't need to add any extra at all or may have to remove some fat.
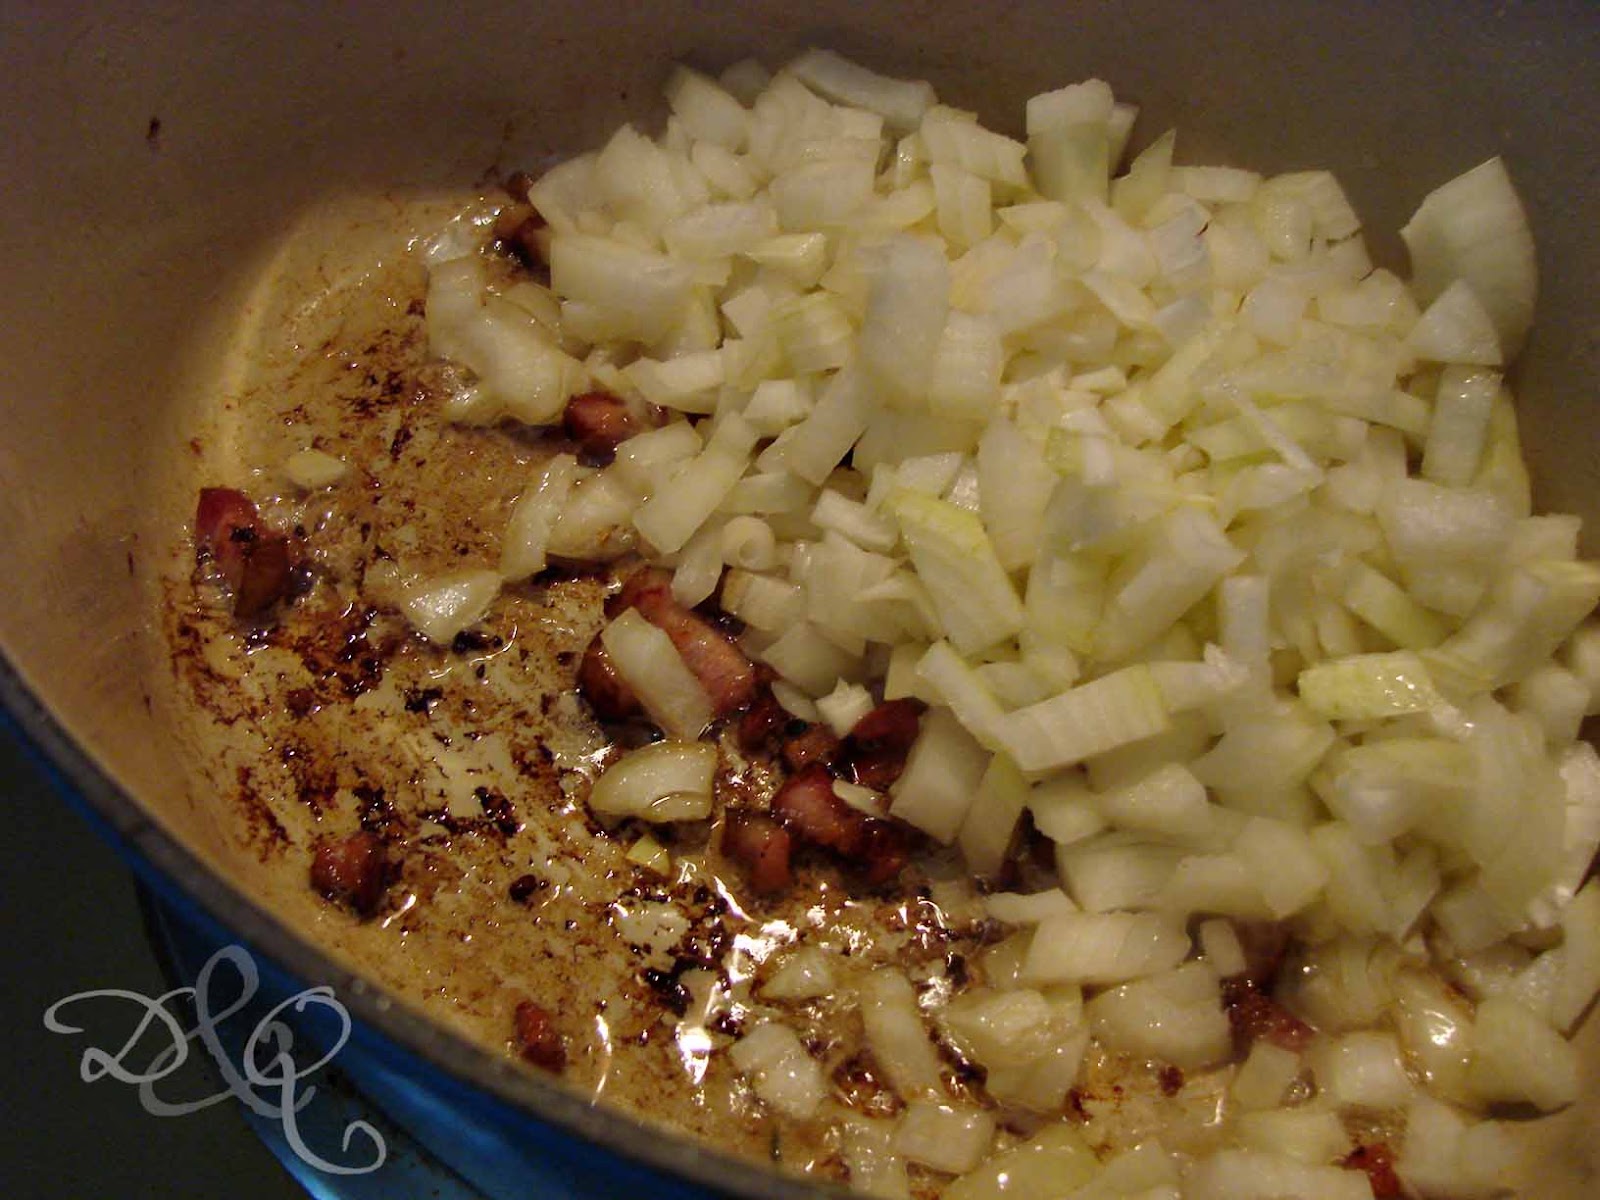
Bacon fat. It's flavour country.
3. Add onions to the fat and sauté until softened and just beginning to turn brown, about 5 minutes more.
Stir in tomato paste, and cook for about 1 minute, stirring to pick up all the brown goodness at the bottom of the pan.
Stir in water, molasses, mustard powder and beans (do not add the salt yet, this will result in a tough bean).
Cover dutch oven with lid and place in the oven for 1 hour.
4. Check on beans after the first hour in the oven. Stir and check on water level. They should still be covered by an inch or so of liquid. If they aren't, add some more water. Return to oven for another hour.
5. After they've spent two hours in the oven, stir the beans again and check on the liquid level. Cover and bake for an additional hour, stirring and checking the liquid level every 30 minutes or so. The beans should become tender between hours 2 and 3 in the oven. It took mine closer to the 3 hour mark.
6. Once the beans are tender, remove the lid from the dutch oven and crank the heat up to 400º. Stir in salt and pepper. If you want to add more mustard or molasses, feel free to do that here too. You want to reduce all that liquid now, so return the pot to the oven and let cook for about 30 minutes more, or until the sauce is thick.
Like just about all things that are slow cooked, these are much better the following day. If you want to be really authentic about the whole deal, make some steamed brown bread.
Now, to be clear, these aren't your canned Heinz variety. And, while I'm sure they'd be very good on toast, they're even better paired with a spicy sausage, cornbread and some coleslaw. Yes, the flavour profile is the same (molasses, tomato, bacon) as those canned, but these taste infinite better and the consistency of the bean is toothsome and not mushy at all, because you'll be using dried beans.
Wait a minute, I can practically hear you saying through my computer screen, did you say dried beans? Don't beans require soaking time?
Good news, my friends, use a small bean (I used navy beans) and you can just dump them in to the pot. The great advantage to this is they cook in the flavoured liquid, which means they're infused inside and out with sweet, smoky goodness.
I adapted this recipe from a vegetarian version by Mark Bittman. He uses konbu (seaweed) to tenderize the beans and add some of that earthy flavour that the traditional version gets from bacon.
Since I had the bacon (and since it was the good stuff), I decided to use it. I mean, I have the konbu too... but in a competition of bacon vs seaweed, I'm going to declare bacon the winner.
You know what the best part of this is? It's just so darned simple. There are very, very few ingredients.
![]() |
| missing: molasses, salt and pepper |
Baked Beans
(adapted from Mark Bittman's How to Cook Everything Vegetarian)
Ingredients
½ lb slab bacon, chopped
½ -1 tbsp canola oil
2 medium onions, chopped
¼ cup tomato paste
6 cups water
¼ cup molasses
2 tsp mustard powder
1 lb small dried beans (like navy)
2 tsp salt
pepper to taste
(optional: a minced chipotle in adobo sauce, or replace with molasses with maple syrup and throw a chopped apple in)
Directions
1. Preheat oven to 300º.
2.. In a dutch oven placed over medium heat, cook bacon until fat is rendered, about 7 minutes. Remove bacon with a slotted spoon and set aside. Add enough canola oil to the fat in the pan to make 3 tbsp oil total. It's possible you won't need to add any extra at all or may have to remove some fat.
Bacon fat. It's flavour country.
3. Add onions to the fat and sauté until softened and just beginning to turn brown, about 5 minutes more.
Stir in tomato paste, and cook for about 1 minute, stirring to pick up all the brown goodness at the bottom of the pan.
![]() |
| tomato paste in a tube, where have you been all my life? |
Stir in water, molasses, mustard powder and beans (do not add the salt yet, this will result in a tough bean).
Cover dutch oven with lid and place in the oven for 1 hour.
4. Check on beans after the first hour in the oven. Stir and check on water level. They should still be covered by an inch or so of liquid. If they aren't, add some more water. Return to oven for another hour.
![]() |
| not cooked yet! |
![]() |
| Beans are plumping up nicely. |
![]() |
| Perfectly thick sauce and tender beans |
Tuesday, December 21, 2010
A casserole for a party
So, remember that whole legumes + pork kick I'm on?
Yeah, that hasn't stopped yet. I've been dying to try this recipe for the better part of a year, but couldn't because dried flageolet beans weren't readily available at my local grocery store. They taste a lot like navy beans, so feel free to substitute those!
Though this recipe takes a while (especially if you let the beans soak in their cooking liquid overnight), I think it's well worth it. Creamy, porky, yummy.
For the record, I apologize in advance for the weird formatting here. The source for the recipe wasn't formatting friendly!
Fine Cooking's Flageolet Bean Gratin with Sausage
(Cooking.com)
Yeah, that hasn't stopped yet. I've been dying to try this recipe for the better part of a year, but couldn't because dried flageolet beans weren't readily available at my local grocery store. They taste a lot like navy beans, so feel free to substitute those!
Though this recipe takes a while (especially if you let the beans soak in their cooking liquid overnight), I think it's well worth it. Creamy, porky, yummy.
For the record, I apologize in advance for the weird formatting here. The source for the recipe wasn't formatting friendly!
Fine Cooking's Flageolet Bean Gratin with Sausage
(Cooking.com)
Recipe Ingredients
| 1 pound dried flageolet beans |
| 1 large onion, peeled and quartered |
| 1 head garlic, cloves separated but not peeled |
| 1 bay leaf |
| 1 sprig fresh sage |
| 1 sprig fresh thyme |
| 2 teaspoon salt |
| For the Gratin: |
| 6 tablespoons olive oil |
| 2 large onions, finely diced |
| 1 tablespoon finely chopped fresh thyme |
| 1 tablespoon finely chopped fresh sage |
| 6 to 8 cloves garlic, minced |
| 1 pound French-style garlic sausage or sweet Italian sausage |
| 2 cups homemade bread crumbs |
| Homemade or low-salt canned chicken stock if needed |
| Directions | |||||||||
1. FOR THE BEANS: Pick over the beans. Soak if desired and drain. In a large, heavy-based pot, cover the beans with 8 cups cold water. Add the onion, garlic, bay leaf, sage, and thyme; bring to a boil over high heat. Reduce the heat to a bare simmer, skimming any foam that rises to the surface. Simmer gently until the beans have softened, about 1 and 1/2 hours. Add the salt and continue cooking until the beans are quite tender, 20 to 30 minutes longer. Allow the beans to cool in the broth. Refrigerate overnight to let the flavors meld. 2. FOR THE GRATIN: Heat the oven to 450 degrees. Drain the beans, reserving the cooking liquid. Discard the garlic and any stems from the herbs. In a frying pan, heat 4 Tbs. of the olive oil over medium heat. Add the onions, 1/4 tsp. salt, and 1/4 tsp. pepper; cook until the onions are soft and lightly browned, about 10 minutes. Add the thyme, sage, and garlic; cook 1 minute longer. 3. In a large mixing bowl, combine the beans with the onion mixture. Taste for seasoning and add more salt and pepper if needed. The mixture should be highly seasoned. Transfer the beans to a shallow 2 1/2 qt. casserole. 4. In a hot frying pan, brown the sausages well on all sides. Let the sausages cool before cutting them into 1 1/2 -inch thick slices. Arrange the sliced sausages over the beans, then push them down beneath the surface of the beans with a wooden spoon. 5. Bring the reserved cooking liquid to a boil and pour enough of it into the casserole to barely cover the beans (add chicken stock if there isn’t enough). Sprinkle the bread crumbs over the top and, with a wooden spoon, push them down a bit to absorb some of the liquid. Drizzle the remaining 2 Tbs. olive oil over the top. Cover with aluminum foil, set the pan on a baking sheet to catch any drips, and bake for 30 min. Reduce the heat to 325 degrees and continue cooking for 45 minutes. Remove the foil and cook until the surface is golden brown and the juices are bubbling, about 15 minutes longer. The recipe claims to serve 6. I'd base closer bets on 8. | |||||||||
Main Ingredients:
beans,
Fine Cooking,
flageolet,
sausages
Subscribe to:
Posts (Atom)