As the last days of August draw to a close, I escaped the city to head up to the cottage where service is spotty at best... so I probably won't be around much this week.
Thanks for all the advice I received both as messages here, in emails and on Facebook about allergen free products! I really appreciate all the input!

Tuesday, August 30, 2011
Saturday, August 27, 2011
Frustrations (a non-cooking post)
I had a bit of a setback this week that I'm pretty bummed out about. For the past 15 years or so, I've had a variety of allergic reactions (contact - on my skin) to different things, and until this point, I've pretty much been guessing at what I'm allergic to. So, last November, I bit the bullet and asked to see an allergist.
Two months later, I got to see him, but he couldn't run the patch tests because he only worked at my doctor's office once a week (you need to see a doctor 3 times in 5 days). So he referred me to the Occupational Health Clinic at St. Mike's. Of course, this meant that I had to wait another 4 months for my appointment... which, I discovered, was only a consultation appointment. Well. Crap.
If you've never heard of the allergen patch test, it's pretty simple. They tape 5 patches each covered 10 common allergens (making a total of 50) to your back, forbid you to shower for 5 days and peel off the patches your skin's allergic reactions (or not) to specific stimuli.
Really, it's a pretty basic experiment.
Anyway, I've got two big allergies and a couple of small ones, but it's the big ones that are giving me a headache.
I've known for years (like 15 or so) that I'm allergic to nickel. Jean buttons bother me, I can't wear cheap jewellery (meh - it means I have expensive tastes), watch strap closures cause me to react... that's stuff I've been able to handle. What I didn't know is that people who have nickel allergies (and ones that manifest particularly badly) can have problems with foods that have nickel in them... and there's a big long list including kale, leeks, soy, spinach, oatmeal, shellfish, rhubarb, pineapple, plums, raspberries, tea, nuts, dark chocolate (God, just kill me now)...
Apparently you are allowed to eat Brussels sprouts, dill, parsnips and macaroni. Whee.
Basically a ton of stuff that's otherwise good for you goes off the table.
Now, I'm not at the point yet where I even vaguely feel like I need to go on an elimination diet, but as my allergies have gotten worse over the years, an elimination diet may not be far off.
My bigger concern is the second allergy: fragrance mix. Go take a look at a bottle of shampoo, or your deodorant, or your sunscreen, or your laundry detergent, and when you look at the ingredient list, you'll probably see fragrance or parfum listed. This is a compound of up to 8 different compounds and is the number one producer of allergic reactions to cosmetics. It has far reaching effects that go beyond cosmetics though - paints, insecticides, toothpaste, pads, cola, bubble gum, periodontal dressings... The list just goes on and on.
Now, I'm not allergic to all 8 compounds. I react to some sunscreen but not others. But because companies don't list their fragrance compounds individually, I'll never know if I'm allergic to something unless I try it out.
That pretty much means I have a lifetime of allergic reactions ahead of me.
I'm left feeling even more confused than before I had these tests done. I'm glad that I know that I'm allergic to these things, but I'm frustrated that I'm going to continue to be exposed to a lot of the ingredients that I'm allergic to.
Anyone have any great leads as to products that are fragrance free? Specifically eye creams?
Thursday, August 25, 2011
Preserve Week: Claussen-Style Refrigerator Pickles (Round Two)
Last year, I made a big to-do about the Claussen-Style pickles that I'd made.
Turns out, while the sliced ones were good, they really didn't taste like Claussen's version. The ones I left whole were flaccid.
And I think it's safe to say that flaccid pickles have no place in my house.
So, with kirby cukes at the markets, I'm back at it this year, and once again, my hopes are high.
There are a few important changes I've made to my efforts this year: no heating up the brine and a different spice mix.

Already, I can tell a difference in the colour compared to last year. That alone has me jumping for joy.
Claussen-Style Refrigerator Pickles
(adapted from a website that no longer exists)
makes 3 pints
Ingredients
1¼ cups distilled water (this can be replaced with water you've boiled and then chilled)
1¼ cups white vinegar
12 - 16 kirby cucumbers, scrubbed and cut into spears
place into each pint jar:
½ tbsp kosher salt
1 tbsp dill seeds
1/8 tsp celery seeds
½ tsp mustard seeds
½ tsp red pepper flakes
1 small bay leaf
1 clove garlic, minced
Directions
1. Sterilize 3 pint jars in boiling water.
2. Stir together water and vinegar in a measuring cup. Set aside. Add spices to jars. Tightly pack in cucumber spears on top of the spices. Pour vinegar mixture over top. Cover, seal and shake to dissolve salt.
3. Place in the fridge. Shake jars for 10 seconds every day for a week. Try to restrain yourself from sampling the wares at this time. Hold out. You can do it! Cucumbers should have undergone the transformation to Cinderella Pickles after 7 days. They'll keep in the fridge for 1 month.
Turns out, while the sliced ones were good, they really didn't taste like Claussen's version. The ones I left whole were flaccid.
And I think it's safe to say that flaccid pickles have no place in my house.
So, with kirby cukes at the markets, I'm back at it this year, and once again, my hopes are high.
There are a few important changes I've made to my efforts this year: no heating up the brine and a different spice mix.
Already, I can tell a difference in the colour compared to last year. That alone has me jumping for joy.
Claussen-Style Refrigerator Pickles
(adapted from a website that no longer exists)
makes 3 pints
Ingredients
1¼ cups distilled water (this can be replaced with water you've boiled and then chilled)
1¼ cups white vinegar
12 - 16 kirby cucumbers, scrubbed and cut into spears
place into each pint jar:
½ tbsp kosher salt
1 tbsp dill seeds
1/8 tsp celery seeds
½ tsp mustard seeds
½ tsp red pepper flakes
1 small bay leaf
1 clove garlic, minced
Directions
1. Sterilize 3 pint jars in boiling water.
2. Stir together water and vinegar in a measuring cup. Set aside. Add spices to jars. Tightly pack in cucumber spears on top of the spices. Pour vinegar mixture over top. Cover, seal and shake to dissolve salt.
3. Place in the fridge. Shake jars for 10 seconds every day for a week. Try to restrain yourself from sampling the wares at this time. Hold out. You can do it! Cucumbers should have undergone the transformation to Cinderella Pickles after 7 days. They'll keep in the fridge for 1 month.
Wednesday, August 24, 2011
Preserve Week: Nigel Slater's Elderberry Jelly-Jam
I mentioned last week that my husband, at my request for interesting fruit, brought home some elderberries.
The first thought that popped into my head was:
My second thought was: what the heck am I going to do with elderberries?
So I googled just that. There were recipes for syrups and a couple for pies, but I knew I wasn't particularly interested in making either of those.
Elderberries aren't exactly the most popular fruit out there.
I removed myself to the kitchen and pulled Nigel Slater's Tender II off my shelf. He had two options for me: a sauce for venison or a jelly-jam that could later be put into a Jam Roly-Poly.
Now, I've never had a roly-poly, but I like the sound of a jam filled rolled cake (like a swiss roll), which seems to pretty much describe what a roly-poly is. The cake was traditionally steamed in a shirt sleeve (we're talking back in the 19th century here), which earned it the title Dead Man's Arm.
That's certainly a less appealing name.
So, if making the jelly-jam meant I could have cake at a later date, I knew I was in.

I should clarify one thing: Nigel calls this a jelly-jam because, after straining the berries over night as one does to make jelly, you have the option of incorporating some of the berries back into the jelly. So, it's like this beautiful combination of the two.
Oh! And before I forget: a warning.
Elderberries don't smell the prettiest. I think they smell rather of wet hay. Monty Python was definitely on to something!
Elderberry Jelly-Jam
(from Nigel Slater's Tender II)
makes 3 cups
Ingredients
750 grams elderberries (weight should be berries already removed from stems)
600 ml water
400 grams tart apples (I used Granny Smith, but if you have access to crab apples, even better), halved and left uncored and unpeeled
750 grams granulated sugar
Directions
1. Place elderberries, apples and water in a large dutch oven. Bring to a boil over medium high heat and simmer for 20 minutes, until apples are tender. Remove from heat and then place mixture in a jelly bag to drip over night. Don't squeeze the bag or its contents, as you'll end up with a cloudy jelly.
2. The next day, pour the collected juices into a dutch oven along with the sugar. If you would like fruit in your jelly, add in some of the berries from the jelly bag. Discard the rest. Bring mixture back to a boil and boil hard for 10-15 minutes, or until jelly reaches its setting point.
3. Pour into sterilized jars and process in boiling water for 10 minutes.
The first thought that popped into my head was:
My second thought was: what the heck am I going to do with elderberries?
So I googled just that. There were recipes for syrups and a couple for pies, but I knew I wasn't particularly interested in making either of those.
Elderberries aren't exactly the most popular fruit out there.
I removed myself to the kitchen and pulled Nigel Slater's Tender II off my shelf. He had two options for me: a sauce for venison or a jelly-jam that could later be put into a Jam Roly-Poly.
Now, I've never had a roly-poly, but I like the sound of a jam filled rolled cake (like a swiss roll), which seems to pretty much describe what a roly-poly is. The cake was traditionally steamed in a shirt sleeve (we're talking back in the 19th century here), which earned it the title Dead Man's Arm.
That's certainly a less appealing name.
So, if making the jelly-jam meant I could have cake at a later date, I knew I was in.
I should clarify one thing: Nigel calls this a jelly-jam because, after straining the berries over night as one does to make jelly, you have the option of incorporating some of the berries back into the jelly. So, it's like this beautiful combination of the two.
Oh! And before I forget: a warning.
Elderberries don't smell the prettiest. I think they smell rather of wet hay. Monty Python was definitely on to something!
Elderberry Jelly-Jam
(from Nigel Slater's Tender II)
makes 3 cups
Ingredients
750 grams elderberries (weight should be berries already removed from stems)
600 ml water
400 grams tart apples (I used Granny Smith, but if you have access to crab apples, even better), halved and left uncored and unpeeled
750 grams granulated sugar
Directions
1. Place elderberries, apples and water in a large dutch oven. Bring to a boil over medium high heat and simmer for 20 minutes, until apples are tender. Remove from heat and then place mixture in a jelly bag to drip over night. Don't squeeze the bag or its contents, as you'll end up with a cloudy jelly.
 |
| draining through a jelly bag |
3. Pour into sterilized jars and process in boiling water for 10 minutes.
Tuesday, August 23, 2011
Preserve Week: Shiro Plum Jam
I cannot express to you how ridiculously excited I am about this recipe. After I'd finished making it, I was sending an email to my Mum while licking the spoon I had used to stir the jam. It's tangy and vibrant, and the vanilla bean seeds just make the whole thing so insanely delicious.
You can tell a jam recipe tastes delicious when you lick the plate rest your spoon was sitting on.
Not that I did that.
Cough. Cough. Ahem.
I'm sorry. Something was stuck in my throat there.
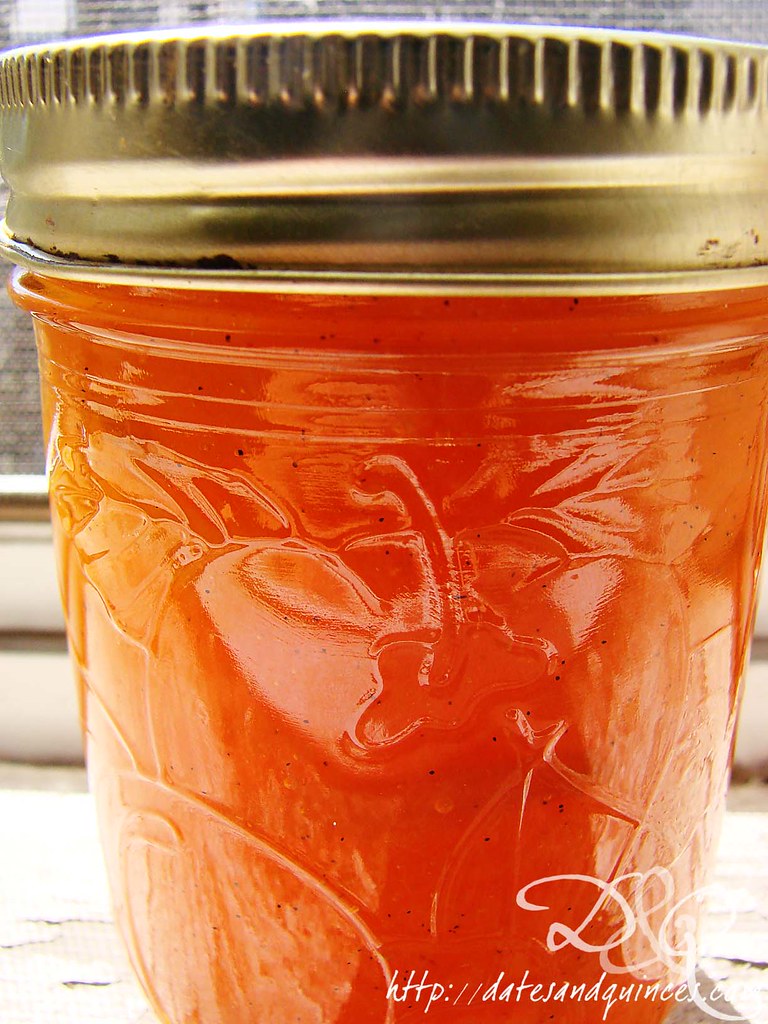
This recipe was very lightly adapted what looks like an abandoned blog: Toast. It's a shame really, because the jam turned out beautifully. Check out that amazing orange colour!
Shiro Plum Jam
makes 3 cups jam
Ingredients
2 lbs shiro plums, stoned, but not peeled
2 cups sugar
3 tbsp fresh lemon juice
½ large, plump vanilla bean
Directions
1. Toss plums in a large, non-reactive container with sugar and lemon juice. Let sit for one hour. After, place contents in a dutch oven. Bring to a boil. Boil for one minute then return plum mixture to the container. Place a piece of parchment paper directly on the surface of the plum mixture and place in the fridge overnight.
2. Process canning jars accordingly.
3. Place plum mixture in a large dutch oven. Scrape vanilla bean seeds from pod and stir into mixture. Throw the pods in as well, because a little extra hit of vanilla can never go amiss! Bring mixture to a boil and continue boiling, stirring constantly and skimming off any foam, until jam hits its setting point.
Have we talked about the setting point yet? The setting point is the point at which the jam promises, once cooled, to set to a firmer consistency.
I'm old school and do it the way my mother and I have done it for the better part of 25 years. I like to place a plate in the freezer to chill it. When I think the jam might be ready, I pull the plate out, and put a little dollop of jam on, and put it back in the freezer for 1 minute. You know the jam is ready when it wrinkles when you drag your finger through it.
If you're new school though, pull out your candy thermometer - it'll hit 220ºF.
If the jam is done, proceed to the next step. If not, keep boiling away. I think my jam took a good 20 minutes of boiling... however, I am working on the worst stove known to man (totally inefficient burners), so use your own judgment.
4. Place jam in sterilized jars and process in boiling water for 10 minutes. Remove, let cool and store.
Can I just say, this jam would be killer in thumbprint cookies. Or in cheesecake.
You can tell a jam recipe tastes delicious when you lick the plate rest your spoon was sitting on.
Not that I did that.
Cough. Cough. Ahem.
I'm sorry. Something was stuck in my throat there.
This recipe was very lightly adapted what looks like an abandoned blog: Toast. It's a shame really, because the jam turned out beautifully. Check out that amazing orange colour!
Shiro Plum Jam
makes 3 cups jam
Ingredients
2 lbs shiro plums, stoned, but not peeled
2 cups sugar
3 tbsp fresh lemon juice
½ large, plump vanilla bean
Directions
1. Toss plums in a large, non-reactive container with sugar and lemon juice. Let sit for one hour. After, place contents in a dutch oven. Bring to a boil. Boil for one minute then return plum mixture to the container. Place a piece of parchment paper directly on the surface of the plum mixture and place in the fridge overnight.
2. Process canning jars accordingly.
3. Place plum mixture in a large dutch oven. Scrape vanilla bean seeds from pod and stir into mixture. Throw the pods in as well, because a little extra hit of vanilla can never go amiss! Bring mixture to a boil and continue boiling, stirring constantly and skimming off any foam, until jam hits its setting point.
Have we talked about the setting point yet? The setting point is the point at which the jam promises, once cooled, to set to a firmer consistency.
I'm old school and do it the way my mother and I have done it for the better part of 25 years. I like to place a plate in the freezer to chill it. When I think the jam might be ready, I pull the plate out, and put a little dollop of jam on, and put it back in the freezer for 1 minute. You know the jam is ready when it wrinkles when you drag your finger through it.
If you're new school though, pull out your candy thermometer - it'll hit 220ºF.
If the jam is done, proceed to the next step. If not, keep boiling away. I think my jam took a good 20 minutes of boiling... however, I am working on the worst stove known to man (totally inefficient burners), so use your own judgment.
4. Place jam in sterilized jars and process in boiling water for 10 minutes. Remove, let cool and store.
Can I just say, this jam would be killer in thumbprint cookies. Or in cheesecake.
Monday, August 22, 2011
Preserve Week: Riesling Poached Spiced Pears
August's bounty thrills me to no end. The markets and grocery stores are bursting with Ontario produce and the weather is just cool enough for me to be enthusiastic about standing over a pot of boiling water processing batches of preserves, pickles and canning fresh fruit.
The fact that, amid all the enthusiasm for urban homesteading, canning is having a huge comeback has been nothing but beneficial. It means that all those jars and lids that my mother and I used to have to scour the stores for are now ubiquitous to each of my local grocery and hardware stores.
It also means that, although I've made jam and preserves since I was a child, I'm by no means an expert and now, there's a ton of great information out there on the internet. Sites like Well Preserved and Food in Jars are great places to start. Some of my favourite recipes come from Yvonne Tremblay's book Prizewinning Preserves (also released as The Complete Idiot's Guide to Jams, Jellies and Preserves in the US - guess which name I like better?), in which she gives recipes that have won awards at the Royal Agricultural Fair. If you pick it up, try the pear, ginger and crème de cacoa jam. It's amazing.
I'm lucky that I grew up in a household where my mother canned fruit for winter every year (though she doesn't anymore, much to both my brother's and my chagrin). Going down to the basement and pulling out a mason jar of Ontario peaches on a wintry Sunday in the middle of February was always such a cause for excitement. They would make their way into some kind of dessert - crisp was always a favourite at our house - and for a few brief moments, we'd relive the flavours of summer.
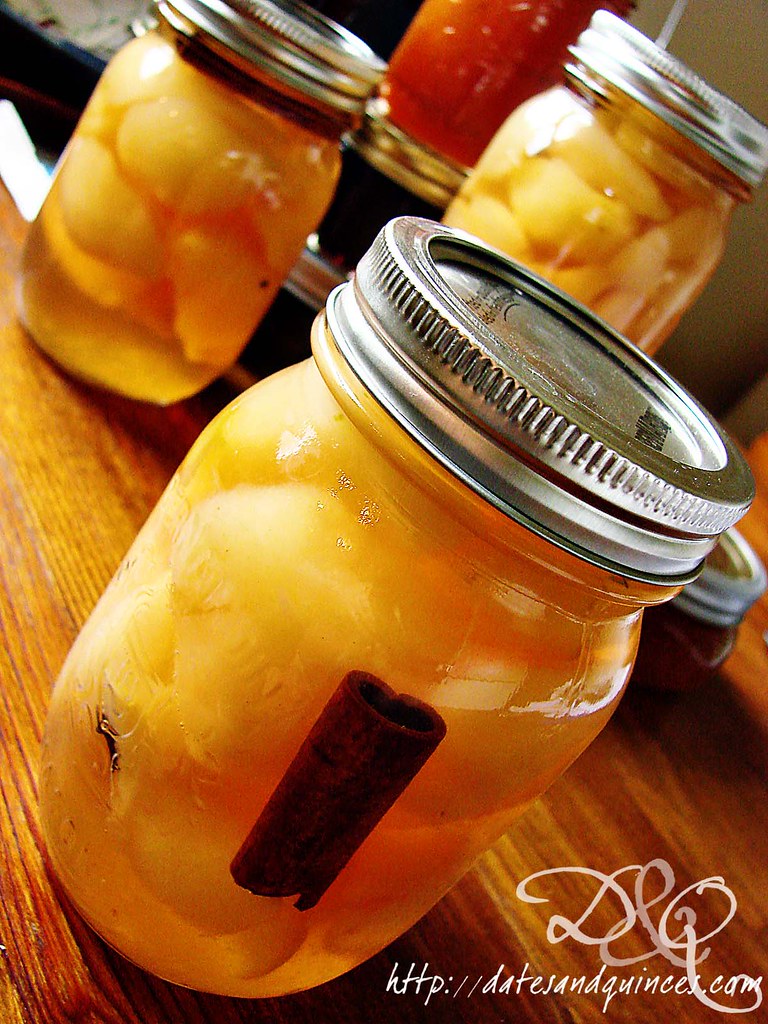
So, to kick off preserves week, I'm going to share a recipe for preserved pears. They're poached and then canned in a gorgeous Riesling and spice syrup. I used small sugar pears, but feel free to use larger ones as you see fit. Just don't make them too big, otherwise you might not get enough of them in your cans!
I can't wait to break into them one stormy January night.
For complete canning instructions and safety, please check out the USDA site or, for more basic instructions, check out Canadian Living's 101 guide.
Riesling Poached Spiced Pears
(from Canadian Living)
makes enough to fill 3 pint jars
Ingredients
4 lbs sugar pears
½ cup fresh lemon juice, divided
9 cups water, divided
3 cups granulated sugar
1½ cups Riesling (keep it in the family and pick up an Ontario wine!)
2 1" x 2" strips lemon rind
2 cinnamon sticks, broken in half
3 whole cloves
3 whole pods cardamon
Directions
1. Prep 3 pint sized mason jars according to canning technique listed above.
1. In a very large, non-reactive bowl, stir together ¼ cup lemon juice with 6 cups water. You'll use this bowl to put your peeled, cored pears into to prevent discoloration.
2. Peel and core pears, placing them in the lemon water. Try not to let the pears sit for more than 20 minutes in the water.
3. Meanwhile, in a large dutch oven over medium-high heat, stir together remaining 3 cups water and ¼ cup lemon juice with sugar and Riesling. Once sugar is dissolved, throw in lemon rind, cinnamon, cloves and cardamon. Bring to a boil, and set boil for 5 minutes. Drain pear halves and add to dutch oven. Return to boil and let cook for 5-15 minutes, cooking just until pears are tender. You don't want mushy ones, so keep an eye out.
4. Using a slotted spoon, remove pairs from pot and divide between the 3 prepped mason jars. Remove the lemon rind from the syrup and discard. Divide the cinnamon, cloves and cardamon evenly between the jars.
5. Return syrup to a boil, and boil hard for 10-15 minutes until syrup is reduced to 3 cups. Pour syrup over pears, leaving ½" of headspace between the liquid and the rim of the jar. Use a wet paper towel to remove and syrup on the rim. Failure to do so could result in an improper seal.
6. Seal and process in canner for 10 minutes. Remove, let cool and check that seals have popped. If any don't, place those jars in the fridge and use within a week.
The rest will keep a room temperature (though preferably in a coolish dark space) for a year.
The fact that, amid all the enthusiasm for urban homesteading, canning is having a huge comeback has been nothing but beneficial. It means that all those jars and lids that my mother and I used to have to scour the stores for are now ubiquitous to each of my local grocery and hardware stores.
It also means that, although I've made jam and preserves since I was a child, I'm by no means an expert and now, there's a ton of great information out there on the internet. Sites like Well Preserved and Food in Jars are great places to start. Some of my favourite recipes come from Yvonne Tremblay's book Prizewinning Preserves (also released as The Complete Idiot's Guide to Jams, Jellies and Preserves in the US - guess which name I like better?), in which she gives recipes that have won awards at the Royal Agricultural Fair. If you pick it up, try the pear, ginger and crème de cacoa jam. It's amazing.
I'm lucky that I grew up in a household where my mother canned fruit for winter every year (though she doesn't anymore, much to both my brother's and my chagrin). Going down to the basement and pulling out a mason jar of Ontario peaches on a wintry Sunday in the middle of February was always such a cause for excitement. They would make their way into some kind of dessert - crisp was always a favourite at our house - and for a few brief moments, we'd relive the flavours of summer.
So, to kick off preserves week, I'm going to share a recipe for preserved pears. They're poached and then canned in a gorgeous Riesling and spice syrup. I used small sugar pears, but feel free to use larger ones as you see fit. Just don't make them too big, otherwise you might not get enough of them in your cans!
I can't wait to break into them one stormy January night.
For complete canning instructions and safety, please check out the USDA site or, for more basic instructions, check out Canadian Living's 101 guide.
Riesling Poached Spiced Pears
(from Canadian Living)
makes enough to fill 3 pint jars
Ingredients
4 lbs sugar pears
½ cup fresh lemon juice, divided
9 cups water, divided
3 cups granulated sugar
1½ cups Riesling (keep it in the family and pick up an Ontario wine!)
2 1" x 2" strips lemon rind
2 cinnamon sticks, broken in half
3 whole cloves
3 whole pods cardamon
Directions
1. Prep 3 pint sized mason jars according to canning technique listed above.
1. In a very large, non-reactive bowl, stir together ¼ cup lemon juice with 6 cups water. You'll use this bowl to put your peeled, cored pears into to prevent discoloration.
2. Peel and core pears, placing them in the lemon water. Try not to let the pears sit for more than 20 minutes in the water.
3. Meanwhile, in a large dutch oven over medium-high heat, stir together remaining 3 cups water and ¼ cup lemon juice with sugar and Riesling. Once sugar is dissolved, throw in lemon rind, cinnamon, cloves and cardamon. Bring to a boil, and set boil for 5 minutes. Drain pear halves and add to dutch oven. Return to boil and let cook for 5-15 minutes, cooking just until pears are tender. You don't want mushy ones, so keep an eye out.
4. Using a slotted spoon, remove pairs from pot and divide between the 3 prepped mason jars. Remove the lemon rind from the syrup and discard. Divide the cinnamon, cloves and cardamon evenly between the jars.
5. Return syrup to a boil, and boil hard for 10-15 minutes until syrup is reduced to 3 cups. Pour syrup over pears, leaving ½" of headspace between the liquid and the rim of the jar. Use a wet paper towel to remove and syrup on the rim. Failure to do so could result in an improper seal.
6. Seal and process in canner for 10 minutes. Remove, let cool and check that seals have popped. If any don't, place those jars in the fridge and use within a week.
The rest will keep a room temperature (though preferably in a coolish dark space) for a year.
Friday, August 19, 2011
Plum-a-palooza: A Small Plum Cake for Four
At the farmer's market this week, my husband picked up a few pounds of shiro plums. The shiro plum is a Japanese variety and isn't white, as the name might lead you to believe, but yellow.
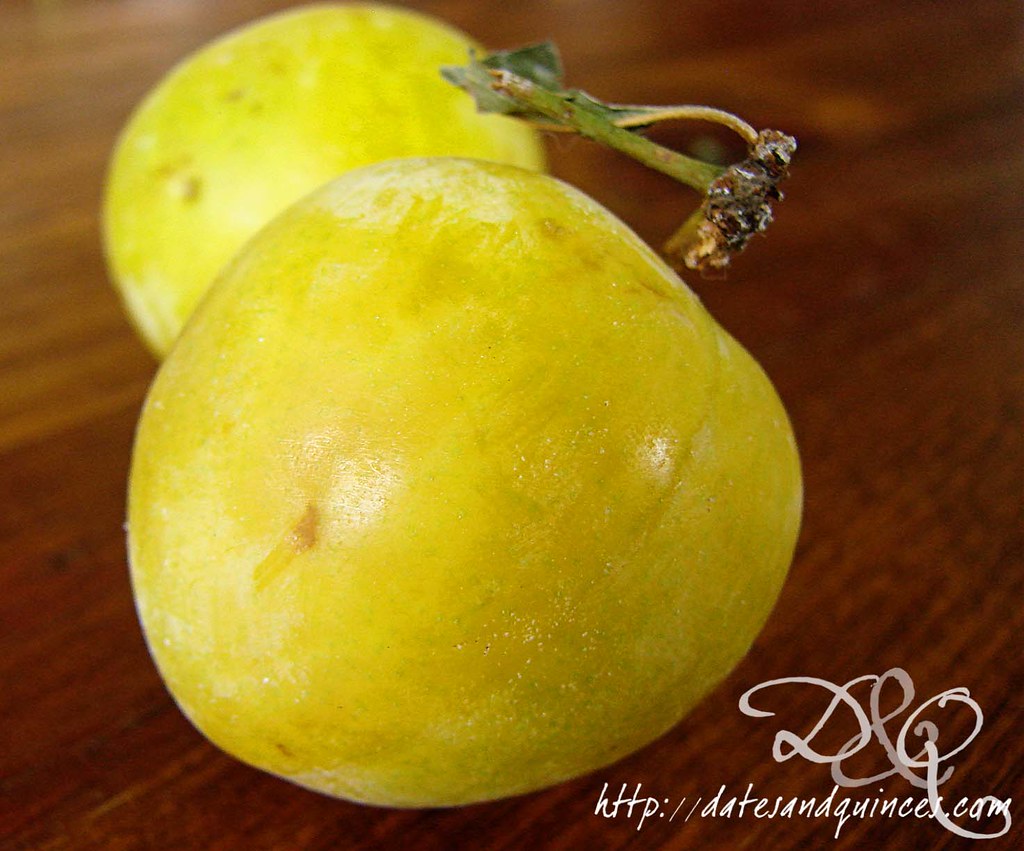
Shiro plums are sweet and bright, but also happen to be clingstone, which may deter you if segmenting clingstone fruits annoys you.
Truth be told, although I had asked him to pick up some interesting fruit, I wasn't really sure what I was going to do with 4lbs of these plums. In the end, I opted to make a small plum cake and to use the rest of the fruit in a jam (which I've started and is currently sitting in my fridge waiting for a flavour infusion tomorrow - vanilla? star anise? cardamon? I definitely want the vanilla... but I can't decide what, if anything, else to put in).

Plum Cake
(adapted from Martha Stewart)
Ingredients
¼ cup + 2 tbsp butter, at room temperature
½ cup all purpose flour
¼ cup spelt flour (you can use all purpose instead)
¼ tsp baking soda
generous pinch kosher salt
¼ cup packed brown sugar
¼ cup granulated sugar
1 egg + 1 egg white
½ tsp vanilla extract
zest of one lemon
1/3 cup plain yogurt
4 plums, halved, pitted and cut into 6-8 slices
Directions
1. Preheat oven to 375º. Generously butter and flour a small, 6" springform pan. Set aside.
2. In a small bowl, sift together flours, baking soda and salt.
3. In the bowl of a mixer (or, using a hand mixer), cream together butter. Gradually add in sugars. Once mixture is light and fluffy, add in whole egg then the egg white. Once this is incorporated, add in vanilla, lemon zest and yogurt.
4. Add flour mixture to wet ingredients in 2 batches, making sure each batch is incorporated before adding the next one. Pour batter into prepared pan. Smooth.
5. Arrange plum slices over the top of the batter. Place in oven for 30 minutes. Remove, loosely tent with foil and return to oven for an additional 35 minutes. Cake is done when a skewer inserted into centre comes out clean.
Let cool on rack on counter. Cake is best eaten the day it was made! Might I recommend some ice cream, whipped cream or a sifting of icing sugar?
You may have noticed in the picture that I've cut the cake into more than four slices... we weren't particularly hungry, so smaller was the way to go!
Shiro plums are sweet and bright, but also happen to be clingstone, which may deter you if segmenting clingstone fruits annoys you.
Truth be told, although I had asked him to pick up some interesting fruit, I wasn't really sure what I was going to do with 4lbs of these plums. In the end, I opted to make a small plum cake and to use the rest of the fruit in a jam (which I've started and is currently sitting in my fridge waiting for a flavour infusion tomorrow - vanilla? star anise? cardamon? I definitely want the vanilla... but I can't decide what, if anything, else to put in).
Plum Cake
(adapted from Martha Stewart)
Ingredients
¼ cup + 2 tbsp butter, at room temperature
½ cup all purpose flour
¼ cup spelt flour (you can use all purpose instead)
¼ tsp baking soda
generous pinch kosher salt
¼ cup packed brown sugar
¼ cup granulated sugar
1 egg + 1 egg white
½ tsp vanilla extract
zest of one lemon
1/3 cup plain yogurt
4 plums, halved, pitted and cut into 6-8 slices
Directions
1. Preheat oven to 375º. Generously butter and flour a small, 6" springform pan. Set aside.
2. In a small bowl, sift together flours, baking soda and salt.
3. In the bowl of a mixer (or, using a hand mixer), cream together butter. Gradually add in sugars. Once mixture is light and fluffy, add in whole egg then the egg white. Once this is incorporated, add in vanilla, lemon zest and yogurt.
4. Add flour mixture to wet ingredients in 2 batches, making sure each batch is incorporated before adding the next one. Pour batter into prepared pan. Smooth.
5. Arrange plum slices over the top of the batter. Place in oven for 30 minutes. Remove, loosely tent with foil and return to oven for an additional 35 minutes. Cake is done when a skewer inserted into centre comes out clean.
Let cool on rack on counter. Cake is best eaten the day it was made! Might I recommend some ice cream, whipped cream or a sifting of icing sugar?
You may have noticed in the picture that I've cut the cake into more than four slices... we weren't particularly hungry, so smaller was the way to go!
Thursday, August 18, 2011
Happy Anniversary!
Two years ago today, my husband and I were married at the Olowalu Plantation House on Maui. It was a DIY destination wedding, with only 30 guests, some croquet, drinks, dancing and lots of laughing.
To top it all off, I married a man who I genuinely love more today than I did when we got married - something I didn't know was possible. He brings out the best in me and tempers the worst.
Plus: he makes me laugh.
Everyday.
Without fail.
Our relationship looks pretty much as it did that day two years ago:


I love you, babe!
To top it all off, I married a man who I genuinely love more today than I did when we got married - something I didn't know was possible. He brings out the best in me and tempers the worst.
Plus: he makes me laugh.
Everyday.
Without fail.
Our relationship looks pretty much as it did that day two years ago:
I love you, babe!
Tuesday, August 16, 2011
Corn Sauté with Sweet Onion and Zucchini
This is resoundingly one of my go-to August dishes. It's safe to say that it's my mother's too, because she called me asking for the recipe just as I was whipping this up.
It's best with fresh corn on the cob, so make it up while the corn is fresh!
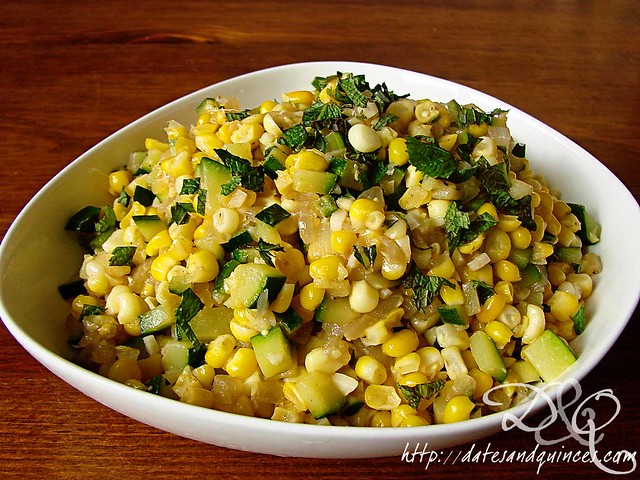
It serves 4 as a side dish, but my husband and I have been known to just chow down on it alone for dinner.
Corn Sauté with Sweet Onion and Zucchini
(lightly adapted from Fine Cooking)
Ingredients
1 tbsp butter, divided
½ tbsp olive oil
1 tsp kosher salt, divided
1 medium sweet onion, finely diced
1 medium zucchini, finely diced
2 heaping cups fresh corn kernels, cut from about 4 ears
2 cloves garlic, minced
½ tsp ground corianger
½ tsp ground cumin
juice of ¼ lemon
3 tbsp chopped fresh mint
freshly ground black pepper
Directions
1. In a dutch oven or very large skillet, melt ½ tbsp butter with ½ tbsp olive oil over medium-low heat. Add in onion and ½ tsp salt. Cover and cook for 5 minutes, stirring occasionally, until onion is translucent. Remove heat and cook, stirring occasionally, for an additional 3 minutes, until onion is beginning to brown. Add in zucchini, and continue cooking until zucchini begins to shrink and lose some of its moisture, about 3 minutes more.
2. Add in remaining ½ tbsp butter, corn kernels, garlic and remaining ½ tsp of salt. Cook, stirring frequently until corn becomes bright, tender and caramelizes slightly, about 5 minutes. Add in coriander and cumin and cook for 30 seconds, until fragrant. Remove pan from heat. Stir in lemon juice and 1 tbsp mint. Let sit for 2 minutes, then add in black pepper and additional salt to taste. Serve with additional mint sprinkled on top.
It's best with fresh corn on the cob, so make it up while the corn is fresh!
It serves 4 as a side dish, but my husband and I have been known to just chow down on it alone for dinner.
Corn Sauté with Sweet Onion and Zucchini
(lightly adapted from Fine Cooking)
Ingredients
1 tbsp butter, divided
½ tbsp olive oil
1 tsp kosher salt, divided
1 medium sweet onion, finely diced
1 medium zucchini, finely diced
2 heaping cups fresh corn kernels, cut from about 4 ears
2 cloves garlic, minced
½ tsp ground corianger
½ tsp ground cumin
juice of ¼ lemon
3 tbsp chopped fresh mint
freshly ground black pepper
Directions
1. In a dutch oven or very large skillet, melt ½ tbsp butter with ½ tbsp olive oil over medium-low heat. Add in onion and ½ tsp salt. Cover and cook for 5 minutes, stirring occasionally, until onion is translucent. Remove heat and cook, stirring occasionally, for an additional 3 minutes, until onion is beginning to brown. Add in zucchini, and continue cooking until zucchini begins to shrink and lose some of its moisture, about 3 minutes more.
2. Add in remaining ½ tbsp butter, corn kernels, garlic and remaining ½ tsp of salt. Cook, stirring frequently until corn becomes bright, tender and caramelizes slightly, about 5 minutes. Add in coriander and cumin and cook for 30 seconds, until fragrant. Remove pan from heat. Stir in lemon juice and 1 tbsp mint. Let sit for 2 minutes, then add in black pepper and additional salt to taste. Serve with additional mint sprinkled on top.
Monday, August 15, 2011
Coming home is hard
especially when you're used to seeing this for two weeks...

I've just managed to hit up the grocery store and begin thinking about getting back into the swing of cooking and blogging.

I've just managed to hit up the grocery store and begin thinking about getting back into the swing of cooking and blogging.
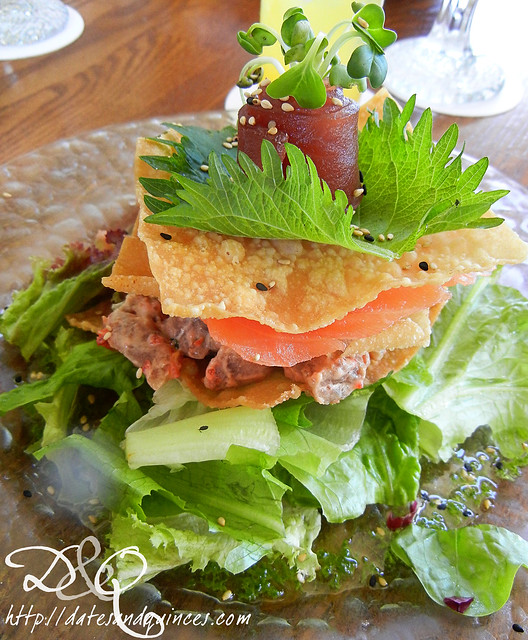
Until then, let me just share this photo of the most amazing sashimi napoleon I ate at the Hali'imale General Store:
Spicy ahi (tuna) poke, smoked salmon, ahi rosette, Upcountry greens, chive vinaigrette, tobiko and picked ginger with fried wontons and a wasabi dressing.
And deconstructed:
One of the most delicious things I ate on the islands!
Friday, August 12, 2011
Talking Big
For some reason, I swore to my husband I would get through five full pineapples on this trip. I knew that I'd aimed high, but I figured if I used it in cooking (hence the last recipe posted below) it would work out. And if I was really struggling, I'd just pick up some baby pineapples.
It's the spirit of the bet, right?
There have been no baby pineapples. No baby pineapples! No shortcuts, just me and gigantic Maui Gold pineapples.
Sigh.
Hence, this:

You know that episode of the Simpsons where Homer eats the 64 slices of American cheese? I now have pineapple blindness. And I only got through a quarter pineapple in that sitting.
I think I have a full 3 pineapples left to go.
And we're leaving tomorrow.
This is not going to turn out well.
Tuesday, August 09, 2011
Pineapple Cucumber Salsa
I've got a bottle of Wailua Wheat Beer sitting by me as I write this from the lanai of our condo at the Kahana Village on Maui. Isn't that how all days on the islands should end?
When we left Kauai today, both Phil and I were feeling kind of bummed. We've passed the halfway mark of our time here and *only* have 5 nights left before the long haul back to Toronto.
Wah. Wah. Wah.
I feel like a huge baby for admitting that. What I should be saying (and am saying now) is: we have five nights on Maui, and we're going to enjoy every minute of it. Driving along the highways here made me feel like we were home. We drove past Olowalu, where we got married almost 2 years ago (I waved at the site), picked up some frappuccinos from Bad Ass coffee and grabbed some groceries from Costco (GIGANTIC containers of mac nuts for everyone). I'm so happy right now, I could explode.
For dinner, I wanted something light and fresh. We picked up some opah from Costco. For those of you not in the know, opah is also known as moonfish, sunfish or kingfish.
And it's freaking huge.
We're grilling it up with some pineapple cucumber salsa I just whipped up.

Have I mentioned how happy I am right now?
Pineapple Cucumber Salsa for Fish
Ingredients
1/2 fresh pineapple, peeled, cored and chopped finely
1/2 English cucumber, finely chopped
1/2 red bell pepper, finely chopped
1/2-1 jalapeno pepper, finely chopped (seeds and ribs removed if you're not into heat)
juice of 1/2 lime
1 green onion, minced
1/4 cup cilantro, chopped
Directions
1. Mix all ingredients together in a bowl. Let sit at room temperature for at least 30 minutes to allow flavours to meld.
Monday, August 08, 2011
A post about swimming pools
When I was a kid, I would rate hotels by their swimming pools. They were easily my favourite part of the stay. I'd give out basic point for your standard rectangular shape, more if the pool had varying degrees of depth (over the head = good) and the system went up from there.
I still rate hotels by their pools, which pretty much means that Grand Hyatt Kauai is the happiest place on earth for me.
We swam from the adult pool down a kiddie slide, through the lazy river with its waterfall grottoes, under two bridges before reaching the big water slide down to the activity pool (volleyball and basketball anyone?), with its jacuzzi plopped into a centre island.
And then we hopped into the salt water lagoon, which took a good 30 minutes to swim 'round. There are three islands in it. And another waterfall.
It was heaven, I tell you.
And because we were honeymooning, we got a cabana for free one day (after my husband exposed himself to a maid - story here), and sat out watching all the goings on of the salt water lagoon. Fun. Fun. Fun.
I'm not a hotel/resort kinda gal, but once and a while, it's a lot of fun to go that way!
The real question is: how does one go back to regularly sized condo pools from here?

It was utter bliss with my husband for 3 glorious nights!

We're off to Maui on Monday (which is tomorrow for me, but probably today for you), back to the Kahana Village. I'm so excited to get some hiking and snorkelling in!
I still rate hotels by their pools, which pretty much means that Grand Hyatt Kauai is the happiest place on earth for me.
We swam from the adult pool down a kiddie slide, through the lazy river with its waterfall grottoes, under two bridges before reaching the big water slide down to the activity pool (volleyball and basketball anyone?), with its jacuzzi plopped into a centre island.
And then we hopped into the salt water lagoon, which took a good 30 minutes to swim 'round. There are three islands in it. And another waterfall.
It was heaven, I tell you.
And because we were honeymooning, we got a cabana for free one day (after my husband exposed himself to a maid - story here), and sat out watching all the goings on of the salt water lagoon. Fun. Fun. Fun.
I'm not a hotel/resort kinda gal, but once and a while, it's a lot of fun to go that way!
The real question is: how does one go back to regularly sized condo pools from here?
 |
| the husband and me |
 |
| view from our lanai of the adult pool (right) and the beginning of the lazy river (left) |
 |
| reading around the corner from the waterslide |
 |
| Love when mai tais are brought to you! |
 |
| lazy river with waterfall grotto |
 |
| private, lagoon front cabana |
 |
| View from the cabana. Note the proximity of my feet to the water! |

 |
| enjoying a small waterfall (over my shoulder) |
 | ||
| Phil diving down in the lagoon. |

We're off to Maui on Monday (which is tomorrow for me, but probably today for you), back to the Kahana Village. I'm so excited to get some hiking and snorkelling in!
Thursday, August 04, 2011
A few pictures from Kauai
I've been meaning to post as often as possible, to keep up a virtual travel journal, but wouldn't you know it? We're just too damned busy to post everyday. Anyway, today, we did a tour with Kauai Photo Tours - a hiking/walking/photography tour of the east and north shores of Kauai. It was fabulous. I got to play around with a DSLR for the first time and use a polarizer.
Anyway, here are some shots from the day:
Moloa'a Beach


Lighthouse and bird sanctuary

And we can't talk this blog without mentioning some ono grindz (that's pidgin for delicious noms) from a roadside stand.

Hello plate lunch! As usual, I wanted to try everything, so I got way too much. I made it through maybe 1/3 of the whole meal.

Two scoops rice, macaroni & taro salad (oishii!), lomi lomi salmon, kalua pork (best I've had yet), mochi taro cake, ti leaf wrapped chicken...

And let's not forget about the taro fields...

... and the joy of being able to stop to chow down on some strawberry guavas from the side of the road!

Have I mentioned lately how much I love being on these islands?
Next up: tomorrow we're hitting the Hyatt and Josselin's Tapas Bar (a meal I've been waiting for more than a year for).
Monday, August 01, 2011
A Quick Post from YYJ
It's taken me a long time to get to this, but there's something to be said for B&Bs. While on Salt Spring Island, we stayed at the Wisteria Guest House in Ganges. It's a lovely little place on the outskirts of town - perfect for larger families travelling together!
And their breakfasts were superior. Each was two courses served with freshly pressed juices. One of my favourites was a plum cobbler that had a hint of tea and mint in it. It was accompanied by a yogurt cream (whipped cream mixed with yogurt). Totally delicious. It was followed by scrambled eggs, roasted asparagus and cherry tomatoes, thick cut bacon and sweet potato fries.
Plus, I have to say Beverly and Len were just amazing hosts. The beds were comfortable, the location serene... and you've already heard me talk about the food! I would definitely recommend it to anyone looking for a place to stay on Salt Spring.

The next day we had house made sausages basted in hot mustard (after enjoying a big bowl of alpine muesli) served with baked french toast with apricot compote. It was breakfast heaven.
I should mention that the wedding was lovely! We spent Friday decorating the hall and making the lemonade and iced tea.

And I only looked slightly ridiculous with my hair flying all over the place. The view from the site was incredible, as it looked out over the ocean. My cousin Jenn (on the left of me) almost got myself and I thrown off the cliff when the doves they released got a little too close for comfort... but other than that, the bride and groom looked incredible (alas, the pictures don't do them justice, so I won't include them here).

And now, we're off to Vancouver to await out plane to Honolulu!
Subscribe to:
Posts (Atom)