Showing posts with label pears. Show all posts

Saturday, February 11, 2012

Jam Oat Bars

When I was, oh, I don't know, maybe 12 or 13, my mother had (and I believe she still does have) a Company's Coming Bars and Squares cookbook. There was one recipe in there that I love so much, that it was the first thing I knew how to make by heart - chocolate chip squares. They were so easy, I could throw them together on a week night for our lunches throughout the week.

This post isn't really about the chocolate chip squares. It IS about throwing together some bars for lunches mid-week, AFTER you've made dinner, you're exhausted and pregnant.

Expedient. That's the name of the game.

I'd like to think I've upped the health ante somewhat on your typical jam bar by using spelt flour (you could just as easily use all purpose or whole wheat) and gluten free oats. And, since all I have on my shelves is homemade jam, I used up what was left of a jar of my mother's Ginger, Pear & Crème de Cacao jam AND finally cracked into one of my jars of elderberry jam.

In the interest of honesty, let me admit that the elderberry jam scared me. When I made it, I was totally turned off by the smell. But, as it turns out, if you let the jam sit for the better part of 6 months, you're in for a decadent treat. This is up there with blackcurrant jelly in terms of rich berry flavours.

Which is a big relief, given how much effort I put into making the stuff.
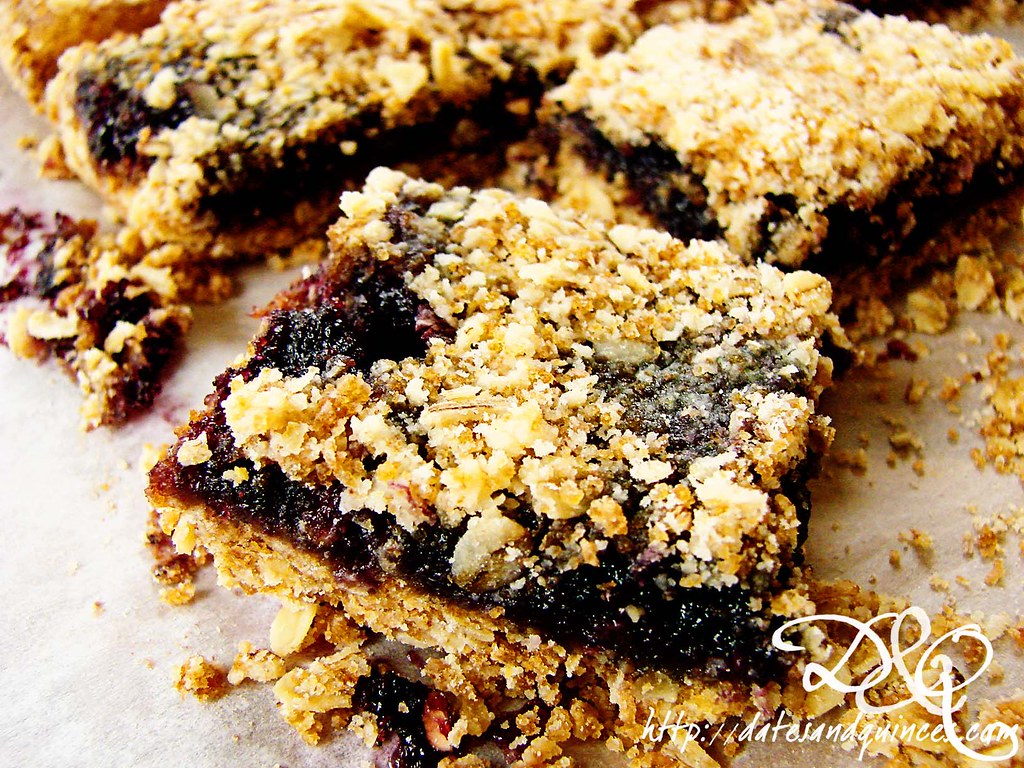

Jam Oat Bars

Ingredients

1 3/4 cups flour (spelt, whole wheat, all purpose, or a mixture)
1 cup packed brown sugar
¼ tsp salt
½ tsp baking soda
3/4 cups chilled unsalted butter (use earth balance if you want to make this vegan), cut into chunks
½ tsp vanilla extract
1½ cups GF oats
1½ cups jam

Directions

1. Preheat oven to 350º. Line a 9"x13" baking ban with parchment paper, ensuring that paper extends over the sides of pan. This will make it easy to remove the bars.

2. In a food processor, pulse together, flour, sugar, salt and baking soda. Add in chilled butter and vanilla, pulsing until small granules are formed. Add in oats and pulse twice. You want some of the oats to be in small pieces and others left whole.

3. Put 3/4 of the flour-oat mixture into the baking pan, patting down to firm. Spread jam over base. If you're using two flavours of jam, spread half on one side and half on the other. Sprinkle with remaining flour-oat mixture. Bake for 20-25 minutes, or until jam is bubbly.

4. Remove from oven and let cool completely in pan on a rack. Makes about 28 pieces, but you decide how much jammy goodness you need in a serving!

Monday, August 22, 2011

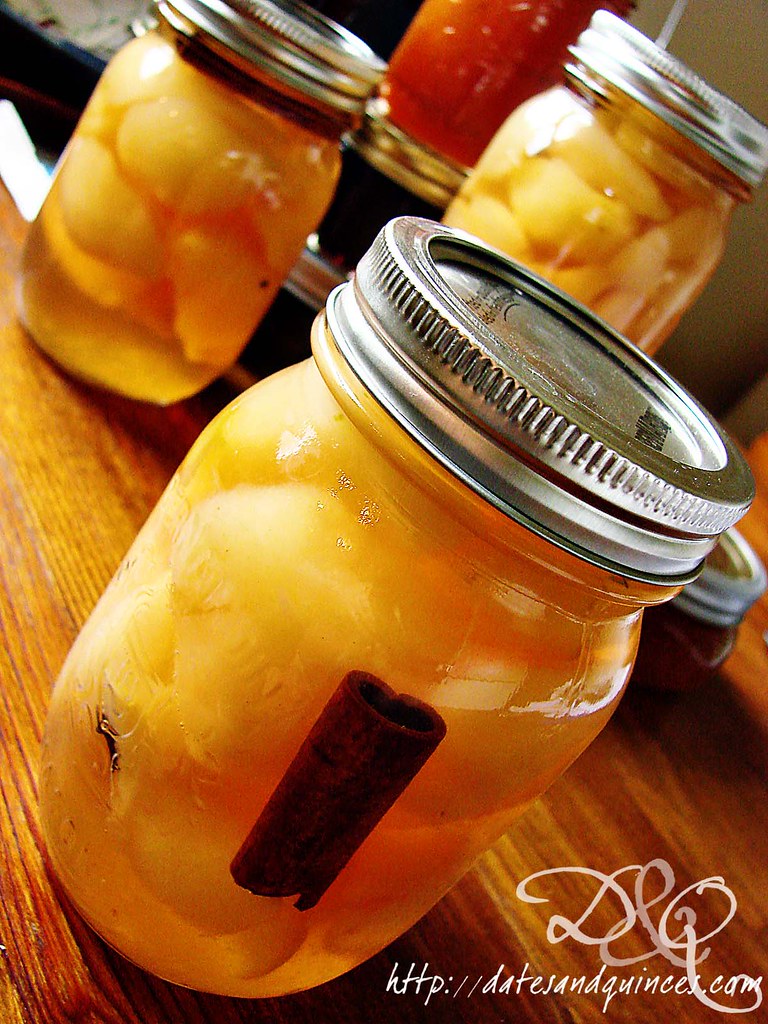
Preserve Week: Riesling Poached Spiced Pears

August's bounty thrills me to no end. The markets and grocery stores are bursting with Ontario produce and the weather is just cool enough for me to be enthusiastic about standing over a pot of boiling water processing batches of preserves, pickles and canning fresh fruit.

The fact that, amid all the enthusiasm for urban homesteading, canning is having a huge comeback has been nothing but beneficial. It means that all those jars and lids that my mother and I used to have to scour the stores for are now ubiquitous to each of my local grocery and hardware stores.

It also means that, although I've made jam and preserves since I was a child, I'm by no means an expert and now, there's a ton of great information out there on the internet. Sites like Well Preserved and Food in Jars are great places to start. Some of my favourite recipes come from Yvonne Tremblay's book Prizewinning Preserves (also released as The Complete Idiot's Guide to Jams, Jellies and Preserves in the US - guess which name I like better?), in which she gives recipes that have won awards at the Royal Agricultural Fair. If you pick it up, try the pear, ginger and crème de cacoa jam. It's amazing.

I'm lucky that I grew up in a household where my mother canned fruit for winter every year (though she doesn't anymore, much to both my brother's and my chagrin). Going down to the basement and pulling out a mason jar of Ontario peaches on a wintry Sunday in the middle of February was always such a cause for excitement. They would make their way into some kind of dessert - crisp was always a favourite at our house - and for a few brief moments, we'd relive the flavours of summer.


So, to kick off preserves week, I'm going to share a recipe for preserved pears. They're poached and then canned in a gorgeous Riesling and spice syrup. I used small sugar pears, but feel free to use larger ones as you see fit. Just don't make them too big, otherwise you might not get enough of them in your cans!

I can't wait to break into them one stormy January night.

For complete canning instructions and safety, please check out the USDA site or, for more basic instructions, check out Canadian Living's 101 guide.


Riesling Poached Spiced Pears

(from Canadian Living)

makes enough to fill 3 pint jars

Ingredients

4 lbs sugar pears
½ cup fresh lemon juice, divided
9 cups water, divided
3 cups granulated sugar
1½ cups Riesling (keep it in the family and pick up an Ontario wine!)
2 1" x 2" strips lemon rind  
2 cinnamon sticks, broken in half
3 whole cloves
3 whole pods cardamon

Directions

1. Prep 3 pint sized mason jars according to canning technique listed above.

1. In a very large, non-reactive bowl, stir together ¼ cup lemon juice with 6 cups water. You'll use this bowl to put your peeled, cored pears into to prevent discoloration.

2. Peel and core pears, placing them in the lemon water. Try not to let the pears sit for more than 20 minutes in the water.

3. Meanwhile, in a large dutch oven over medium-high heat, stir together remaining 3 cups water and ¼ cup lemon juice with sugar and Riesling. Once sugar is dissolved, throw in lemon rind, cinnamon, cloves and cardamon. Bring to a boil, and set boil for 5 minutes. Drain pear halves and add to dutch oven. Return to boil and let cook for 5-15 minutes, cooking just until pears are tender. You don't want mushy ones, so keep an eye out.

4. Using a slotted spoon, remove pairs from pot and divide between the 3 prepped mason jars. Remove the lemon rind from the syrup and discard. Divide the cinnamon, cloves and cardamon evenly between the jars.

5. Return syrup to a boil, and boil hard for 10-15 minutes until syrup is reduced to 3 cups. Pour syrup over pears, leaving ½" of headspace between the liquid and the rim of the jar. Use a wet paper towel to remove and syrup on the rim. Failure to do so could result in an improper seal.

6. Seal and process in canner for 10 minutes. Remove, let cool and check that seals have popped. If any don't, place those jars in the fridge and use within a week.

The rest will keep a room temperature (though preferably in a coolish dark space) for a year.

Tuesday, February 08, 2011

Fresh Pear Sorbet with Poire William

Yesterday, I walked home via Whole Foods with the intention of picking up Moro blood oranges and some coconut milk in order to make a tropical sorbet for our Monday night Bachelor fest.

I also walked away with Jazz apples, three pears, a canister of olives from their olive bar (my not-so-secret addiction) and some smoked salmon trimmings.

Does anyone else find themselves veering off their grocery list on a regular basis?

As I ambled my way down the snowy streets, I walked past my favourite wholesale florist, paused and then decided that I hadn't treated myself to any flowers in months. (If you're in Toronto and haven't done so already, check out the 6 or so wholesale florists on Avenue by Davenport. Their prices are fantastic! I always go to Yang's.)

Whenever I usually by flowers, I usually go for bright and vibrant colours, but last evening, as the snow fell gently on the street outside, the orchids and roses all done up for Valentine's Day all seemed too garish and vulgar all of a sudden. Instead, I opted for a mix of cream and white carnations, freesia, hypericum berries and this totally fascinating flower whose buds look like the trip of an asparagus.

Vase from etsy seller Pretty Random Objects
If you know what this is, please fill me in!


Carrying that bundle of white flowers home through the deserted snow-laden parks made me begin to rethink my sorbet choice. Suddenly, it felt as though a vibrant pink sorbet had no place in my evening. I wanted something equally pure, crisp and soft on my tongue - something that tasted like the sweetness of a calm winter night.

I had the pears, albeit not entirely ripe ones. I had a bottle of Poire William (pear eau de vie that tastes like a gorgeous summer evening in the garden).

And I had Nigel Slater to inspire me, and an ice cream maker to make my job easier.

When we sampled dessert, there were groans of pleasure all around. Sometimes the absence of words speaks volumes.

Pear Sorbet with Poire William

(adapted from Tender II)

Ingredients

1 cup water
½ cup sugar
3 pears, peeled, cored and coarsely chopped
1 lemon, cut in half, seeds removed
2 tbsp Poire William

Directions

1. Bring water and sugar to a boil in a saucepan over medium heat. Add pears and lemon halves. Reduce heat and let simmer until pears are perfectly tender.

2. Remove from heat. Remove lemon halves from mixture. Pour everything else into a blender (or, if you destroyed yours yours broke that time you were trying to make clementine smoothies, a food processor) and blend until totally smooth. Stir in Poire William. Place in a bowl in the fridge to let cool.

3. Once cool, pour all ingredients into the canister of your ice cream machine and process according to manufacturers' instructions.


Sweet, intensely peary and floral. The perfect ending to brighten a snowy February weekday.

Friday, October 15, 2010

Cranberry Pear Tart with Walnut Shortbread Crust

Who wants an insanely easy but totally delicious dessert that will get you through the fall/winter festivities? Might I introduce you to this little beauty?


It's got a pat-in-the-pan crust, filling chopped in a food processor and a whole lot of personality!

You may have noticed I've been doing a lot of cooking from Fine Cooking magazine lately. They're definitely my new favourite!

Mmm. Macro-licious!

Follow the link for the recipe! 


Saturday, September 11, 2010

The Return of Monday Nights with Kat

You know what's awesome? Sleeping for 10½ hours. I can feel my sanity returning!

In spite of the lack of Bachelor/Bachelorette on tv right now, Kat and I have restarted our Monday night cookery fun. We had double fun last Monday because it was Labour Day! That meant we could get to work around 3.

Have I mentioned how much I love just sitting in the kitchen chatting over tea?

I love it. Like, seriously.

We had three killer recipes that night, beginning with Roasted Garlic, Sun-dried Tomato Chickpea Dip

We easily could have eaten the whole bowl!
From there, we moved on to a Lucy Waverman-inspired dish: Sicilian Quinoa with Roasted Cauliflower. She does hers with pasta and anchovies.

Lucy's version, from her cookbook.
 We replaced the pasta with quinoa, the anchovies with kalamata olives and made the Parmesan optional.

Capers, garlic, red pepper flakes and olives
Seriously, this was AMAZING.

Served on my Nana's china!
Quinoa is such a powerhouse grain and it just worked so beautifully with the salty/briny flavours of the capers and olives and the spiciness of the pepper flakes.

Ingredients:

8 cups small cauliflower florets (1 medium head)
1/3 cup olive oil
Salt and freshly ground pepper
1 cup quinoa
2 tbsp chopped garlic
1 tsp chili flakes
2 tbsp capers
¼ cup chopped kalamata olives
1 tbsp lemon juice
1/2 cup chopped parsley
1/2 cup grated Parmesan cheese
1 tbsp extra-virgin olive oil

Instructions:

Step 1: Preheat oven to 450°F.
Step 2: Break florets into bite-sized pieces and place in a bowl. Toss with 2 tbsp olive oil and season with salt and pepper. Spread on a baking sheet and roast, tossing occasionally, for 10-15 minutes, or until browned and tender.
Step 3: While cauliflower is roasting, bring 2 cups of salted water to a boil. Add quinoa and cook for 15-20 minutes, or until all water is absorbed.
Step 4: Heat remaining 1/4 cup oil in a large, deep skillet over medium-low heat while pasta is cooking. Add garlic, chili flakes, capers and olives and sauté for 3 minutes or until garlic is pale gold and softened.
Step 5: Add cauliflower and lemon juice and cook for 2 minutes, or until cauliflower is heated through.
Step 6: Toss quinoa with parsley, cheese (optional) and extra-virgin olive oil. Stir together with cauliflower until well coated with sauce.

For dessert, we whipped up a Pear-Cranberry Crumble (the recipe was originally for a Pear Cranberry pie with streusel topping, but we opted to dump the pie crust).

Fresh out of the oven
I think the next picture really speaks volumes about how good we thought the dish was.

All gone!

Friday, August 06, 2010

Summer Markets

Wednesday is the day for my local farmer's market, and to tell the truth, today was the first time I've gone all year. My husband and I mozied about last year once, but I just thought it was too expensive at the time. Given the threat of the termination of my employment, it probably was.

I had 15$ in my pocket today, so I decided to flee the air conditioned glory of the front room of my house and brave into the 40 degree heat outside to see what was available.

I spent the 15$.

Purchases:

1 mixed basket of peaches, plums, pears and apricots - 6$
1 pint of heirloom grape and cherry tomatoes - 5$
1 pint of fresh field peas - 4$

Mixed Fruits (crisp pears, peaches, apricots and yellow plums)
Huh. That 15$ went very quickly. Now I just need to figure out what I'm going to do with it.
Related Posts Plugin for WordPress, Blogger...