Showing posts with label cookies. Show all posts

Monday, November 07, 2011

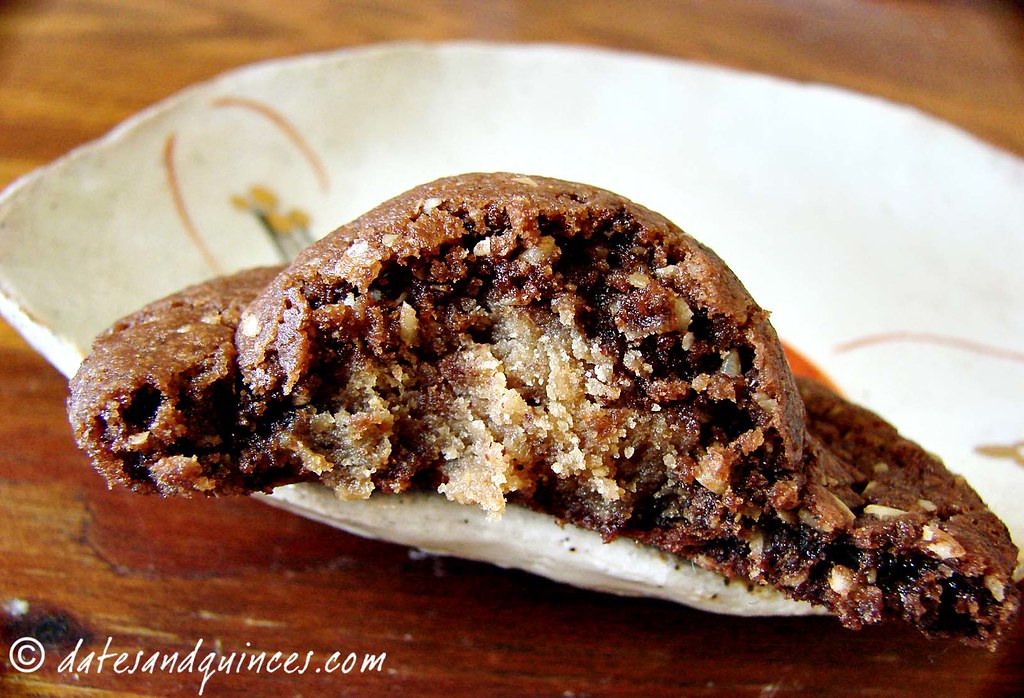
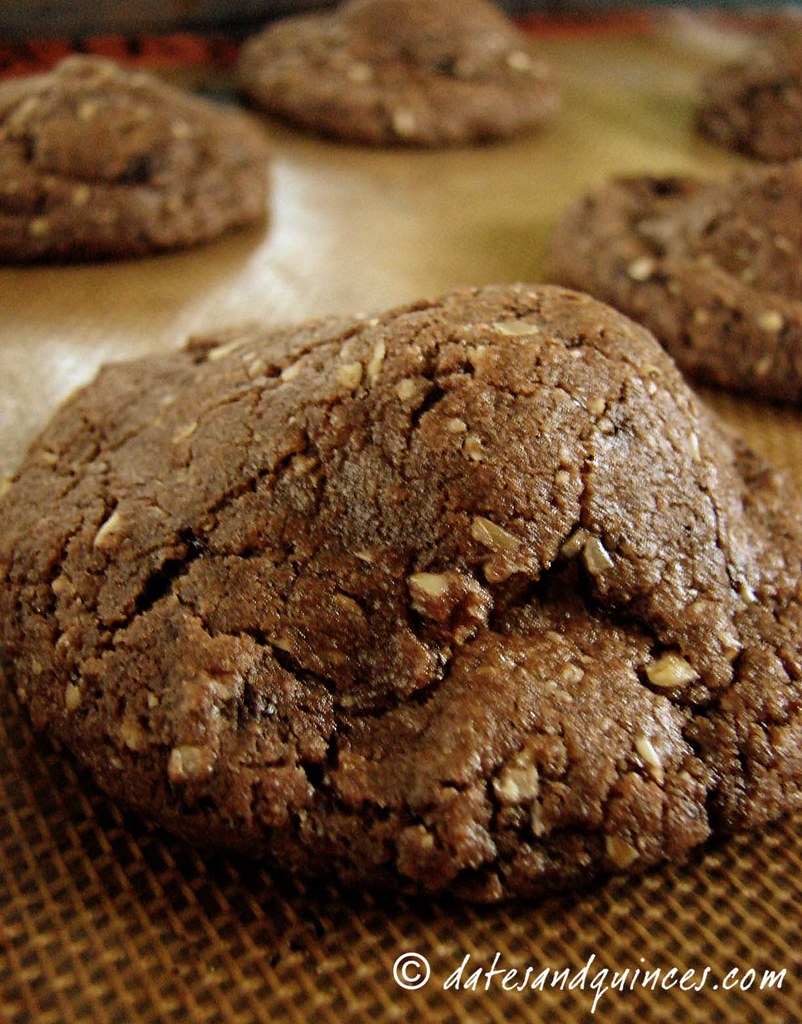
Chocolate PB & J Pillow Cookies

A few months back, I received a shipment of jams and jellies from Uncanny Preserves and I promised Lindsay that I would make something using them.

But... you know... then they were too delicious and I just kept eating the jams directly out of the jars. The chutneys disappeared in a flurry of cracker crumbs and tidbits of cheese.

In spite of myself, I managed to restrain myself from opening the last remaining jar of sweet goodness until a few weeks ago. The blackcurrant jelly sat in my cupboard while I waited for divine inspiration to strike.

And then, voila: in my google reader feed over the weekend I spotted Angela's, from Oh She Glows, peanut butter chocolate cookies (she adapted them from Post Punk Kitchen - another great vegan resource) and I thought to myself, sure you could have chocolate and peanut butter, but what if you took it up a notch and threw in some sweet, tangy blackcurrant jelly.


Oh.

My.

God.

The jelly addition was a revelation. It took a recipe that was good and elevated it to a whole new level by balancing out the sweetness found in the two doughs.

Next time, I'm totally trying this with hazelnut butter and orange marmalade. Can you imagine?


Chocolate PB & J Pillow Cookies

(adapted from Post Punk Kitchen)
makes 24

Ingredients

Chocolate Dough
 
1 cup all purpose flour
½ cup finely ground oats
1/3 cup cocoa powder
¼ tsp salt
½ tsp baking soda
scant ½ cup canola oil
1 cup granulated sugar
¼ cup maple syrup
3 tbsp non-dairy milk (I like almond)
1 oz dark chocolate (72%), melted
½ tsp vanilla

Peanut Butter Filling
 
½ cup natural peanut butter
2/3 cup confectioner's sugar
½ tsp vanilla
2 tbsp non-dairy milk

6 tsp blackcurrant jelly


Directions

1. In a medium bowl, stir together flour and oats. Sift in cocoa powder, salt and baking soda. Set aside. In a large bowl, mix together oil, granulated sugar, maple syrup, non-dairy milk, chocolate and vanilla. Stir dry ingredients into wet. Mixture should form a smooth ball. If not, add additional flour, 1 tbsp at a time. Set chocolate dough aside.

2. In a small bowl, mix together peanut butter, confectioner's sugar, vanilla and non-dairy milk. Mixture should be smooth and malleable.

3. Preheat oven to 350º. Line a large baking tray with a Silpat mat or parchment paper.

4. Divide doughs into 24 balls each, rolling to making a sphere.

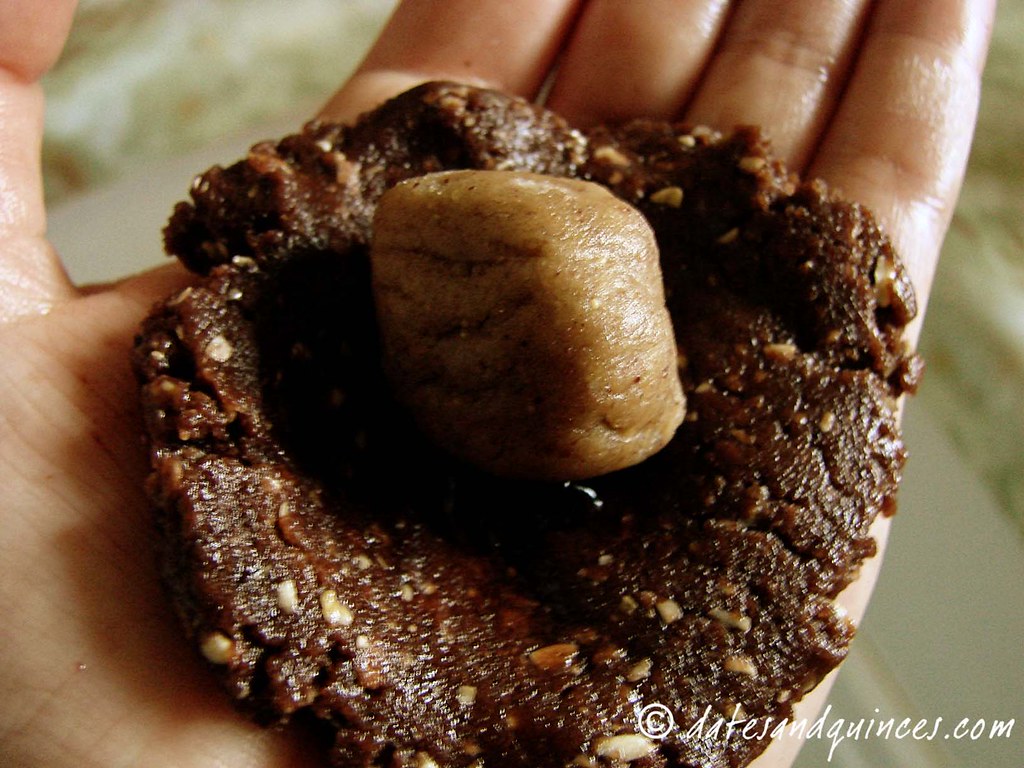
5. Take a chocolate ball and flatten it out to form a circle.


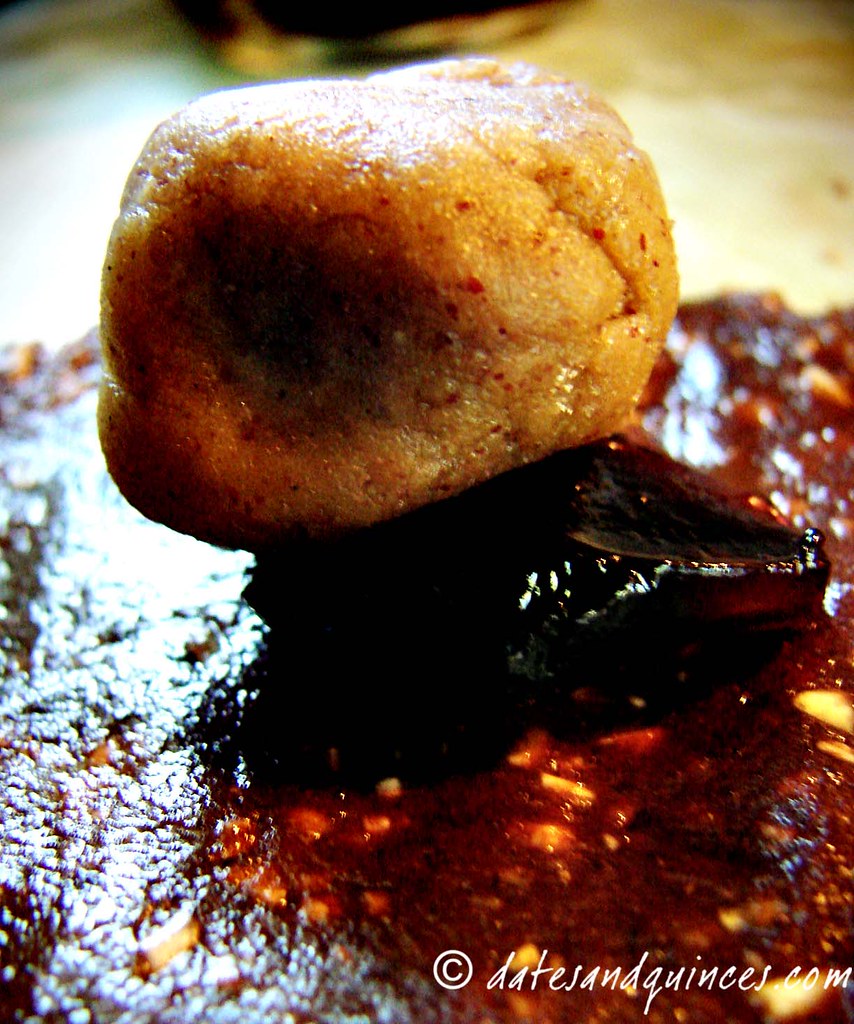
 Place ¼ tsp jelly on the centre of the dough and then top with a peanut butter sphere. Pull the chocolate dough up over the filling and pinch to close.


 You make want to roll (gently!) the ball in your palms to smooth everything out. Repeat with remaining dough and jelly. Bake, 8 cookies at at time (they spread a lot - leave 2" clearance around each) for approximately 10 minutes.


Let cool on pan for 5 minutes before transferring to cooling rack.

Monday, October 17, 2011

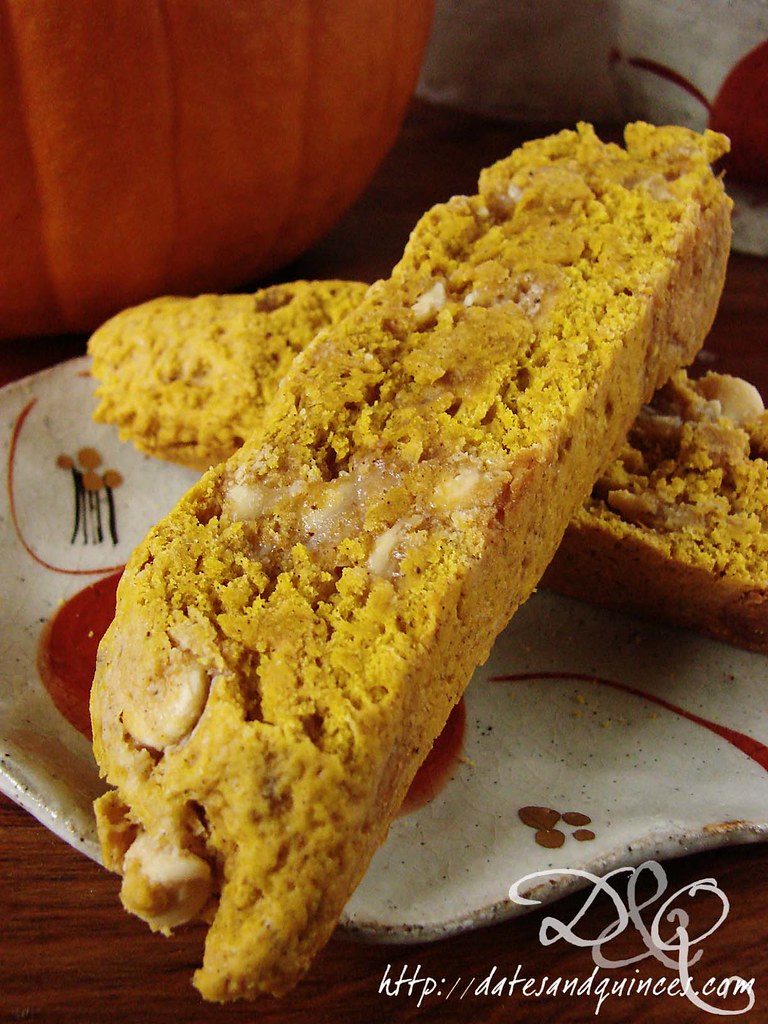
Pumpkin Biscotti with White Chocolate and Ginger

As the leaves fall, this autumn is becoming busier and busier for me. Not only is my infinite pile of marking getting larger by the minute, but my Wednesday & Saturday drama classes have begun (I'm taking my specialist in drama right now), leaving me with less and less time for baking and cooking and, by extension, blogging. So, fair warning, the prolific 5-6 posts a week is definitely going down to 2-3.

It's exhausting. We also had our school's curriculum night last week, so I feel like I've barely seen our apartment since returning from the cottage last Monday.

Our apartment.

We've been living here for just over 4 years now. It was built back in the 1800's as one of the original landowners mansions in Toronto, served as a convent for a while and was transformed again into a 5 apartment unit back in the '70s. When my husband (then-boyfriend) and I did a scouting trip to Toronto back in '07, we spent the first day of our trip looking at soulless concrete highrises off of Yonge.

I was going to be a student at University of Toronto, while my husband had yet to find employment. And although we had the money saved up for rent, no one in any of those soulless, cramped spaces would rent to us.

It was easily one of the most depressing, spirit-destroying days I have ever spent in this city.

But, like most things in life, what originally seemed like disaster turned into a great blessing (also see: moving to Japan, getting into teacher's college, having my first LTO finish early, getting bumped from my high school to my current school), we were SO lucky that no one in those buildings wanted us.

On day two, we stepped back out into the smoggy world of Toronto, and had an early morning appointment for a place in the Annex. For the first time in more than 24 hours, we were walking down tree-lined streets. I felt as though I could breathe again. And then, we were at a huge house. It was set back off the street on a green grassy lawn, with bright, wide windows. And when we stepped inside, we loved it instantly. It felt like home. Those same windows, viewed from the inside, reminded me of the windows in my grandparents' house in Victoria. We signed for it on the spot. Our landlady liked and trusted us enough to rent to us.

We've been really, really happy here. But, as we've grown busier and older (read: have more stuff), we've outgrown our space. At some point in the nearish future, we'd like to have an addition to our family. So, we've known for a while that we'll have to give up this space.

I've been scouring the MLS site for more than a year now. All I can say is that the Toronto real estate market depresses me. The reality is we cannot afford to buy a place that allows us to have the lifestyle we want to live (pedestrian friendly). More to the point, we're not interested in raising a family here. I desperately want to get back to Ottawa within the next 5 years.

So buying can't be an option right now. And the reality of having to move into a lesser quality apartment was looming in front of us.

Then: magic once again. Our next door neighbours on our floor decided that they would be moving out, meaning their 2 bedroom + solarium + wood burning fireplace 1500 sq ft space was up for grabs.

We grabbed it. I'm excited to say we'll be moving the shortest move in the history of moves (approximately 5 feet from our door to theirs) to a flat that is simply spectacular. I couldn't be happier! I intend to get a Christmas tree this year as we'll suddenly have space for it!


This brings us all the way (via the long, windy route) to today's recipe! It's here I made because we're hoping that tonight will be the last showing of our apartment. I hope to entice some awesome new neighbours into the space, who will love it as much as we have (and as much as the tenant before us, who was here 7 years)! And nothing says love me quite as much as the scent of cinnamon, chocolate and pumpkin, right?

I hope you're all warm and cozy in your home tonight!

Pumpkin Biscotti with White Chocolate and Ginger

(adapted from Chatelaine)

Ingredients

2½ cups all purpose flour
½ cup granulated sugar
½ cup packed brown sugar
1½ tsp baking powder
1½ tsp cinnamon
¼ tsp ground cloves
¼ tsp grated nutmeg
¼ tsp salt
¼ cup minced crystalized ginger
2 eggs
½ cup canned pumpkin puree
½ cup unsalted butter, melted
1 tsp vanilla extract
½ cup white chocolate chips

Directions

1. Preheat oven to 300º. Line a large baking sheet with parchment paper or a silpat mat.

2. In a large bowl, stir together flour, sugars, baking powder, cinnamon, cloves, nutmeg, salt and crystallized ginger. In a separate bowl, stir together eggs, pumpkin puree, melted butter and vanilla. Pour wet ingredients into dry and mix until almost combined.

3. Stir in white chocolate chips, until evenly distributed. Divide dough in half. Gently form each half into a log shape, about 15" long and place on prepared baking sheet. Bake in oven for 30 minutes.

4. Remove tray from oven. Reduce temperature to 275º. Let logs of dough sit for 5 minutes. Carefully remove one log from the pan, and, using a serrated knife, slice diagonally into ½" slices. Place, with cut side down back on baking sheet. Repeat with the second log of dough.

5. Return biscotti to oven to bake for an additional 35 minutes, or until dried and crispy. Let cool on rack.

You could glaze these with the spice glaze from the pumpkin scones, if desired.

Saturday, September 17, 2011

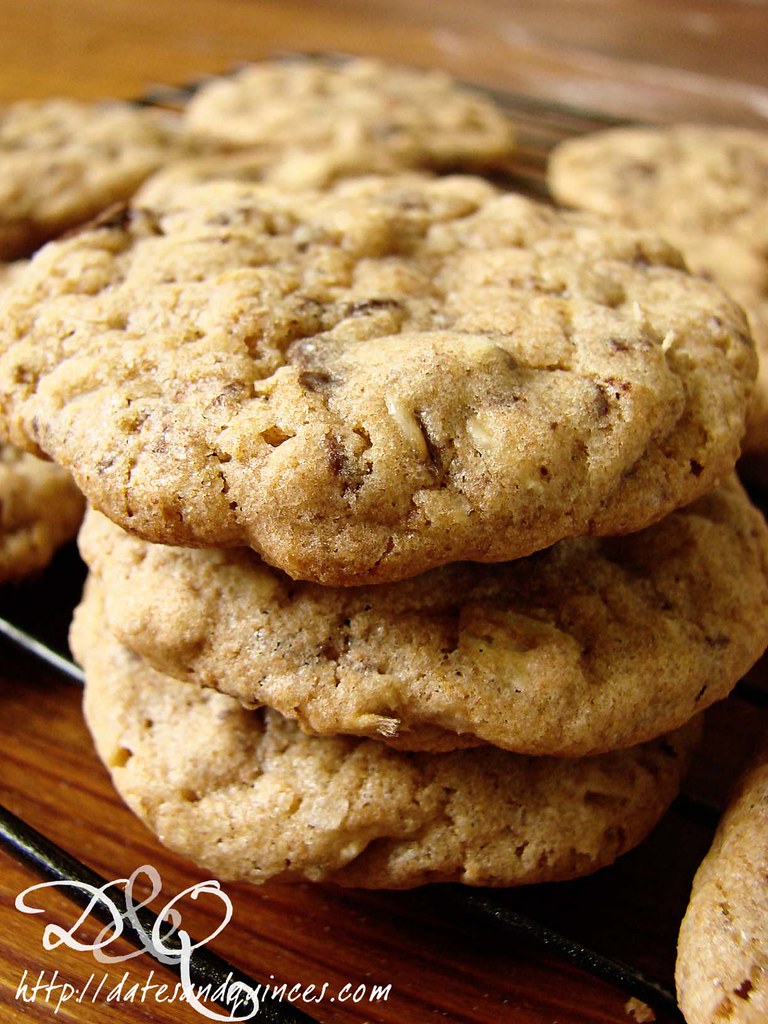
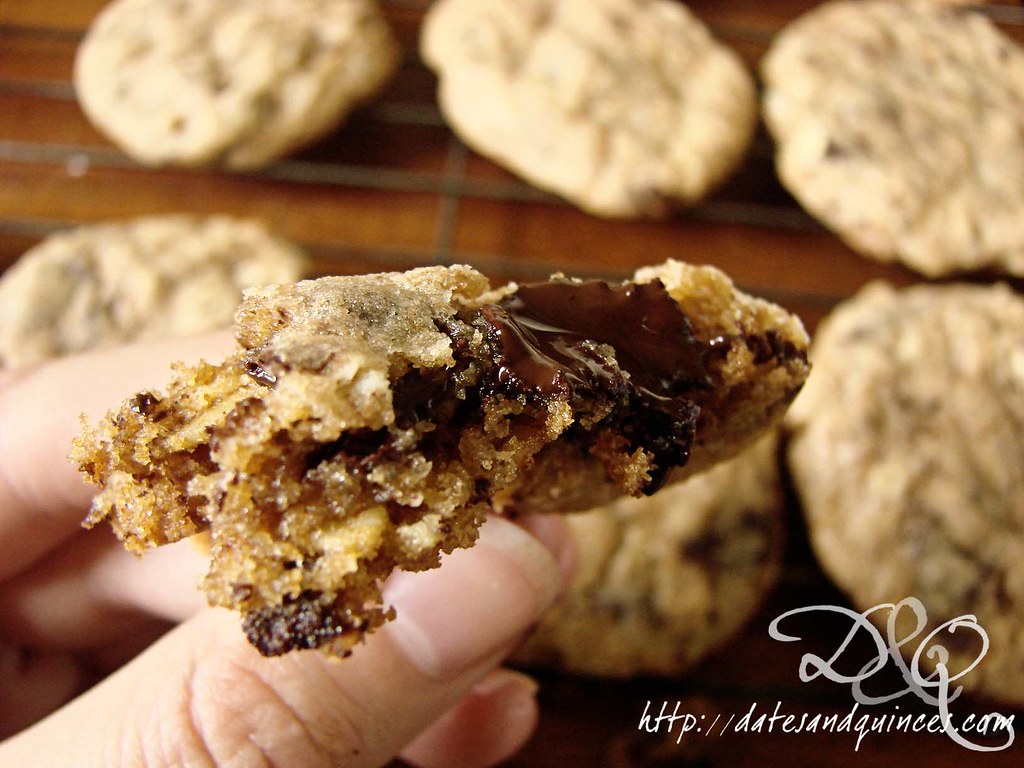
Spelt and Oat Chocolate Chunk Cookies

Most people combat the onset of a cold with vitamin C, chicken noodle soup or a rigorous routine of Cold FX. But, I'm heading into week 3 of the school year (only 185 days left to go), and that means that I'm looking for some real comfort food.

And that means chocolate chip cookies. Or, because I like going big, chocolate chunk cookies.

As someone who worked in a Belgian chocolate shop for 4 years, I firmly believe that chocolate has the ability to heal all illness.


Or at least make you forget that you're sick for the 30 seconds it takes to eat one of these cookies.


NOM.

See? You're feeling better just by looking at these cookies.

Spelt and Oat Chocolate Chunk Cookies

(adapted from So Good and Tasty)

makes 2 dozen

Ingredients

½ cup granulated sugar
½ cup packed brown sugar
1/3 cup butter, softened
1 egg
1 tsp vanilla extract
½ tsp baking soda
1¼ cups spelt flour
½ tsp kosher salt
½ cup (heaping) coarsely chopped good quality chocolate (about 80 grams or 3 oz)
½ cup oats (not instant)

optional ad-ins: 1 tbsp grated orange zest, 2 tbsp minced crystallized ginger, ¼ cup chopped nuts

Directions

1. Preheat oven to 300º. Line a large baking sheet with parchment or a silpat mat.

2. Cream together butter with sugars. Beat in egg and vanilla extract. In a separate bowl, mix together baking soda, spelt flour and salt. Mix dry ingredients into wet. Stir in chocolate chunks, oats and any optional ingredients.

3. Drop by tablespoons onto baking sheet, at least 1" apart. Bake for 12-15 minutes or until edges are lightly browned. Remove baking sheet from oven and let cookies cool on sheet for 2-3 minutes before transferring to a cooling rack.


Thin, chewy and oh-so-delicious. Plus, the spelt flour adds a nice nutty undertone.

Thursday, May 19, 2011

Toasted Coconut Macadamia Nut Cookies with White Chocolate

This summer, Phil and I are going on vacation in Hawaii - we'll be escaping on our own in Kauai for a bit before joining my parents at the condo they've rented in Kauai and then we're all going back to Maui.

I've been dreaming of this:

View to Kahului from the Waihe'e Ridge Trail

and this:

Eggs Benny /w Portugese Sausage and Coconut-Pineapple Pancakes at the Hula Grill Waikiki

And the trees at the Kahana Village (I took this picture from my seat at dinner the night before my husband and I were married:

Add caption
And most of all the water. God. I love the water.

Kahekili Beach, Maui
All the thinking and dreaming of my summer vacation has me salivating for island food. So, riffing off of the vegan brownie bites I did last week, I played around and came up with this recipe. The coconut oil just called for more coconuty goodness, you know?


Toasted Coconut Macadamia Nut Cookies with White Chocolate

Ingredients

1 cup oatmeal
1 cup flour
½ cup brown sugar
¼ tsp baking powder
¼ tsp baking soda
½ tsp kosher salt (if you're feeling adventurous, replace the salt with 1½ tsp white miso! Inspiration here.)
1/3 cup almond milk (or any non-dairy milk)
2 tbsp maple syrup
1 tbsp ground flax seeds
1/3 cup coconut oil
1 tsp vanilla extract

¼ tsp coconut extract

¼ cup chopped toasted macadamia nuts
¼ cup toasted flaked coconut
¼ cup coarsely chopped white chocolate (use dried pineapple or mango if you want to make these vegan)

Directions

1. Preheat oven to 350º.

2. In a large bowl, stir together first 6 ingredients (oatmeal through salt). In a separate bowl, mix together wet ingredients (milk through extracts). Pour wet ingredients into dry and stir, just to combine. Stir in chopped hazelnuts and coconut and white chocolate.

3. Divide batter into 20 balls (roll with your hands), and place on parchment lined baking sheets about 1" apart. Bake for 12 minutes. Do not overcook these! You want them to be nice and chewy.

4. Remove from pan and let cool on rack. Keeps in an airtight container for 3-4 days.

Sunday, April 03, 2011

Cherry Chocolate Oatmeal Cookies

It's got all the ingredients of a healthy recipe!

Dark chocolate? Good for you in moderation (the whole recipe contains 2 oz)

Dried cherries? Fibre and antioxidants!

Oatmeal? Good for lowering the blood pressure.

Maple syrup? Lots of great nutrients.

The fact that it's a cookie? Well, that's just pure awesome. Truthfully, I was sold at the words chocolate and cherry.


Cherry Chocolate Oatmeal Cookies

(adapted from Cooking Light)

Ingredients

2/3 cup all purpose flour (you can replace this with whole wheat, if you prefer)
1½ cups rolled oats (not instant)
1 tsp baking soda
½ tsp salt
6 tbsp unsalted butter
½ cup packed brown sugar
¼ cup maple syrup
1 tsp vanilla extract
1 large egg, lightly beaten
1 cup dried cherries, chopped
2 oz 70% dark chocolate (the better the quality, the less you need!), chopped into chunks

Directions

1. Preheat oven to 350º.

2. In a large bowl, mix together flour, oats, baking soda and salt. Set aside.

3. Melt butter in a small saucepan set over medium heat. Once melted, remove from heat and add brown sugar and maple syrup. Stir until sugar is dissolved. Stir in vanilla extract.

4. Pour butter mixture over oat mixture. Using an electric mixture, beat until just combined. Add egg, beating again to combine. Stir in cherries and chocolate, mixing thoroughly.


5. Drop by teaspoonfuls onto a silpat or parchment lined baking sheet, leaving 2 inches between cookies. Bake for 11 minutes. Remove from heat and let cool on baking sheet for 3 minutes (until just about set) before transferring to a cooling rack.

Makes about 3 dozen!

I think it would be really tasty to replace the dried cherries with dried pineapple or mango or papaya and use white chocolate in place of the dark. Heck, a few chopped macadamia nuts wouldn't go amiss either!

Sunday, March 13, 2011

No-Bake Granola Cookies

There are times when I crave sugar. My husband calls those days weekdays. But, for Lent, I gave up all things candy and so, I'm left with a sugar void.

I may have given up candy, but I haven't given up cookies. Especially ones that are made from that healthy, no-added fat granola. I won't lie, these aren't healthy cookies, but they aren't as bad for you as they could be.

And really, who cares? They're delicious, plus you get to use up leftovers!


 I whipped up a fresh batch of this stuff yesterday, opting for a tropical variation.


For the orchard fruits and nuts, I swapped just about everything out and used dried pineapple and mangoes, a bit of candied ginger, some pumpkin seeds and some chopped macadamia nuts. I used ¼ cup of maple syrup and ¼ cup of coconut milk. And, because I used the coconut milk, the whole thing took about 35 minutes to cook, in order for the excess liquid to evaporate.

It's not as colourful a granola as my last batch, but man, is it tasty!


I also lucked in to some huge coconut flakes, which really makes a difference in texture. Ultimately, you can use whichever granola you happen to have on hand, but, given the amount of sugar used to bind these cookies together, I recommend using a granola with minimal sweeteners!

No Bake Granola Cookies

(makes about 20)

Ingredients

¼ cup butter (or Earth balance buttery spread to make this vegan)
¼ cup milk (dairy, coconut, soy, rice, almond - your choice)
2/3 cup sugar
¼ tsp vanilla extract
¼ tsp coconut extract*
2 cups granola

* if you're not using a granola with a prominent coconut flavour, you may wish to replace the coconut extract with almond extract, or remove it all together and have ½ tsp of vanilla extract instead.

Directions

1. Melt butter with milk and sugar in a saucepan over medium heat. Bring to a boil, and let boil for 1 minute. Remove from heat and stir in extracts.

2. Stir in granola, mixing thoroughly to coat. Drop by heaping tablespoonfuls onto a parchment lined baking sheet. Dip fingers in water and pat into desired shape. Let cool on baking sheet.


There's no need to aim for perfection here! Aim for free form shapes, I say.

Tuesday, February 22, 2011

Coconut Thumbrint Cookies with Mango-Ginger-Lime Jam

Last week, my friend Lindsay sent me a couple of jars of her preserves: a raisin chutney (yum! I have a cheese platter calling its name) and a mango-lime-ginger jam of her own creation.


Now, I love tropical flavours, and I adore mango, so I was super excited to try it out.

And, it was delicious. As always.

But, if you're simply eating your preserves on toast, you're really missing out on half the fun of a jar of great jam. I was in a baking mood and knew that I wanted something tropical but easy. Thumbprints seemed to be the way to go.

Seriously, I think this recipe came together in about 10 minutes.


Coconut Thumbprint Cookies with Mango Lime Ginger Jam

Ingredients

½ cup unsalted butter
½ cup sugar
1 tsp vanilla
1 egg yolk
1¼ cups all purpose flour
¼ tsp salt
1 egg white, lightly beaten
1¼ cups flaked coconut (I used unsweetened)
¼ cup jam

Directions

1. Preheat oven to 300º. Line a baking sheet with parchment paper or a silpat baking mat.

2. Cream together butter and sugar. Once light and fluffy, add in vanilla and egg yolk. Blend. Then add in flour, mixing until combined.


3. Roll the dough into 20 balls and place on baking sheet. These cookies won't spread too much, so you don't need too much room between them.


4. Place beaten egg white in one shallow dish and coconut into another. Working with one ball at a time, roll dough first into egg white, then into coconut. Place each back onto the baking sheet.


Once all balls are covered with coconut, make an indent in the centre of each, using your thumb (hence the name thumbprint cookies). This little well will be where you put the jam.


5. Spoon ¼-½ tsp jam into the well of each cookie. Be careful not to overfill the centres; you don't want the jam to leak out all over the cookie sheet. It has a tendency to burn then.


Take a moment to admire all those cookies with jewel-like toppings. You're a genius!


6. Bake in oven for about 25 minutes, or until just lightly golden and firm to the touch. Because we have a temperamental oven, I started keeping a close eye on mine at about the 20 minute mark and they were finished at 27 minutes. Remove to rack and let cool.


Serve with tea and try not to eat too many at once!

Thursday, December 02, 2010

Christmas in the air!

Can anyone else feel it? We have lights up down a few of my school's hallways. I'm drinking mint tea and wearing long cardigans. The kids keep saying that the new versions of the national anthem that we've been playing all sound like Christmas carols.

I'm really excited about this weekend for a few reasons:

This past weekend, while I was making sponge toffee, Phil whipped up a really delicious spiced chocolate shortbread recipe. While we both really liked it, we agree that a little more spice would be nice.

Spiced Chocolate Shortbread Pyramids

(Canadian Living)

Ingredients

6oz oz(170 g) bittersweet chocolate, chopped
1 cup (250 mL) butter, softened
1/4cup (50 mL) granulated sugar
1-1/2 (7 mL) vanilla
2-1/4 (550 mL) all-purpose flour
1/4  (50 mL) cornstarch
1 tsp (5 mL) cinnamon
1/2tsp (2 mL) pepper
1/2tsp (2 mL) ancho chili pepper
1/4  (1 mL) salt

Topping:

2 2oz oz(57 g) (57 g) bittersweet chocolate, melted

Preparation:

In heatproof bowl over saucepan of hot (not boiling) water, melt chocolate, stirring occasionally. Remove from heat; let cool.

In bowl, beat butter until fluffy; beat in chocolate until smooth. Beat in sugar and vanilla. In separate bowl, whisk together flour, cornstarch, cinnamon, pepper, ancho chili pepper and salt ; stir into chocolate mixture

On parchment paper, shape half of the dough into 10-inch (25 cm) log. Repeat for second log. Wrap and flatten to create triangular logs. Refrigerate until firm, about 2 hours, reshaping logs if necessary. (Make-ahead: Freeze in airtight container up to 3 weeks.)

Cut logs into generous 1/4-inch (5 mm) thick slices. Arrange, 1 inch (2.5 cm) apart, on parchment paper–lined baking sheets. (If dough softens, freeze for 15 minutes.)

Bake in 325°F (160°C) oven until firm, about 20 minutes. Let cool on pans on racks for 2 minutes. Transfer to racks; let cool completely.

Topping: Using piping bag or fork, drizzle cookies with chocolate; refrigerate until set, about 30 minutes.

Picture to come later today!

Friday, November 26, 2010

A Video After My Own Heart


Sometimes, when I see cookies, I stuff them in my mouth a la Cookie Monster.

True story.

Thursday, November 25, 2010

My cupcakes bring all the boys to the yard...

The teacher in charge totally should have charged 2$ for these bad boys instead of 1$. They were awesome and sold out in 2 minutes. Literally.

Why?

Because they're Cookies'n'Cream Cupcakes.

You can't see it, but there's an oreo cookie half on the bottom!
Cream cheese frosting! Chopped oreos in the batter! Sweet vanilla cake! You can't go wrong.

I got the recipe off of Annie's Eats and adapted it to suit my purposes (did a half recipe, using 2 egg whites for the 3 called for and made 16 cupcakes instead of 12). My icing did NOT, in any way, shape or form, whip up as hers does in her pictures, but...meh! (I guess that means you could go wrong) They were still very tasty.

And 13 year olds don't have the most sophisticated palettes.

Mmm. Nom. Nom. Nom.
You know you want one!

Monday, November 01, 2010

Pumpkin Chocolate Chip Cookies

If I haven't mentioned how lucky I am to have the husband I do, let me be the first to say it: I'm very lucky. My neck has been in so much pain for the past 48 hours and it's been giving me a huge headache all weekend long. Phil knew I wanted to make pumpkin chocolate chip cookies, and so stepped up to the kitchen aid to tackle it for me!

He's a handsome bloke, isn't he?
Pumpkin Chocolate Chip Cookies

½ cup butter, softed
1 cup granulated sugar
½ cup brown sugar
1 egg
1 cup pumpkin puree
1 tsp vanilla
2½ cups flour
1 tsp baking powder
1 tsp baking soda
1 tsp salt
zest of one medium orange
1½ tsp cinnamon
1 1/8 tsp nutmeg
¼ tsp ginger
1/8 tsp ground cloves
1 cup chocolate chips

Preheat oven to 350º.

Cream together butter and sugars, then beat in egg, pumpkin and vanilla.

In a separate bowl, whisk together the remaining ingredients, except chocolate chips. Gradually add to wet ingredients in 3 additions. Stir in chocolate chips.

I love my man in the kitchen!

Drop batter by teaspoonfuls onto a baking tray and bake for 15 minutes. Cookies should be puffed and golden. They don't spread too much.


I really enjoy the puffiness of these cookies. If I still drank milk, I'd definitely want a glass of it with these!


And here's to the chef!

Aw, he's got a heart cookie!
Sickeningly sweet, huh?
Related Posts Plugin for WordPress, Blogger...