Showing posts with label vegetarian. Show all posts

Friday, October 21, 2011

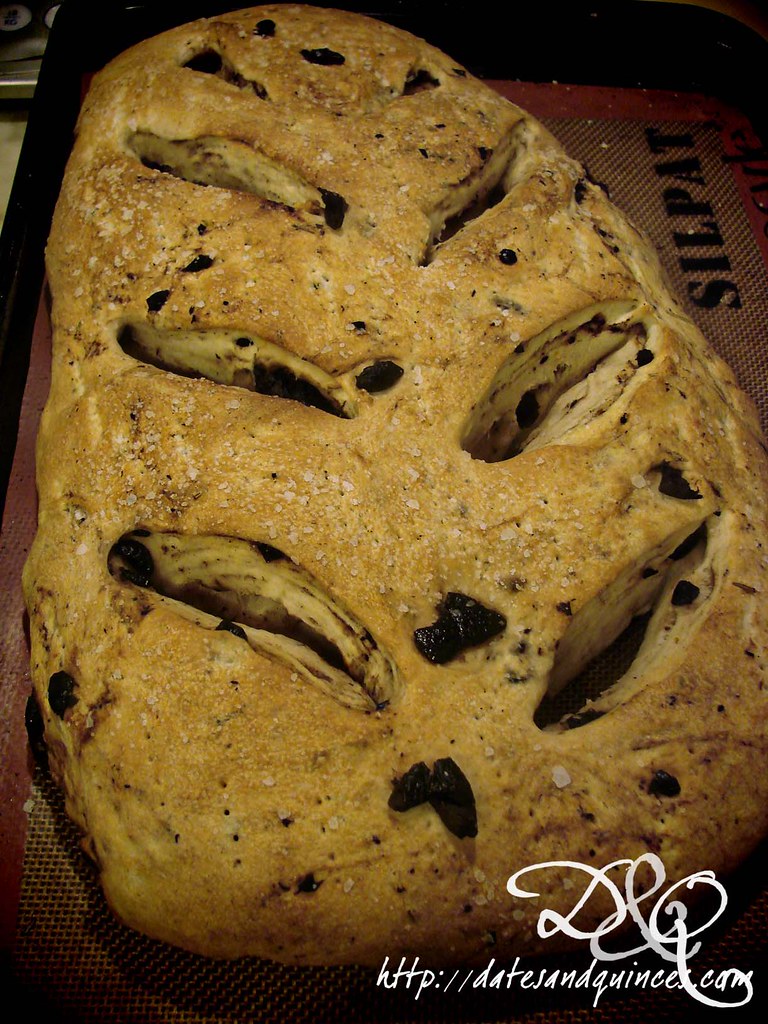
Dorie's Provençal Olive Fougasse

It's been one of those weeks where I start to consider bringing a paper bag everywhere I go, just, you know, so I can deal with all of my hyperventilating. We're gearing up for both Hallowe'en and Remembrance Day at school (although, we've been banned from using the word Hallowe'en) - both of which were things I didn't involve myself in before, but as one of teachers attached to the student council, I'm involved in all of their activities this year, And, since my drama class was doing the bulk of the work for Remembrance Day, I decided that it was easier and less stressful for me to manage the whole thing.

We'll see if that thought holds true.

We also got news that we'd have a news crew at our school for the Remembrance Day assembly, so the pressure is on!

I used to find the stretch between Thanksgiving and Christmas to be the longest and most painful to teach, but being so busy this year is making the time fly by too quickly. I never thought I'd hear myself beg for more weeks of school, but I could definitely do with some extra days.

Alas, my own schooling is taking up a ton of my time. We had both Saturday and Wednesday classes this week, so I'm thoroughly looking forward to a weekend that's longer than one day. I will say that, if I have to be in school on top of working, there's no place I'd rather be than taking drama. Yesterday I realized how sad I'll be to have this drama class be my last at the university/teacher's college level. It's nice to meet new people, learn lots and bond in a short period of time!

Knowing how little time I'd have to myself this week, I made some bread on Sunday with the intention of munching on it throughout the week. I returned Mario Batali's Molto Italiano to the library and took out Dorie's Around My French Table, and was immediately taken with her recipe for Provençal Olive Fougasse.

You've probably noticed my love of dough by this point (bread is so easy to make, and everyone is terribly impressed when you do it because they think it's hard) and my love of olives means that I spend way too much on Whole Foods' olive bar... I wish I could quit it, I really do. They're just so bloody tasty.

Turning bread into shapes (other than little round buns) isn't something I'd tried before. Fougasse typically has slashes through it to make it resemble a leaf. Again, easily done, and it makes the bread dead easy to pull apart.


You can find the recipe and directions here. I made absolutely no adjustment to the recipe, though next time, I'll go for the orange rind instead of the lemon, I think. And, I'd love to try this out with green olives too.

Friday, September 30, 2011

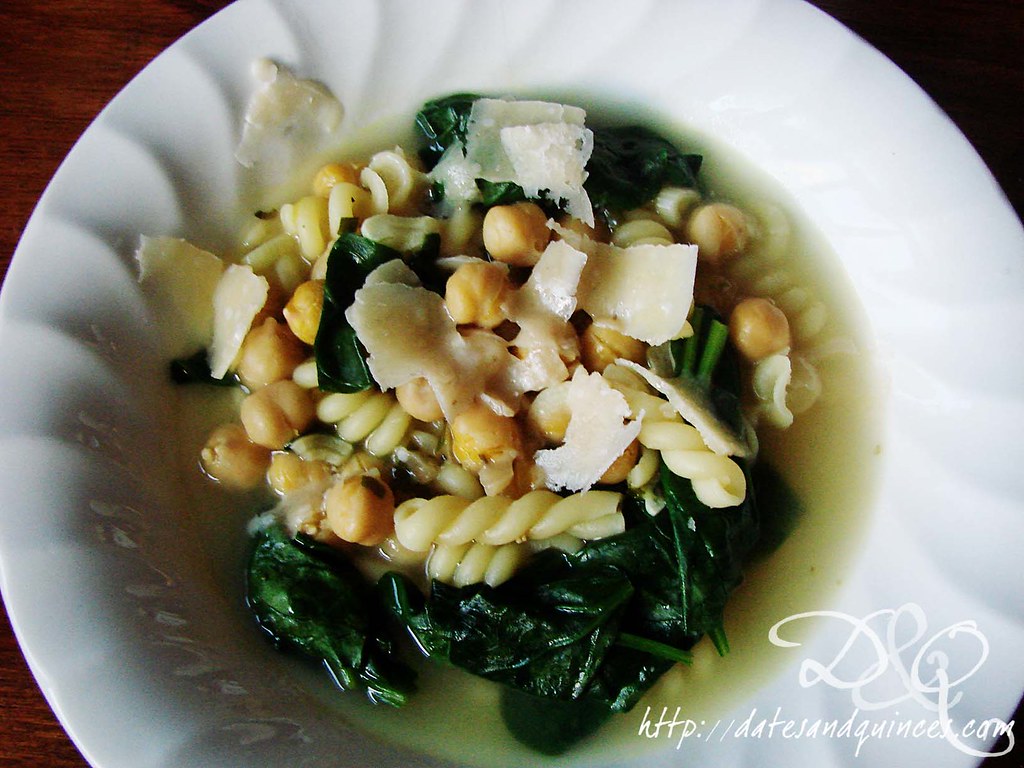
Cooking Light's Spinach & Chickpea Soup

All the credit for this recipe has to go to my husband, who whipped this up the other day while I was running late from work (workshop on IEP writing, if you must know). It's a really beautiful, easy dinner that I think will go into rotation as my comfort food on dreary, rainy days.


The lemon juice and zest keep the soup light and fresh, while the spinach adds colour and the pasta brings substance.

Plus, you've got to love anything that's ready in about 20 minutes!

Cooking Light's Spinach & Chickpea Soup

(source) serves 4


Ingredients

2 tsp canola oil
2 green onions, sliced
1 tsp dried oregano
4 cups vegetable or chicken stock
2 cups water
1 tbsp lemon zest
1 15oz can chickpeas, drained and rinsed
3/4 cup pasta of your choice
1 tbsp fresh lemon juice
5 oz baby spinach
½ tsp ground black pepper
shaved Parmesan


Directions

1. Heat canola oil in a large saucepan. Sauté onions and oregano for two minutes. Add in stock and water and bring to a boil. Add in zest, chickpeas and pasta, cover and continue boiling for 10 minutes. Test pasta for doneness. Stir in lemon juice, spinach and black pepper. Serve with Parmesan shaved on top.


Monday, September 19, 2011

Spiced Sweet Potato & Carrot Soup

Okay, I might have been exaggerating slightly when I said that chocolate cures all illness. There's definitely a place in my cold-fighting repertoire for vitamin C rich food.

And soup. And the combination of vitamin C therewith.

Can you tell that I haven't quite been healed yet? Can you hear my sniffling through the computer screen?


This makes a ton, so you'll have lots on hand in the freezer for emergency cold-fighting power (you know, should you be out of your first line of defence). If you want to keep things vegan, omit the yogurt and use olive or canola oil in place of the butter.

Spiced Sweet Potato & Carrot Soup

Ingredients

2 tbsp butter, divided
1 medium onion, chopped
¼ tsp ground cinnamon
¼ tsp ground nutmeg
2 large sweet potatoes, peeled and chopped
3 cups chopped, peeled carrots
3½ cups vegetable or chicken broth
3 cups water
1/3 cup plain yogurt, plus more for serving (optional)
salt and pepper to taste
2 tbsp parsley, minced

For added flavour, add one of the following: 1 tbsp orange zest and ½ cup orange juice (remove ½ cup water), ½ tsp curry powder, 1 tbsp freshly grated ginger

Directions

1. Heat 1 tbsp butter in a large dutch oven. Add onions and sauté until translucent and soft, about 4 minutes. Push onions to side of pan. Add remaining 1 tbsp butter to the center of the pan and let milk solids brown. Once browned, stir in cinnamon and nutmeg and stir just until fragrant.

2. Stir in potatoes and carrots, tossing to get butter over all the vegetables. Then pour in broth and water. Bring to a boil, reduce heat and simmer until vegetables are tender, about 35 minutes. Purée in batches in a blender or with an immersion blender. Check seasoning and add salt and pepper to taste. Stir in yogurt, if using, and serve in deep bowls with an additional dollop and a sprinkling of parsley.

Wednesday, September 14, 2011

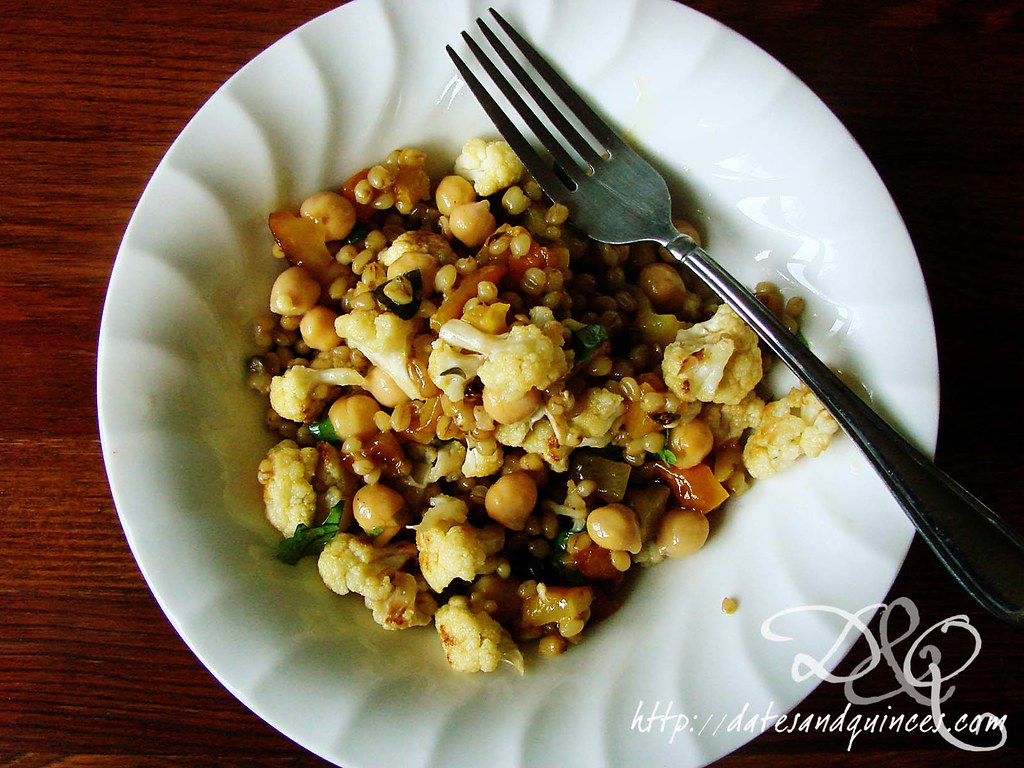
Roasted Cauliflower, Chickpea & Wheat Berry Toss

There are never enough hours in the day to get everything done. It feels like the instant my head hits the pillow, I'm already asleep. And when I wake up in the morning, I'm bleary eyedly stumbling towards my coffee.

So I'm all about getting as much shut-eye as possible. And that's where easy lunches come into play.
I refuse to give up sleep to prepare food, so I always put my lunch together the night before. Leftovers play a big part in what I eat for lunch, so I'm always looking for meals that are brown bag approved. To me, that means if I have to use cutlery to eat it, I'm only required to use a spoon OR a fork. And, preferably, it can be eaten at room temperature without causing too much of a mess.

If you've been reading the blog for a while, you know that I have a deep and abiding love affair with legumes - and the mixture of legumes and grains always strike me as a perfect combination of ingredients for a packed lunch.


This recipe was adapted from the fabulous blog No Recipes. I tarted mine up with more ingredients and reduced the oil but, I must say the dressing is just killer! I hesitate to say it, but it was even better day two.

Roasted Cauliflower, Chickpea and Wheat Berry Toss

(lightly adapted from No Recipes)

Ingredients

2 cups uncooked wheat berries
1 head of cauliflower, stalks discarded and florets cut into bite sized pieces
1 tbsp olive oil
2 red peppers, roasted, peeled, seeded and diced
1 15 oz can chickpeas
1 tbsp capers, drained and rinsed
3 tbsp parsley, chopped

dressing

3 tbsp olive oil
1 tbsp truffle oil (if you have it, if not, use some more olive oil)
2 tablespoons sherry vinegar
1 tablespoon honey
2 tsp sesame oil
1 teaspoon dijon mustard
salt and pepper to taste

Directions

1. Cook wheat berries according to manufacturer's directions. When finished cooking, place in a large bowl.

2. Preheat oven to 400º. Toss cauliflower florets with olive oil and place on a large baking tray. Bake for 20-30 minutes, or until lightly browned, stirring once or twice. Add to wheat berries. Stir in peppers, chickpeas, capers and parsley.

3. In a separate bowl, whisk together all ingredients. Pour over wheat berry mixture and toss to coat.

Tuesday, August 16, 2011

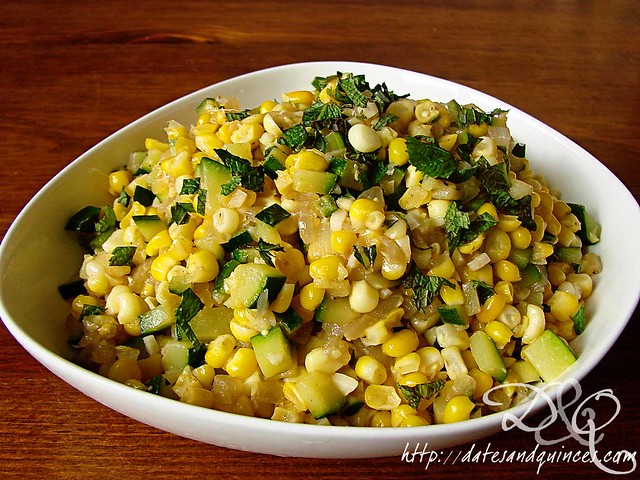
Corn Sauté with Sweet Onion and Zucchini

This is resoundingly one of my go-to August dishes. It's safe to say that it's my mother's too, because she called me asking for the recipe just as I was whipping this up.

It's best with fresh corn on the cob, so make it up while the corn is fresh!


It serves 4 as a side dish, but my husband and I have been known to just chow down on it alone for dinner.

Corn Sauté with Sweet Onion and Zucchini

(lightly adapted from Fine Cooking)

Ingredients

1 tbsp butter, divided
½ tbsp olive oil
1 tsp kosher salt, divided
1 medium sweet onion, finely diced
1 medium zucchini, finely diced
2 heaping cups fresh corn kernels, cut from about 4 ears
2 cloves garlic, minced
½ tsp ground corianger
½ tsp ground cumin
juice of ¼ lemon
3 tbsp chopped fresh mint
freshly ground black pepper

Directions

1. In a dutch oven or very large skillet, melt ½ tbsp butter with ½ tbsp olive oil over medium-low heat. Add in onion and ½ tsp salt. Cover and cook for 5 minutes, stirring occasionally, until onion is translucent. Remove heat and cook, stirring occasionally, for an additional 3 minutes, until onion is beginning to brown. Add in zucchini, and continue cooking until zucchini begins to shrink and lose some of its moisture, about 3 minutes more.

2. Add in remaining ½ tbsp butter, corn kernels, garlic and remaining ½ tsp of salt. Cook, stirring frequently until corn becomes bright, tender and caramelizes slightly, about 5 minutes. Add in coriander and cumin and cook for 30 seconds, until fragrant. Remove pan from heat. Stir in lemon juice and 1 tbsp mint. Let sit for 2 minutes, then add in black pepper and additional salt to taste. Serve with additional mint sprinkled on top.

Tuesday, August 09, 2011

Pineapple Cucumber Salsa

I've got a bottle of Wailua Wheat Beer sitting by me as I write this from the lanai of our condo at the Kahana Village on Maui. Isn't that how all days on the islands should end?

When we left Kauai today, both Phil and I were feeling kind of bummed. We've passed the halfway mark of our time here and *only* have 5 nights left before the long haul back to Toronto.

Wah. Wah. Wah.

I feel like a huge baby for admitting that. What I should be saying (and am saying now) is: we have five nights on Maui, and we're going to enjoy every minute of it. Driving along the highways here made me feel like we were home. We drove past Olowalu, where we got married almost 2 years ago (I waved at the site), picked up some frappuccinos from Bad Ass coffee and grabbed some groceries from Costco (GIGANTIC containers of mac nuts for everyone). I'm so happy right now, I could explode.

For dinner, I wanted something light and fresh. We picked up some opah from Costco. For those of you not in the know, opah is also known as moonfish, sunfish or kingfish.

And it's freaking huge.

We're grilling it up with some pineapple cucumber salsa I just whipped up.


Have I mentioned how happy I am right now?

Pineapple Cucumber Salsa for Fish


Ingredients

1/2 fresh pineapple, peeled, cored and chopped finely
1/2 English cucumber, finely chopped
1/2 red bell pepper, finely chopped
1/2-1 jalapeno pepper, finely chopped (seeds and ribs removed if you're not into heat)
juice of 1/2 lime
1 green onion, minced
1/4 cup cilantro, chopped

Directions

1. Mix all ingredients together in a bowl. Let sit at room temperature for at least 30 minutes to allow flavours to meld.

Wednesday, July 27, 2011

Rich and Creamy Coconut Jelly Squares

Oh, I can taste the tropics just on the horizon. In a week from today, I'll be enjoying the lush green forests and dramatic coasts of Kauai.

And hopefully, I'll be enjoying some coconut based deliciousness along the way! This recipe is made using agar agar, meaning it's suitable for vegetarians and vegans.


It also uses creamed coconut - which you should not confuse with coconut cream! Creamed coconut is the unsweetened, dried flesh of the coconut ground into a paste and then formed into solid blocks (coconut cream, on the other hand, is a liquid.) It adds an intense coconut flavour to dishes and means you don't have to use any coconut extract to amp up that delicious flavour.


Coconut Jelly Squares

Ingredients

1½ cups full fat coconut milk
3/4 cups water, divided
¼ cup creamed coconut (not to be confused with coconut cream)
3/4 cup sugar
4 heaping tsp agar agar powder

Directions

1. In a medium saucepan, whisk together coconut milk, ½ cup water, creamed coconut, sugar and heat until just simmering.

2. In a separate, small saucepan, bring remaining ¼ cup water to a boil. Sprinkle with agar agar powder and let boil for 3-4 minutes, until agar agar is dissolved. Pour mixture into coconut mixture, stir well to combine and simmer for 3-4 more minutes.


3. Rinse a 5"x9" loaf pan with water. Pour coconut mixture into loaf pan and refrigerate for at least 1 hour, or until set. Cut into 1" squares and serve with toasted coconut or your favourite tropical sorbet.


Tuesday, July 26, 2011

The Last to Catch On

Do you ever feel like you're the last person to catch on to a trend? I've been reading about people combining watermelon and feta to make a salad for years now, and only did it myself last night for the first time.


The contrast between the salty feta and the sweet watermelon is dynamite. I through in some chopped parsley, Hawaiian Haleakala sea salt (it's an earthy red), freshly ground black pepper and some olive oil. And voila! Done!

I can see using some mint in there as a great addition too.

Friday, July 22, 2011

Minted Quinoa and Cannellini Bean Salad with Watermelon, Peas & Feta

This recipe was inspired by a Cooking Light recipe that called for farro, watermelon and peas. I was intrigued by the combination, but wanted to make the salad a more substantial meal and balance it out with more salty and tangy flavours.


Quinoa and Cannellini Bean Salad with Watermelon, Peas & Feta

(inspired by Cooking Light)

serves 6

Ingredients

1 cup quinoa
1½ cups water
1 cup freshly shelled peas
1½ cups diced seedless watermelon
1 can cannellini beans, drained and rinsed
½ cup minced parsley
¼ cup shredded mint
1/3 cup crumbled feta
2 tbsp lemon juice
1 tbsp olive oil
½ tsp kosher salt
¼ tsp freshly ground black pepper

Directions

1. Rinse quinoa in a fine mesh strainer, rubbing grains between fingers to remove any residue. Place in a large pot with the water, bring to a boil, then reduce heat, cover and simmer for 15 minutes. Stir in the peas in the last two minutes of cooking time, and replace lid. If peas are not bright green and tender after two minutes, let cook for a minute longer. Remove from heat, drain any excess water off and rinse under cold water.

2. Place quinoa mixture in a large bowl. Toss with watermelon, cannellini beans, parsley, mint and feta.

3. Whisk together dressing ingredients (lemon juice through pepper) in a separate bowl. Pour over quinoa, toss again and serve.

Monday, July 11, 2011

Three Bean Salad with Corn and Red Peppers

Sometimes I think my mother and I are the only people on the planet who love bean salads. There's something so delightfully passé about them. I always associate them with the '80s... Does anyone else?

When I was in elementary school, we had several Canadian Living seasonal cooking magazines, and inevitably the summer ones had bean salads in them. Whenever the teachers had lunch & learn sessions at school, the library would be set up with tons of food with a mandatory gigantic bowl of bean salad. As a kid, I just assumed that they were making bean salads out of the Canadian Living magazines, because that was the logical assumption to make.

I'm all about the logic.

I'd lobby to bring back the bean salad into vogue. It's healthy, filling, fibre rich, and, when done right, colourful. Plus, it makes a quick and easy lunch to bring.


So, now, my go to bean salad recipe is based off a Canadian Living recipe: Red Barn Bean and Corn Salad. It serves 12 and keeps a decent amount of time in the fridge which especially important if you're, like me, not serving 12 people at once.

If you're alone in liking bean salads in your house, be prepared to be eating this for the better part of a week. It makes about 9 cups worth!

But, it's way better than those drenched salads from the supermarket, and you know you love it. So go ahead, grab a gigantic spoon and dig in.

Three Bean Salad with Corn and Red Peppers

(adapted from Canadian Living)

Ingredients

1 14oz can chickpeas, drained and rinsed
1 14oz can black beans, drained and rinsed
1 14oz can red kidney beans, drained and rinsed
½ cup finely chopped sweet onion
1 cup frozen corn, thawed
½ cup celery, chopped
1 red pepper, chopped
1 tbsp dried basil (you can use ¼ cup fresh, if you anticipate no leftovers)
¼ cup chopped fresh parsley

½ cup apple cider vinegar
3 tbsp olive oil
1 clove garlic, minced
1 tbsp Dijon mustard
1 tsp kosher salt
½ tsp freshly ground black pepper

Directions

1. Mix together first 9 ingredients, chickpeas through parsley in a large bowl. Toss well. In a measuring up, whisk together remaining ingredients. Pour over bean mixture, toss well and refrigerate for at least 1 hour to let flavours meld together.


How easy was that?

Sunday, June 26, 2011

Quick Tabbouleh

Tomatoes - specifically raw ones - are one of those things I'm trying to incorporate into my diet more. They've never been something I've really liked to eat, though they're one of my favourite things to try and grow in the garden.

So, when Phil came home with some heirloom cherry tomatoes earlier this week, I knew I wanted to use them in a recipe that would showcase lots of bright, fresh flavours.


Earthy cracked wheat, fresh green onions, parsley, mint and tomatoes form the base of this recipe. Any leftovers the next day can be turned into a lunch time salad when mixed with tuna, chopped kalamata olives and capers.

Quick Tabbouleh

(slightly modified from Cooking Light)

Ingredients

2½ cups boiling water, or vegetable stock brought to a boil
1½ cups uncooked bulgur wheat
1 cup chopped fresh flat-leaf parsley
1 cup quartered heirloom cherry tomatoes
3/4 cup diagonally sliced green onions
¼ cup chopped fresh mint
1 tsp freshly grated lemon zest 
6 tablespoons fresh lemon juice
3 tablespoons extra-virgin olive oil
1 teaspoon kosher salt
1 teaspoon freshly ground black pepper
½ teaspoon ground cumin

Directions

1. Place bulgur in a large bowl. Pour boiling water or stock over top. Cover with plastic wrap and set aside for an hour.


2. Once the hour has passed and liquid has been absorbed, fluff bulgur with a fork. To it add parsley through lemon zest.


3. In a small bowl, whisk together remaining ingredients. Pour over bulgur mixture. Toss gently and let sit for at least 30 minutes to allow flavours to combine. Mixture will keep for 3 days in the fridge.

Monday, June 20, 2011

Cucumber and Radish Salad with Lemon Dressing

I'm so glad the most recent issue of Cooking Light arrived before the postal strike began! It has some great recipes in it.

After all the heavy food (read: fast and deep fried) I ate on the Ottawa-Montreal trip, I've been in serious need of lightening things up. I'm paying off the sins I indulged in at Frites Alors!

It's T-6 weeks until Hawaii, and I'd love love LOVE to drop those 10 pounds that I've struggling with the past 2 months. Plus, one of my students (who we're pretty sure has Aspergers) announced very loudly that I have a "fat ass".

And when even the Aspergers kid notices, you know you've got to take action.

So here I am. Taking some action. Even though I'm not a huge fan of either cucumbers OR radishes, something about this salad spoke to me.


I'm pretty sure it was saying: I'm what your body needs right now. Crunchy. Cold. Vibrant.

I really enjoyed this salad - some fresh dill in place of the parsley would be totally delicious and highly recommended. Plus, although I'm unabashedly trying to lose weight, this salad doesn't feel like deprivation. It feels like the antidote to a scorching summer day.

If you have a mandolin, be sure to whip it out for the radishes and cucumbers. That will make your life SO much easier.

Cucumber and Radish Salad with Lemon Dressing

(from Cooking Light)

Ingredients

½ cup thinly sliced radishes
2 cups thinly sliced cucumber
¼ orange pepper, finely chopped
¼ cup parsley, finely chopped
1 tsp lemon zest
1 tbsp lemon juice
1 tsp apple cider vinegar
½ tbsp olive oil
¼ tsp kosher salt
¼ tsp black pepper

Directions

1. Gently toss radishes, cucumber, pepper and parsley together in a large bowl. In a separate bowl, whisk together remaining ingredients. Pour over cucumber mixture and gently toss again. Let flavours meld in fridge for an hour.


Also, it's a tasty accompaniment for grilled steak, or as a side on some kind of Middle Eastern plate (baba ghanoush, hummus, pita, tabbouleh).

Saturday, June 11, 2011

Wheat Berry and Chickpea Salad

The other night, we had one of my good friends for Ottawa over for dinner. Poor guy is stuck in Cambridge during the week living in a hotel.

I may have forced an experimental ice cream on him.

He only made a few faces.

That's one of the risks of eating chez nous. I tend to want to try things out.

One of the experiments that did work, however, was this wheat berry and chickpea salad.


Like most of my recipes, proportions are guidelines at best. You could add in zucchini, tons of additional herbs, some tomatoes, garlic... the list just goes on and on. And isn't that the best part about recipes anyway? The adaptability?

Wheat Berry and Chickpea Salad

Ingredients

1 cup wheat berries
1 19 oz can chickpeas
1 cup chopped parsley
½ cup finely minced onion (red would be pretty if you have it)
½ cup chopped parsley
1 roasted red pepper, chopped
2 tbsp sherry vinegar
1½ tbsp olive oil
2 tbsp capers, rinsed and coarsely chopped
2 oz crumbled feta (remove for a vegan option)
salt and pepper to taste

Directions

1. Bring 4 cups water and wheatberries to a boil. Reduce heat and simmer for 70 minutes, or until wheatberries are tender. Drain and rinse to stop cooking and place in a large bowl. Toss in remaining ingredients and let sit for at least 30 minutes to allow flavours to come together.


If you're not a fan of raw onion, soak the minced onion in some cold water for 10-15 minutes. This will draw out some of the sharpness and mellow them nicely.

Friday, June 10, 2011

Cooking with Leftover Ingredients

First off, let me say thank you to all who commented here, on my facebook account or on my message boards wishing me good luck with the interview. My name was put forward as the candidate they want, but we're still waiting on approval from the school board. So right now, we're in a holding pattern.

I can deal with a holding pattern for a little while.

A little while.

Now, this recipe relates to impatience.

You know those days when you buy an ingredient but the recipe only calls for some of it, so you end up with some left over that has to be used RIGHT NOW or else it'll go bad.

I had that experience earlier this week with half an avocado. I don't even remember what I used my first half for. But the second half? Oh, yum.

Now, I won't blame you if you run screaming in the other direction right now, but before you do, let me assure you that this is delicious dessert. It has four ounces of the finest dark chocolate, and crushed hazelnuts and hazelnut butter.

With me so far?

It also has... uhm... half an avocado.

What? You couldn't read that? That's okay, just drool over this picture and never you mind what it said.


Frosty, nutty, and deeply, deeply chocolatey. It's an all round winner.

And frankly, if the avocado (yes, avocado) weirds you out too much, replace it with two small bananas.

Dark Chocolate Hazelnut Torte

(inspired by Oh She Glows)

Ingredients

Crust

1 cup whole hazelnuts, toasted and skinned
2 tbsp cocoa powder
1 tbsp coconut oil
2 tbsp maple syrup
1 tsp vanilla extract


Mousse

½ large avocado, pitted and flesh scooped out or 2 small bananas, peeled
3 tbsp soy milk (or other non-dairy milk)
1/3 cup maple syrup
1 tbsp hazelnut butter
1 tbsp cornstarch
1/8 tsp kosher salt
1 tsp vanilla extract
3 tbsp cocoa powder
4 oz dark chocolate, chopped and melted

Directions

1. Line the base of  a small 5-6" springform pan with parchment paper. In a food processor, pulse the hazelnuts together with cocoa powder, until crumbly. Add in oil, maple syrup and vanilla extract. Pour into springform pan and pat in place to create a crust.

2. To make mousse, add all ingredients except melted chocolate to a cleaned food processor bowl. Process until totally smooth and creamy. Add in melted chocolate and process again. Pour mousse onto crust, smoothing the top.

3. Freeze for at least 2 hours to set up. Allow to sit on the counter for 5 minutes before cutting and serving.


Makes 6 small but totally decadent pieces.

Friday, June 03, 2011

Happy Friday with Inari Zushi

Phew, this week couldn't end any sooner! What a crazy time.

I took some students to Peace Tree Day (I was approached by the Harmony Movement to take this on) on Wednesday - they were Peace Tree Spirit presenters, which means they were responsible for teaching 700 kids (ranging from grade 3-8) a multi-cultural fusion dance that they choreographed. They were awesome; we had great weather and only one child put their face into Mel Lastman Square's reflecting pool.

I consider that a success.

Some media coverage of the event can be found here.

Today, I went to the hospital  for my allergy tests. My doctor didn't bother to show up, and on top of that, I'd been told I'd be getting tested that day. Instead it was just a consult. Fantastic.

On the plus side, I sat in the waiting room reading one of my new books from the Penguin Great Foods Collection: A Little Dinner Before the Play, and I think I've found the first recipe I'm going to try for my Penguin Great Foods Challenge: Brioches. Now these appear to be little, sweet breads that ought to be served with marmalade.

I'm excited to try that out this evening!

See why I'm glad the week is over? I did have one big success with a new recipe this week. With all these beautiful days, I've started to really crave Japanese food. There's just something about the arrival of summer that makes me dream of kara age, zaru soba and gigantic purple grapes.

For the past two nights, I've been dying for some inari zushi. We ordered out for some sushi one night, but they didn't have any! So, last night I made it my mission to attempt to make them for the first time in my kitchen.

They certainly didn't look as pretty as I would have liked, but that's in part because I cut them the wrong way. But, they tasted pretty damn good! If I'd had more time, I would have let the tofu sit in the dashi marinade in the fridge overnight before stuffing them. But I was hungry, so perfection was going to have to wait.


Inari zushi is essentially deep fried tofu pockets that you simmer in a soy-sake broth to infuse them with flavour.


Then, you stuff them full of sushi rice (rice seasoned with rice vinegar, sugar and salt). I like to mix my sushi rice with little pieces of chopped pickled ginger and sesame seeds.

Alas, I was out of sesame seeds.

Inari Zushi

(adapted from Washoku)

Ingredients

Sushi Rice

2 cups freshly cooked white Japanese rice
1/3 cup rice vinear
1 tbsp granulated sugar
½ tsp salt

8 slices pink pickled ginger, minced

½ tbsp toasted sesame seeds


For Tofu

4 fried tofu slices (I usually buy abura age)
2/3 cup dashi
3 tbsp soy sauce
1½ tbsp sake
2 tbsp sugar

Directions

1. For rice: Place the freshly cooked rice in a large, wide bowl (you, like me, probably don't have the wooden dish traditionally required for sushi rice). In a measuring cup, stir salt and sugar into vinegar to dissolve. Pour about a tablespoon of the vinegar onto the rice and, using a wooden spoon or paddle, gently cut and fold the vinegar into the rice. Continue adding vinegar in a slowly, until it tastes appropriate and liquid is all absorbed. You may only use 2/3 of the vinegar called for, or you may use it all.

Stir in ginger and sesame seeds.

Cover the bowl with plastic wrap and set aside until ready to use.

2. For tofu: Boil some water in a kettle. Place tofu slices in a strainer and pour boiling water over them. This will help remove some of the oil still clinging to the tofu. Squeeze out excess liquid. Cut tofu in half horizontally, and gently form a pull open the pocket. Mix together dashi, soy sauce, sugar and sake. Heat a nonstick frying pan over medium heat, an sear each side of the tofu (about 1 minute on each side). Pour dashi mixture over tofu and simmer for 3 minutes, turning once halfway through. Remove pan from heat. Place a slightly smaller lid (or a drop lid if you have one) directly on the tofu and let cool to room temperature.

3. Remove tofu from dashi. Gently squeeze out extra liquid. Stuff rice into tofu pockets and serve.

Monday, May 30, 2011

My Favourite Chickpea Salad Sandwich

Most of us, at some point in have had an egg salad sandwich or a tuna salad sandwich or chicken salad. Now, I love a good tuna salad as much as the next person, but sometimes, you just want something with a little more oomph, and a little less slathered in mayo.

Enter Fresh's Chickpea Salad. Smashed chickpeas, carrots, celery, green onions and dill pickle... it's got all the right stuff going on. Pumped up with dijon mustard and honey and a mere tablespoon of mayonnaise (I've recently swapped this out for vegenaise because the latter just tastes SO much better), this is a friendly riff off of a classic comfort food.

Chickpea Salad Sandwich with Avocado and Pea Sprouts

Chickpea Salad 

(from Fresh at Home)

Ingredients

1 19 oz can chickpeas, drained and rinsed
1 large carrot, shredded
1 stalk celery, finely chopped
1 green onion, minced
1 large dill pickle, minced
1½ tbsp dijon mustard
½ tbsp honey (or agave)
1 tbsp vegenaise/mayonnaise
1 tsp lemon juice
kosher salt and pepper to taste

Directions

1. Break up chickpeas in a food processor until coarsely chopped. Alternatively, you can mash them with a potato masher.

2. In a large bowl, mix together chickpeas with remaining ingredients. Mixture will keep for 3 days in the fridge.

Makes enough for 6 sandwiches. I like topping mine with avocado, roasted red peppers and some alfalfa sprouts.

Thursday, May 26, 2011

Oprah's Lentil & Brown Rice Burgers

So, after a weekend of barbecued meat, my husband and I were both ready to get back on the whole grain/legume train. As much as I love the kimchi burgers (which I made again up at the cottage - this time with coarse ground chuck - amazing) and the Huli Huli Chicken, I'm seriously beginning to feel like having meat at every meal slows me down. Heck, even having it 4 nights in a row made me feel sluggish.

I'm guessing about the cause of the sluggishness. It might also be a bit of work burn out, lack of sleep, or general stress about the school year winding down. Perhaps it's unfair to blame the meat.

Whatever the case, veggies and legumes are what we're craving right now, so that's what we're eating. And, in honour of Oprah's last show yesterday, I made the Brown Rice and Lentil Burgers out of the June issue of O Magazine.


Nom. Nom. Nom.

Now, what's interesting about this recipe is that the lentils aren't actually cooked until you throw the patties into the frying pan. That lends a bit more texture to the burgers. My husband devoured two of these last night, they were that good!

Lentil & Brown Rice Burgers

(adapted from O Magazine)

Ingredients

½ cup mixed dried lentils (French, green, red, brown) or standard green lentils
3/4 lb mixed shiitake and cremini mushrooms, trimmed and roughly quartered
2½ tbsp canola oil, divided
½ tbsp soy sauce
½ tbsp miso
1½ tsp kosher salt, divided
½ tsp freshly ground pepper
2½ cups cooked brown rice (I used brown basmati)
2 tbsp flaxseeds
2 tbsp toasted oat or wheat bran
1 tsp dried thyme
1 tbsp minced fresh parsley
3 scallions, minced

whole grain bread or buns
hamburger toppings (we used pea shoots, alfalfa & onion sprouts, romaine lettuce, dill pickle, roasted red pepper and vegenaise, ketchup and ballpark mustard)

if you're not going vegan for this, the magazine recommends sharp cheddar cheese for melting on top

Directions

1. Rinse and drain lentils. Place in a small bowl and cover with water. Let sit covered in the fridge overnight. Drain the lentils and pulse in a food processor until very finely chopped, but stopping short of forming a paste. Transfer to a large bowl and set aside.

2. Wipe the food processor clean and add mushrooms to the bowl. Pulse until very finely chopped. Heat 1½ tbsp oil in a large sauté pan. Sauté mushrooms with soy sauce, miso and ¼ tsp each salt and pepper until liquid is evaporated. Add to bowl of lentils, along with all remaining ingredients (through scallions). Fold together until just combined. Divide into 6 balls and shape into patties, about 1" thick.

3. Working in batches, heat ½ tbsp oil over medium low in a pan. Add half of the patties and cook for about 5 minutes. Once a good crust has formed, gently flip patties over. Cook for another 4-5 minutes, or until golden. Place on a plate in a warm oven to keep hot. Repeat with remaining oil and patties.

4. Serve with whatever toppings make you happy!

Wednesday, May 18, 2011

Chickpea and Swiss Chard with Wheat Berries and Tahini-Lemon Dressing

A couple of weeks ago, I read a post from Cooking Light's facebook page that asked if people did a meatless Monday and, if they did, why they chosen to do it. After reading a lot of the responses (good for the environment, want to cut costs, have been vegetarian for years, their family will only allow them on meal a week that's meatless), I realized that our transition (and by our, I mean my husband and I) into more meatless meals has been less about making a conscious choice. Whenever we make vegetarian or vegan meals, I don't think "I'm going to have a vegetarian or vegan meal", I think "this looks good for dinner, I think I'll go with that".

We've just kind of naturally bent into it. When I think about it, I think this attitude (at least on my part) can be attributed to the parents of an ex of mine who were very much flexitarians. His mother was the first person to introduce me to the joys of eggplant, tomato and black olive stew (a recipe I've since lost, so if you ever read this Penny, I'd love to have it again!) about a decade ago. In their house, it wasn't about the fact that meat was missing from the table, it was about celebrating whatever was there.

And that's where the idea of Meatless Mondays doesn't work for me. There's this implication that some integral part of the meal is missing. I'd say, for us, there is no integral part of the meal. As long as there's protein in there, I don't care if it's black beans or flank steak. If it's prepared right and tastes good, I'm a happy camper. I just don't think we appreciate non-animal forms of protein enough, you know?

You're probably tired of hearing me ramble. Let's get to the point.


This recipe, like yesterday's, was born out of a need to empty out the cupboard and the laziness of avoiding the grocery store.

Chickpea and Swiss Chard with Wheat Berries and Tahini-Lemon Dressing

(adapted from Oh She Glows)

Ingredients

1 cup wheat berries
1 15oz can chickpeas, rinsed and drained
1 tbsp olive oil
1 small onion, chopped
2 cloves garlic, minced
½ pint cherry tomatoes, halved
4 cups sliced washed swiss chard, stems separated from leaves
1 cup washed, stemed spinach leaves
Lemon-Tahini Dressing (recipe below)


Directions

1. Cook wheat berries in 4 cups water (the ratio for cooking wheat berries is 1:4) for 60-70 minutes, or until tender. Drain and set aside.

2. Heat oil over medium heat and sauté onion and garlic for 6-7 minutes, or until onion is tender and beginning to colour slightly.

3. Add cherry tomatoes and Swiss chard stems. Sauté for another 5-7 minutes, or until tomatoes begin to burst. Add Swiss chard and spinach leaves. Let cook for about 1 minute. Add in Lemon-Tahini Dressing and stir to coat. Mix in cooked, drained wheat berries and chickpeas.


Serves 5-6.


Lemon-Tahini Dressing

Ingredients

¼ cup tahini
2 cloves garlic, bitter stem removed
juice of one lemon (about 1/3 cup)
2 tbsp olive oil
3 tbsp water
optional: grated Parmesan

Directions

1. Pulse all ingredients together in a food processor. Add salt and pepper to taste.


That was easy, wasn't it?

Thursday, May 12, 2011

Another Soba Bowl: Marinated Tofu, Mixed Greens and Cilantro-Cashew-Coconut Pesto

Over the last weekend, while doing our weekly clean, my husband and I finally put away our winter boots. April had been so cold and wet, I just kept holding off on putting away the boots, but it seems like now, maybe, just maybe it's time to pack it all away.

Yesterday's pesto got me thinking. Along with the winter boots, mitts and jackets, it also feels like it's time to put away the cast iron dutch oven and to get out the salad spinner.

It's spring and I feel like eating my weight in vegetables.

Also, I'm in a wedding this summer AND going back to Hawaii and a man wished me a happy mother's day as an expectant mother last Saturday, which tells me that the belly fat has got to go because I'm not even vaguely pregnant.

Not hot.

And, what better way of plowing through some delicious greens than doing that than another gigantic vegetable-noodle bowl?


Tamari Marinated Tofu

(from More.ca)

Ingredients

1 block tofu, cut horizontally into 8 pieces, each piece then cut diagonally into triangles.
3/4 cup tamari
½ cup apple cider vinegar (I love the Eden organics brand)
¼ cup water
1½ tsp canola oil

Directions

1. Mix together all liquid ingredients in a non-reactive container (I used a glass container with a lid), then layer in the tofu. Cover and refridgerate for at least 1 hour and up to 5 days. Obviously, the longer you let it sit, the more marinade the tofu will absorb.

2. Grill tofu for 1-2 minutes per side.

Easy as pie... erm... tofu.


I like this served with soba noodles that have been tossed with the Cilantro-Cashew-Coconut pesto, topped with steamed broccoli, rainbow chard, bok choi and bean sprouts. A tablespoon each of cashews and toasted pumpkin seeds pumps up the crunch.

Wednesday, May 11, 2011

Cilantro-Cashew-Coconut Pesto

I don't think I should be calling this pesto at all, but to simply call it sauce seems to do it a disservice. I came up with this recipe as the companion to another of my Fresh inspired noodles bowls. It's bright and herbal, with lots of room for adaptation.


I wanted something slightly Thai inspired, but without the heat. This is creamy, smooth and would be so great as a counterpart to a spicy summer roll or dolloped on top of a curry for contrast. YUM.

Cilantro-Cashew-Coconut Pesto

Ingredients

2/3 cup dry roasted, unsalted cashews
½ cup light coconut milk
juice of one lime
1 large handul cilantro
1 large handful basil leaves
1 tbsp tamari (or Thai fish sauce, if you're not concerned about keeping it vegetarian)
¼ cup water

(suggested add ins: 1 garlic clove, a spoonful of green curry paste, minced lemongrass, minced serrano pepper if you want some heat)

Directions

1. Pulse all ingredients except water in a food processor until think. Add water, 1 tbsp at a time until mixture reaches desired consistency.

Now, that was easy, wasn't it? Serve with noodles, if you like.


The pesto on soba noodles. Yum!
Related Posts Plugin for WordPress, Blogger...