Showing posts with label preserve week. Show all posts

Thursday, August 25, 2011

Preserve Week: Claussen-Style Refrigerator Pickles (Round Two)

Last year, I made a big to-do about the Claussen-Style pickles that I'd made.

Turns out, while the sliced ones were good, they really didn't taste like Claussen's version. The ones I left whole were flaccid.

And I think it's safe to say that flaccid pickles have no place in my house.

So, with kirby cukes at the markets, I'm back at it this year, and once again, my hopes are high.

There are a few important changes I've made to my efforts this year: no heating up the brine and a different spice mix.


Already, I can tell a difference in the colour compared to last year. That alone has me jumping for joy.

Claussen-Style Refrigerator Pickles

(adapted from a website that no longer exists)
makes 3 pints

Ingredients

1¼ cups distilled water (this can be replaced with water you've boiled and then chilled)
1¼ cups white vinegar

12 - 16 kirby cucumbers, scrubbed and cut into spears

place into each pint jar:

½ tbsp kosher salt
1 tbsp dill seeds
1/8 tsp celery seeds
½ tsp mustard seeds
½ tsp red pepper flakes
1 small bay leaf
1 clove garlic, minced

Directions

1. Sterilize 3 pint jars in boiling water.

2. Stir together water and vinegar in a measuring cup. Set aside. Add spices to jars. Tightly pack in cucumber spears on top of the spices. Pour vinegar mixture over top. Cover, seal and shake to dissolve salt.

3. Place in the fridge. Shake jars for 10 seconds every day for a week. Try to restrain yourself from sampling the wares at this time. Hold out. You can do it! Cucumbers should have undergone the transformation to Cinderella Pickles after 7 days. They'll keep in the fridge for 1 month.

Wednesday, August 24, 2011

Preserve Week: Nigel Slater's Elderberry Jelly-Jam

I mentioned last week that my husband, at my request for interesting fruit, brought home some elderberries.

The first thought that popped into my head was:


My second thought was: what the heck am I going to do with elderberries?

So I googled just that. There were recipes for syrups and a couple for pies, but I knew I wasn't particularly interested in making either of those.

Elderberries aren't exactly the most popular fruit out there.

I removed myself to the kitchen and pulled Nigel Slater's Tender II off my shelf. He had two options for me: a sauce for venison or a jelly-jam that could later be put into a Jam Roly-Poly.

Now, I've never had a roly-poly, but I like the sound of a jam filled rolled cake (like a swiss roll), which seems to pretty much describe what a roly-poly is. The cake was traditionally steamed in a shirt sleeve (we're talking back in the 19th century here), which earned it the title Dead Man's Arm.

That's certainly a less appealing name.

So, if making the jelly-jam meant I could have cake at a later date, I knew I was in.


I should clarify one thing: Nigel calls this a jelly-jam because, after straining the berries over night as one does to make jelly, you have the option of incorporating some of the berries back into the jelly. So, it's like this beautiful combination of the two.

Oh! And before I forget: a warning.

Elderberries don't smell the prettiest. I think they smell rather of wet hay. Monty Python was definitely on to something!

Elderberry Jelly-Jam

(from Nigel Slater's Tender II)
makes 3 cups

Ingredients

750 grams elderberries (weight should be berries already removed from stems)
600 ml water
400 grams tart apples (I used Granny Smith, but if you have access to crab apples, even better), halved and left uncored and unpeeled
750 grams granulated sugar

Directions

1. Place elderberries, apples and water in a large dutch oven. Bring to a boil over medium high heat and simmer for 20 minutes, until apples are tender. Remove from heat and then place mixture in a jelly bag to drip over night. Don't squeeze the bag or its contents, as you'll end up with a cloudy jelly.

draining through a jelly bag
2. The next day, pour the collected juices into a dutch oven along with the sugar. If you would like fruit in your jelly, add in some of the berries from the jelly bag. Discard the rest. Bring mixture back to a boil and boil hard for 10-15 minutes, or until jelly reaches its setting point.

3. Pour into sterilized jars and process in boiling water for 10 minutes.

Tuesday, August 23, 2011

Preserve Week: Shiro Plum Jam

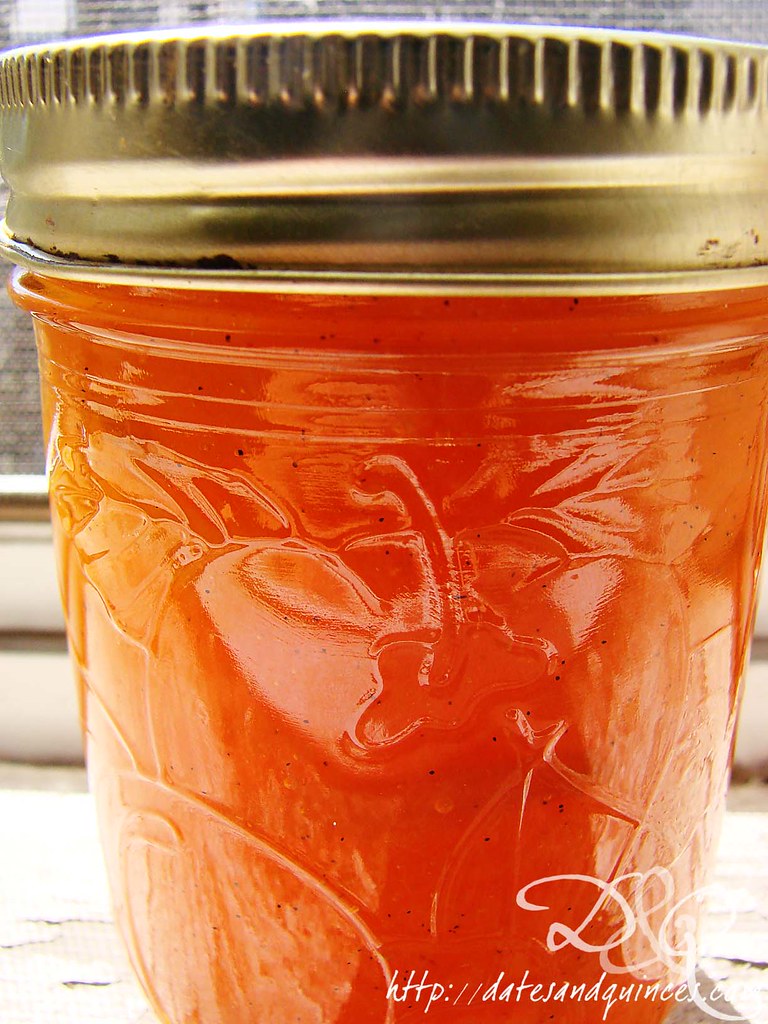
I cannot express to you how ridiculously excited I am about this recipe. After I'd finished making it, I was sending an email to my Mum while licking the spoon I had used to stir the jam. It's tangy and vibrant, and the vanilla bean seeds just make the whole thing so insanely delicious.

You can tell a jam recipe tastes delicious when you lick the plate rest your spoon was sitting on.

Not that I did that.

Cough. Cough. Ahem.

I'm sorry. Something was stuck in my throat there.


This recipe was very lightly adapted what looks like an abandoned blog: Toast. It's a shame really, because the jam turned out beautifully. Check out that amazing orange colour!


Shiro Plum Jam

makes 3 cups jam

Ingredients

2 lbs shiro plums, stoned, but not peeled
2 cups sugar
3 tbsp fresh lemon juice
½ large, plump vanilla bean


Directions

1. Toss plums in a large, non-reactive container with sugar and lemon juice. Let sit for one hour. After, place contents in a dutch oven. Bring to a boil. Boil for one minute then return plum mixture to the container. Place a piece of parchment paper directly on the surface of the plum mixture and place in the fridge overnight.

2. Process canning jars accordingly.

3. Place plum mixture in a large dutch oven. Scrape vanilla bean seeds from pod and stir into mixture. Throw the pods in as well, because a little extra hit of vanilla can never go amiss! Bring mixture to a boil and continue boiling, stirring constantly and skimming off any foam, until jam hits its setting point.

Have we talked about the setting point yet? The setting point is the point at which the jam promises, once cooled, to set to a firmer consistency.

I'm old school and do it the way my mother and I have done it for the better part of 25 years. I like to place a plate in the freezer to chill it. When I think the jam might be ready, I pull the plate out, and put a little dollop of jam on, and put it back in the freezer for 1 minute. You know the jam is ready when it wrinkles when you drag your finger through it.

If you're new school though, pull out your candy thermometer - it'll hit 220ºF.

If the jam is done, proceed to the next step. If not, keep boiling away. I think my jam took a good 20 minutes of boiling... however, I am working on the worst stove known to man (totally inefficient burners), so use your own judgment.

4. Place jam in sterilized jars and process in boiling water for 10 minutes. Remove, let cool and store.

Can I just say, this jam would be killer in thumbprint cookies. Or in cheesecake.

Monday, August 22, 2011

Preserve Week: Riesling Poached Spiced Pears

August's bounty thrills me to no end. The markets and grocery stores are bursting with Ontario produce and the weather is just cool enough for me to be enthusiastic about standing over a pot of boiling water processing batches of preserves, pickles and canning fresh fruit.

The fact that, amid all the enthusiasm for urban homesteading, canning is having a huge comeback has been nothing but beneficial. It means that all those jars and lids that my mother and I used to have to scour the stores for are now ubiquitous to each of my local grocery and hardware stores.

It also means that, although I've made jam and preserves since I was a child, I'm by no means an expert and now, there's a ton of great information out there on the internet. Sites like Well Preserved and Food in Jars are great places to start. Some of my favourite recipes come from Yvonne Tremblay's book Prizewinning Preserves (also released as The Complete Idiot's Guide to Jams, Jellies and Preserves in the US - guess which name I like better?), in which she gives recipes that have won awards at the Royal Agricultural Fair. If you pick it up, try the pear, ginger and crème de cacoa jam. It's amazing.

I'm lucky that I grew up in a household where my mother canned fruit for winter every year (though she doesn't anymore, much to both my brother's and my chagrin). Going down to the basement and pulling out a mason jar of Ontario peaches on a wintry Sunday in the middle of February was always such a cause for excitement. They would make their way into some kind of dessert - crisp was always a favourite at our house - and for a few brief moments, we'd relive the flavours of summer.


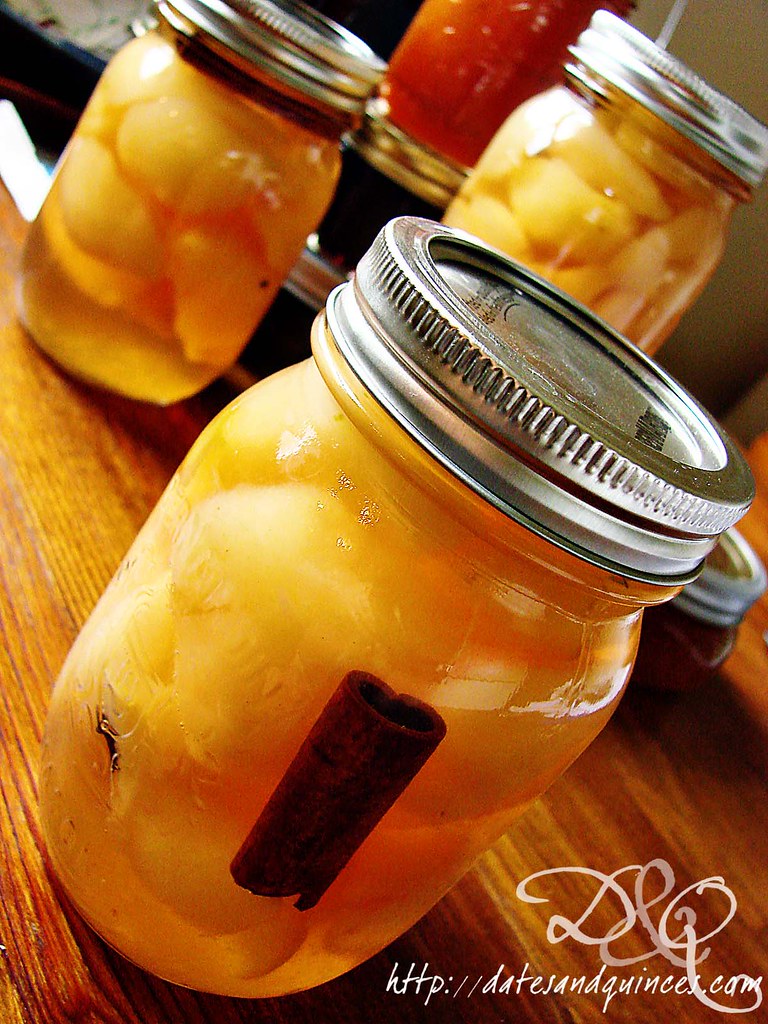
So, to kick off preserves week, I'm going to share a recipe for preserved pears. They're poached and then canned in a gorgeous Riesling and spice syrup. I used small sugar pears, but feel free to use larger ones as you see fit. Just don't make them too big, otherwise you might not get enough of them in your cans!

I can't wait to break into them one stormy January night.

For complete canning instructions and safety, please check out the USDA site or, for more basic instructions, check out Canadian Living's 101 guide.


Riesling Poached Spiced Pears

(from Canadian Living)

makes enough to fill 3 pint jars

Ingredients

4 lbs sugar pears
½ cup fresh lemon juice, divided
9 cups water, divided
3 cups granulated sugar
1½ cups Riesling (keep it in the family and pick up an Ontario wine!)
2 1" x 2" strips lemon rind  
2 cinnamon sticks, broken in half
3 whole cloves
3 whole pods cardamon

Directions

1. Prep 3 pint sized mason jars according to canning technique listed above.

1. In a very large, non-reactive bowl, stir together ¼ cup lemon juice with 6 cups water. You'll use this bowl to put your peeled, cored pears into to prevent discoloration.

2. Peel and core pears, placing them in the lemon water. Try not to let the pears sit for more than 20 minutes in the water.

3. Meanwhile, in a large dutch oven over medium-high heat, stir together remaining 3 cups water and ¼ cup lemon juice with sugar and Riesling. Once sugar is dissolved, throw in lemon rind, cinnamon, cloves and cardamon. Bring to a boil, and set boil for 5 minutes. Drain pear halves and add to dutch oven. Return to boil and let cook for 5-15 minutes, cooking just until pears are tender. You don't want mushy ones, so keep an eye out.

4. Using a slotted spoon, remove pairs from pot and divide between the 3 prepped mason jars. Remove the lemon rind from the syrup and discard. Divide the cinnamon, cloves and cardamon evenly between the jars.

5. Return syrup to a boil, and boil hard for 10-15 minutes until syrup is reduced to 3 cups. Pour syrup over pears, leaving ½" of headspace between the liquid and the rim of the jar. Use a wet paper towel to remove and syrup on the rim. Failure to do so could result in an improper seal.

6. Seal and process in canner for 10 minutes. Remove, let cool and check that seals have popped. If any don't, place those jars in the fridge and use within a week.

The rest will keep a room temperature (though preferably in a coolish dark space) for a year.
Related Posts Plugin for WordPress, Blogger...