Showing posts with label cake. Show all posts

Wednesday, October 12, 2011

Pumpkin Angel Food Cake with Salted Cinnamon Caramel

One of the challenges of cooking at the cottage is we don't have access to clean running water. Each weekend, we lug up three gigantic blue jugs and use that water to wash our dishes, fruits and vegetables.

And that has a huge impact on what we make up there. There's a limited amount of dishes we want to get dirty, because we can only do a limited number of dishes.

I don't know what Thanksgiving looks like at your house, but at ours, it's mess-tastic.

So, when we're at the cottage, it's often easier to turn to recipes that involve pre-packaged ingredients. It's not something I usually do at home; but up there, it's the sensible thing to do.

Thankfully, there are amazing recipes out there that turn packaged mixes into home-cooked delights.


This recipe comes from Grin and Bake It, and was a total hit. Angel food cakes and my family go way back. When I was a teen, I'd always ask for my birthday cake to be an angel food cake covered with whipped cream that had been mixed with crushed up Crispy Crunch Bars.

Be still my beating heart.

So, there was a big cheer when we brought angel food cake back into the fold this Thanksgiving. As I cut it at the table, it was universally declared to "wobble seductively".

Who doesn't love a good seductive wobble?

Pumpkin Angel Food Cake with Salted Cinnamon Caramel


(source)


Ingredients


1 package angel food cake mix
1 tbsp.  all-purpose flour
1 tsp. cinnamon
¼ tsp. ginger
1/8 tsp. nutmeg
1/8 tsp. cloves
¾ cup canned pure pumpkin
1 cup cold water


¼ cup butter, salted
¼ cup dark brown sugar
¼ cup granulated sugar
½ cup whipping cream
¼  tsp. sea salt
2 tsp. cinnamon

Directions

1. Preheat oven to 350º. Place all cake ingredients (food cake mix through water) in a bowl and beat with a hand held mixer for one minute. Pour into an angel food cake tin and bake for 35-45 minutes, or until cake is browned and bounces back when lightly poked. Remove from oven and place upside down on the neck of a glass bottle. You'll do this because you don't want the cake to fall at all. Let cool for at least 2 hours.

2. To make the glaze, heat butter with sugars in a small saucepan. Bring to a boil over medium heat, then stir in cream. Bring back to a boil and let cook for 2 minutes, stirring constantly. Remove from heat, stir in cinnamon and sea salt. Let cool to room temperature before pouring over top of cake.

Might I recommend some whipped cream on the side?

Friday, August 19, 2011

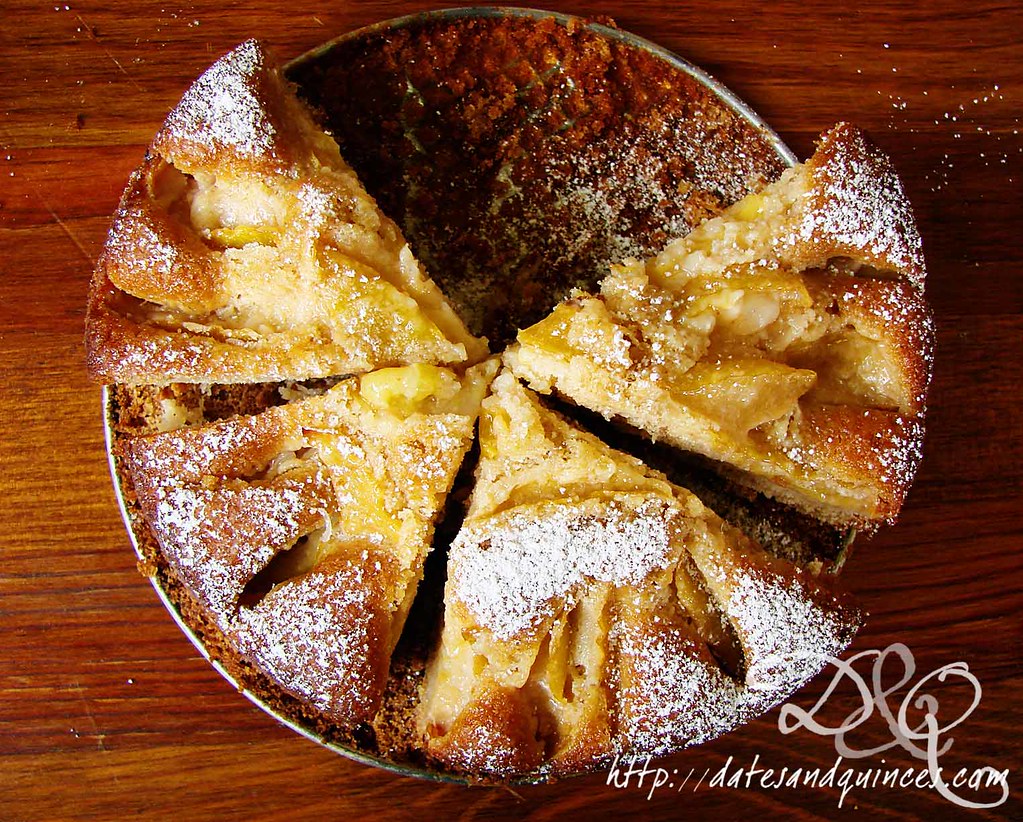
Plum-a-palooza: A Small Plum Cake for Four

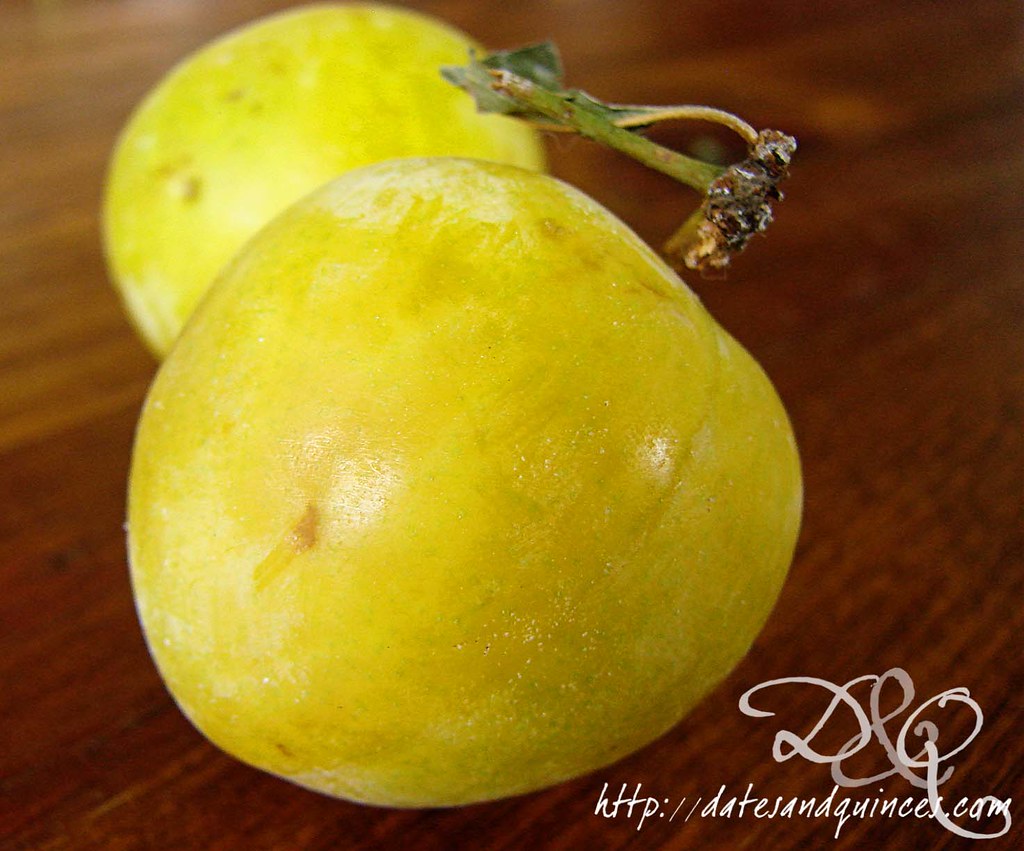
At the farmer's market this week, my husband picked up a few pounds of shiro plums. The shiro plum is a Japanese variety and isn't white, as the name might lead you to believe, but yellow.


Shiro plums are sweet and bright, but also happen to be clingstone, which may deter you if segmenting clingstone fruits annoys you.

Truth be told, although I had asked him to pick up some interesting fruit, I wasn't really sure what I was going to do with 4lbs of these plums. In the end, I opted to make a small plum cake and to use the rest of the fruit in a jam (which I've started and is currently sitting in my fridge waiting for a flavour infusion tomorrow - vanilla? star anise? cardamon? I definitely want the vanilla... but I can't decide what, if anything, else to put in).


Plum Cake

(adapted from Martha Stewart)

Ingredients

¼ cup + 2 tbsp butter, at room temperature
½ cup all purpose flour
¼ cup spelt flour (you can use all purpose instead)
¼ tsp baking soda
generous pinch kosher salt
¼ cup packed brown sugar
¼ cup granulated sugar
1 egg + 1 egg white
½ tsp vanilla extract
zest of one lemon
1/3 cup plain yogurt
4 plums, halved, pitted and cut into 6-8 slices

Directions

1. Preheat oven to 375º. Generously butter and flour a small, 6" springform pan. Set aside.

2. In a small bowl, sift together flours, baking soda and salt.

3. In the bowl of a mixer (or, using a hand mixer), cream together butter. Gradually add in sugars. Once mixture is light and fluffy, add in whole egg then the egg white. Once this is incorporated, add in vanilla, lemon zest and yogurt.

4. Add flour mixture to wet ingredients in 2 batches, making sure each batch is incorporated before adding the next one. Pour batter into prepared pan. Smooth.

5. Arrange plum slices over the top of the batter. Place in oven for 30 minutes. Remove, loosely tent with foil and return to oven for an additional 35 minutes. Cake is done when a skewer inserted into centre comes out clean.

Let cool on rack on counter. Cake is best eaten the day it was made! Might I recommend some ice cream, whipped cream or a sifting of icing sugar?

You may have noticed in the picture that I've cut the cake into more than four slices... we weren't particularly hungry, so smaller was the way to go!

Friday, July 01, 2011

Vanilla Honey & Yogurt Pound Cake

Is there anything more lovely than strawberries for Canada Day? The two were clearly, clearly meant for each other.


And the fact that they're local strawberries picked up at yesterday's farmer's market? Yes please! Better than this would be strawberries we'd picked ourselves at a local farm, but that's hard to come by in downtown Toronto.

Did you pick strawberries with your family when you were young? I remember it was always a highlight of early summer. We'd be freshly off school and my mum would take my brother and I to the fields. I can remember the intense heat of the sun and the squish of the occasional fallen berry beneath my sandals.

And the taste of a freshly picked strawberry eaten in the field? There is so better tasting strawberry.

I know my brother would agree. When he was little, he'd eat himself practically to sickness on the berries. Let's just say more seemed to make it into his mouth than into his basket.

Strawberry thievery. The most delicious of all illicit fruit theft.

Let's go back to the cake, which I posted a picture of, but haven't talked about at all. Tthis isn't a true pound cake - there's no pound of sugar/flour/butter going on. But, for lack of a better word, to describe it, I'm going to go with pound cake. You bake it in a loaf pan and it looks like a pound cake.

And, I'm just not one of those people who gets wrapped up in semantics.

Anyway, it's got a great crumb and a lovely, subtle vanilla and honey flavour. Perfect for showing off strawberries or whatever toppings you might have on hand.

Vanilla Honey & Yogurt Pound Cake


Ingredients

1½ cups all purpose flour
2 tsp baking powder
¼ tsp salt
1 cup whole milk yogurt
3 eggs
3/4 cup granulated sugar
4 tbsp wildflower honey, divided
1 tsp vanilla extract
1/3 cup canola oil (or any other neutral flavoured oil)

Directions

1. Preheat oven to 350º. Grease a 9"x5" loaf pan with cooking spray and set aside.

2. In a large bowl, sift together flour, baking powder and salt. Set aside.

3. In a separate bowl, whisk together yogurt, eggs, sugar, 3 tbsp honey, vanilla and oil. Once combined, pour into dry ingredients. Stir just until combined. Pour into prepared pan and bake in over for 45-50 minutes, or until a cake tester (I use a chopstick) comes out clean.

4. Drizzle remaining tablespoon of honey on the still warm cake. This will create a totally delicious crust.


Serve with fresh local strawberries!

EDIT: I take it back. Don't serve it with local strawberries. I mean, they're delicious, but even better? Uncanny Preserves's Cherries in Almond Syrup.

Holy sweet Jesus.


It's amazing.


It's a thing of beauty. Look at the way that syrup is soaking the cake. DROOOOOOOOOOOOOL.


No... uhm... I wasn't licking the syrup off my fingers. Nor did I stick them back in the jar.

Pshaw.

How dare you insinuate as much.


Okay. Maybe. Maybe it happened.

Anyway, hop on over to Uncanny and try to get yourself a jar of these bad boys. They're outstanding. PERFECT with the cake.

Wednesday, March 23, 2011

Chocolate Cake with a Super Secret Ingredient

When I think back on the picky eater I used to be, I'm pretty sure she would have run screaming from this chocolate cake if she'd known what was in it.

In fact, even as a much more adventurous eater now, I was still really apprehensive about the secret ingredient in this cake.

It looks like a regular ol'chocolate cake....
It's just... I don't think I've ever seen it in a dessert before.

Which is weird, because here in North America, most of our sugar is derived from it.

Have you guessed now?

Callebault Dark Chocolate and a Beet
That's right, it's a chocolate beet cake. And it's pretty darned good at that. Now that's not saying that it tastes like your run of the mill chocolate cake. It tastes like there's something different. It gives it a tangier kick, I'd say. My husband says it's one of the most intense chocolatey cakes he's ever had, but that might also be the Callebault chocolate speaking.

I made a half-ish version of the original recipe, owing to the fact that my only springform pan is pretty small (6"). If you have an 8" pan, please see the original recipe in the link.

With this recipe, it's important to set out and organize all your ingredients in advance. Once the chocolate has melted, you've got to move fairly quickly. Not frantically, but quickly.

Chocolate Beet Cake

(adapted from Nigel Slater)

Ingredients

1 medium beet (a little less than ½ lb)
½ cup all purpose flour
3/4 tsp baking powder
1½ tbsp cocoa powder
3 egg whites
½ cup brown sugar
2 egg yolks
¼ lb good quality dark chocolate, chopped
2 tbsp hot brewed strong coffee
½ cup (scant) unsalted butter, cut into small pieces and chilled

whipped cream (or crème fraiche) to serve

Directions

1. Line the base of a 6" springform pan with parchment paper. Let aside. Preheat oven to 375º.

2. Cook the beet, whole and unpeeled in a large pot of boiling water until tender, about 20-30 minutes depending on size. Remove, drain and run under cold water to both chill the beet and aid in the peeling process. Trim the top and bottom, throw the beet into a food processor and pulse until you have a rough purée.

3. Sift together the flour, cocoa and baking powder into a small bowl and set aside.

4. If you haven't done so already, separate the eggs and place the 3 whites into a large mixing bowl and 2 egg yolks into a small separate bowl. Lightly beat the yolks.

5. Melt the chocolate in a double boiler by setting a large, heatproof bowl over a pot of simmering water. Just dump the chocolate into the bowl and leave it be. That's right. Resist the urge to stir. I had a hard time with it, but Nigel is right! Don't stir. When it looks like the chocolate is just about melted, stir in the coffee. Stir to combine then add butter, pushing it below the surface of the chocolate. Remove the chocolate from heat and let the butter melt into it.

6. Meanwhile, whip the egg whites to soft peaks, then begin adding in sugar, one tablespoon at a time, until sugar is all incorporated and you have stiff peaks. Set aside.

7. Once butter is melted, stir the chocolate and test the temperature. You don't want it to be much more than warm, as you're about to add the eggs. Add in the egg yolks, making sure to stir constantly to combine. Gently fold in egg white mixture into chocolate. Once incorporated, add cocoa-flour mixture, again, quickly but gently. Pour into prepared pan and place pan in oven.

8. Reduce oven temperature to 325º, bake cake for 40 minutes. The outside will feel spongy when touched, and the middle will still jiggle slightly when wobbled. Set aside to cool completely (don't attempt to serve this while evenly vaguely beyond room temperature). It will sink in the middle, and I warn you, that part is dangerously fudgy.


9. Serve with whipped cream and amazed taste buds.

Tuesday, January 18, 2011

Tastes great... but the cake colour? Hmmm.

I'm loving the train wreck that are the ladies of the Bachelor this season. Gosh, they're just off the wall!

I picked up some gorgeous Moro blood oranges at Whole Foods yesterday with the intention of making a sticky orange cake. I figured that the colour of the oranges would produce the most beautiful pink looking cake possible.

I had gorgeous, deep red juice (one might say blood coloured). Surely I wouldn't need food colouring?

So, perhaps you can tell me why the cake went from the colour of this juice:


to this colour on the outside:


And this colour in the middle:


Can you see the blue-green tinge? My cake has a blue-green tinge.

Why does my cake have a blue-green tinge?

In what world is it okay for your dessert to come out of the oven with a surprise blue green tinge?

Because this is pretty much what it was supposed to look like...

Vegan Sticky Orange Cake: thekitchn.com
That looks orange and white to me. Nothing wacky and blue.

Recipe link here. I'd post the recipe, but I'm not sure I can recommend making a cake that turned blue.

It's delicious though... just blue.

Sunday, January 16, 2011

A Quick Birthday Post

An excellent day, complete with an animated MS Paint Card from my little brother, a zojirushi rice cooker from my husband (I've never had one with English buttons before) who loves me even though I look like this in the morning:


I never noticed how seriously gigantic that coffee cup is before. No wonder I feel so twitchy on weekend mornings.

But, best of all, my husband made me a birthday dessert.

Molten Chocolate Lava Cakes


We were destined for each other. The man knows his desserts.

And I love him for it.

Molten Chocolate Lava Cakes

(From: Martha Stewart Great Fast Food)

Ingredients

4 tablespoons unsalted butter, room temperature, plus more for muffin tins
1/3 cup granulated sugar, plus more for muffin tins
3 large eggs
1/3 cup all-purpose flour
1/4 teaspoon salt
8 ounces bittersweet chocolate, melted
Confectioners' sugar, for dusting

Directions

Preheat oven to 400 degrees. Generously butter 6 cups of a standard muffin tin. Dust with granulated sugar, and tap out excess. Set aside.

In the bowl of an electric mixer fitted with the paddle attachment, cream the butter and granulated sugar until fluffy. Add eggs one at a time, beating well after each addition. With the mixer on low speed, beat in flour and salt until just combined. Beat in chocolate until just combined. Divide batter evenly among prepared muffin cups.

Place muffin tin on a baking sheet; bake just until tops of the cakes no longer jiggle when the pan is lightly shaken, 8 to 10 minutes. Remove from oven; let stand 10 minutes.


To serve, turn out cakes, and place on serving plates, bottom sides up. Dust with confectioners' sugar, and serve with whipped cream, if desired.

Wednesday, December 01, 2010

Kat's Fruitcake

Why do so many people hate fruitcake? I love the stuff. My mum makes a light fruitcake, heavily flavoured with orange zest and Grand Marnier that's just awesome. Nothing, nothing says Christmas like fruitcake!

Is it the candied fruit you object to? If so. I have the solution

Over the weekend, Kat made a fantastic fruitcake that's totally devoid of candied fruit. It does have 6 cups of brandied soaked fruit in its place! I think that's a great trade off.

Dark, spiced, moist and boozy, without any candied flavouring.

Kat's Fruitcake

Ingredients

1 cup each dried cherries, dried apricots (chopped), raisins, dried cranberries (unsweetened if you can find them), dried pineapple (chopped) and dried plums (quartered)
½ cup pecan halves, coarsely chopped
½ cup walnut halves, coarsely chopped
1 cup brandy

4 cups spelt flour (feel free to use all purpose white)
2 tsp baking powder
2 tsp baking soda
½ tsp salt
½ tsp ground cardamon
½ tsp ground cinnamon

½ cup plain or vanilla yogurt (OR do as Kat does and make flax eggs*)
¼ molasses
1¼ cups pineapple juice
1 cup brown sugar
1 tbsp almond extract
½ cup coconut milk

*to make flax eggs, blend 3 tbsp of flax seeds with ¼-½ cup water until mixture resembles a thick milkshake

Directions

1. In a large bowl, toss together dried fruit and nuts. Pour in brandy and let sit overnight.

2. Preheat oven to 375º. Lightly coat 6 mini loaf tins with nonstick spray (we used 5 mini tins and one 8"x4").

3. In a large mixing bowl, whisk together the dry ingredients.

4. In a separate bowl, whisk together the remaining ingredients.

5. Fold wet ingredients into the dry, being careful not to over mix.

6. Fold in the fruit and nut mixture.

7. Divide the mixture between the loaf pans.

8. Bake for 30-45 minutes (depending on size of loaf) or until a toothpick inserted comes out clean.

9. Let cool completely in pan on rack. If keeping fruitcake for longer than a week, brush with an extra tablespoon of brandy each week to keep the whole thing moist and boozy.

Thursday, November 11, 2010

Dark Chocolate Cake

And vegan to boot.

But don't let the vegan part scare you off. This is delicious! For the record, I did a half recipe. Kat, Phil and I enjoyed it immensely.

There were no leftovers. We destroyed this thing.

hello!
Moosewood's Deep Chocolate Cake

1 1/2 cups unbleached white flour
1/3 cup unsweetened cocoa powder
1/2 tsp. baking soda
1/2 tsp. salt
1 cup sugar
1/2 cup vegetable oil (I used earth balance vegan buttery spread)
1 cup cold water or chilled brewed coffee
2 tsp. pure vanilla extract
2 Tbs. cider vinegar

1. Preheat oven to 375°F. Generously oil 8-inch square or round baking pan. Dust with sifted cocoa, or line bottom of baking pan with parchment paper.

2. Sift flour, cocoa, soda, salt and sugar. In another bowl, combine oil, water or coffee and vanilla. Pour liquid into dry, and mix until smooth.

3. Add vinegar and stir briefly; baking soda will begin to react with vinegar, leaving pale swirls in batter. Without wasting time, pour batter into prepared pan.

4. Bake for 25 to 30 minutes. Serve cake from pan, or, when cool, transfer to plate.

Chocolate Raspberry Glaze

1/3 cup raspberry fruit spread or jam
two small handfuls semi-sweet chocolate chips

In a double boiler or small heavy saucepan on medium heat, melt jam with chocolate chips, blend and pour over cooled cake.

If you happen to have old, homemade cherry liquor (as I do), soak the chocolate cake before glazing it.

Saturday, August 07, 2010

Yellow Plum & Apricot Cake

Otherwise known as Nigel Slater Strikes Again! I pulled this recipe from one of the first books I got by him: The Kitchen Diaries.

I LOVE this book. It's such a lovely ode to seasonal eating.

The finished cake.
It is delicious, but needs less butter. When I first pulled this out of the pan, it was slick with it! I'll post the recipe with my adaptations. Warning: you'll need a scale for this

Sunday, June 06, 2010

Weekend Cooking

I wish I'd thought to take pictures of the dish I made for a dinner party we went to last night. Fine Cooking's Summer Wheat Berry Salad was a hit with everyone, even though I made it with pot barley instead of wheat berries. One of the advantages of using the barley was it cut the cooking time dramatically - it only took 30 minutes. I subbed the barley in at a one to one ratio, and didn't leave it to cool in the cooking water. You can find the recipe for it after the jump!

A quick note: the dinner party was so lovely! We got to meet up with some of my husband's Tumblr friends, drank copious amounts of wine, ate some seriously delicious pork tenderloin. I don't think I've ever had a moister tenderloin in my life. I think our amazing host, Robin, braised it with figs and shallots. Oh, it was sooo good! It was a totally lovely evening - there's nothing like good company!

Today I've been puttering lazily about the kitchen. Earlier, I whipped together some almond-basil pesto for tonight's pizza (I've got to use up the leftover roasted red pepper and artichokes from last night's salad).

I love five minute recipes! I just had to throw the <--------ingredients in the food processor and voila! Pesto complete!  ------>

Now I'm contemplating how I'm going to use up the five stalks of rhubarb I bought mid week. I think it'll probably end up being Martha's Rhubarb Upside Down Cake (but a half size version, because I don't own a 9" cake pan).


Related Posts Plugin for WordPress, Blogger...