Showing posts with label Japanese. Show all posts

Thursday, July 14, 2011

Tsukune (つくね): an izakaya favourite

Whenever Phil and I went to Daikichi's in his town Tokishi, there were a few standard dishes that we often ordered. And, because it was an izakaya (Japanese pub), it meant that there was lots of delicious food on sticks.

I really, really miss Daikichi's. In fact, about a year ago (almost to the day!), I said about the same thing.

It was a hole in the wall, the guys who ran the place smoked over the food as they grilled it, its tiny booths and stools were often packed with drunk salarymen and attractive young women (who were probably not their wives) and we enjoyed copious amounts of sake, beer and meat on sticks.

We occasionally got eggplant and onion too... but mostly we ordered meat on sticks.

Until recently, I haven't tried to recreate Daikichi's. Anything I do won't live up to the memory in my mind.

Anyway, we always got the chicken-cheese (grilled chicken thighs with a cheese slice on top and special mildly spicy sauce) and the aspara-bacon (grilled bacon wrapped asparagus), and usually got another dish, tsukune.

I attempted those this week, and they're about as authentic as they're going to get given that:

a) I'm not chain smoking over the skewers and
b) I don't have a grill

Tsukune (つくね) are essentially very smooth chicken meatballs seasoned with ginger, sesame and green onion, dipped repeatedly in tare (垂れ) and grilled until dry in between dips. Tare is basically the awesome older brother of the insipid teriyaki sauce we have here.

When I moved to Japan and asked about buying teriyaki sauce in the grocery store, I was met by a round of blank stares. Ask for tare.

Better yet, don't buy it from the grocery store. It's dead easy to make.


Now, I like my tsukune well browned with the tare. Those found at Daikichi's tend to be less assertive. Also, I have yet to perfect the art of perfectly spherical meatballs.
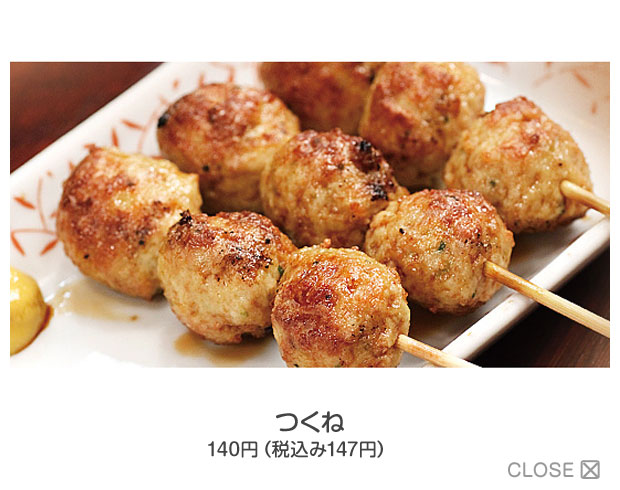
Daikichi's tsukune
Anyway, you can see where the inspiration was and where I ended up, and frankly, I'm really happy with this recipe!

Here are a few pictures of our favourite joint:


A friend outside Daikichi

Inside our Daikichi's
My very young, red faced, and hairier husband fans the grilled goods.
I heard that, after we left Japan, the Daikichi's in Phil's neighbourhood closed down. Clearly our consumption of sake and food on sticks kept the place afloat!

Tsukune: Grilled Chicken Meatballs

(from Hiroko Shimbo's Japanese Kitchen)

Ingredients

1 lb ground chicken or turkey
½ tsp kosher salt
½ tsp finely ground black pepper
2 green onions, both green and white parts, minced
1½ tsp freshly grated ginger
1 egg white, lightly beaten
2 tsp sesame oil
1 tbsp canola oil
sansho pepper (optional)
tare sauce (recipe below)

Directions

1. Begin by soaking 8 bamboo skewers in water for 15 minutes. Set aside.

2. Using a food processor, pulse ground chicken until it forms a coarse paste. Add in salt and black pepper, and pulse again. Alternatively, you can use your hands to squeeze the mixture over and over again (we're talking a good 5 minutes or so) and it'll achieve similar results. Remove mixture from food processor, stir in ginger and green onions. Once they are evenly distributed, mix in the egg white and sesame oil. Divide the mixture into 16 evenly sized balls.

3. Heat 1 tbsp canola oil in a large, non-stick frying pan. Working in batches, cook tsukune for 1 minute or so on each side or just until they're white and firm. You don't actually want to finish cooking them at this stage; you'll finish them off either on the grill or beneath the broiler.

4. Heat the grill on medium high heat or turn on your oven's broiler, making sure the rack is placed about 3-4" below the element. While you're waiting for it to heat up, remove bamboo skewers from water, and thread 2 tsukune onto each. Once your cooking medium is hot, grill or broil the tsukune, for 1 minute. Flip over and repeat on the other side.

5. Once tsukune have been cooked on each side, flip again, and brush with tare. Place back on grill or under broiler and cook until dry, about 1 minute. Remove, flip and brush again with tare. Repeat this procedure once more on each side of the tsukune, ensuring the balls are dry before applying the next coating of tare.

Serve piping hot with a sprinkle of sansho pepper.

Tare: Basting sauce for Yaki-tori

Ingredients

¼ cup sake
1/3 cup + 2 tbsp mirin
1 tbsp granulated sugar
1/3 cup + 2 tbsp soy sauce

optional: add in one dried shiitake mushroom

Directions

1. In a small pot, bring sake and mirin to a boil. Add in the sugar. Cook, stirring until sugar is dissolved. Add the soy sauce (and the mushroom if using) and bring to a boil. Reduce heat and simmer for 30 minutes. Sauce will be thick and glossy. Remove mushroom (feel free to eat it, it's super tasty) and use right away or keep in the fridge for up to a month.

Friday, June 03, 2011

Happy Friday with Inari Zushi

Phew, this week couldn't end any sooner! What a crazy time.

I took some students to Peace Tree Day (I was approached by the Harmony Movement to take this on) on Wednesday - they were Peace Tree Spirit presenters, which means they were responsible for teaching 700 kids (ranging from grade 3-8) a multi-cultural fusion dance that they choreographed. They were awesome; we had great weather and only one child put their face into Mel Lastman Square's reflecting pool.

I consider that a success.

Some media coverage of the event can be found here.

Today, I went to the hospital  for my allergy tests. My doctor didn't bother to show up, and on top of that, I'd been told I'd be getting tested that day. Instead it was just a consult. Fantastic.

On the plus side, I sat in the waiting room reading one of my new books from the Penguin Great Foods Collection: A Little Dinner Before the Play, and I think I've found the first recipe I'm going to try for my Penguin Great Foods Challenge: Brioches. Now these appear to be little, sweet breads that ought to be served with marmalade.

I'm excited to try that out this evening!

See why I'm glad the week is over? I did have one big success with a new recipe this week. With all these beautiful days, I've started to really crave Japanese food. There's just something about the arrival of summer that makes me dream of kara age, zaru soba and gigantic purple grapes.

For the past two nights, I've been dying for some inari zushi. We ordered out for some sushi one night, but they didn't have any! So, last night I made it my mission to attempt to make them for the first time in my kitchen.

They certainly didn't look as pretty as I would have liked, but that's in part because I cut them the wrong way. But, they tasted pretty damn good! If I'd had more time, I would have let the tofu sit in the dashi marinade in the fridge overnight before stuffing them. But I was hungry, so perfection was going to have to wait.


Inari zushi is essentially deep fried tofu pockets that you simmer in a soy-sake broth to infuse them with flavour.


Then, you stuff them full of sushi rice (rice seasoned with rice vinegar, sugar and salt). I like to mix my sushi rice with little pieces of chopped pickled ginger and sesame seeds.

Alas, I was out of sesame seeds.

Inari Zushi

(adapted from Washoku)

Ingredients

Sushi Rice

2 cups freshly cooked white Japanese rice
1/3 cup rice vinear
1 tbsp granulated sugar
½ tsp salt

8 slices pink pickled ginger, minced

½ tbsp toasted sesame seeds


For Tofu

4 fried tofu slices (I usually buy abura age)
2/3 cup dashi
3 tbsp soy sauce
1½ tbsp sake
2 tbsp sugar

Directions

1. For rice: Place the freshly cooked rice in a large, wide bowl (you, like me, probably don't have the wooden dish traditionally required for sushi rice). In a measuring cup, stir salt and sugar into vinegar to dissolve. Pour about a tablespoon of the vinegar onto the rice and, using a wooden spoon or paddle, gently cut and fold the vinegar into the rice. Continue adding vinegar in a slowly, until it tastes appropriate and liquid is all absorbed. You may only use 2/3 of the vinegar called for, or you may use it all.

Stir in ginger and sesame seeds.

Cover the bowl with plastic wrap and set aside until ready to use.

2. For tofu: Boil some water in a kettle. Place tofu slices in a strainer and pour boiling water over them. This will help remove some of the oil still clinging to the tofu. Squeeze out excess liquid. Cut tofu in half horizontally, and gently form a pull open the pocket. Mix together dashi, soy sauce, sugar and sake. Heat a nonstick frying pan over medium heat, an sear each side of the tofu (about 1 minute on each side). Pour dashi mixture over tofu and simmer for 3 minutes, turning once halfway through. Remove pan from heat. Place a slightly smaller lid (or a drop lid if you have one) directly on the tofu and let cool to room temperature.

3. Remove tofu from dashi. Gently squeeze out extra liquid. Stuff rice into tofu pockets and serve.

Tuesday, April 19, 2011

Quick Japanese Pickles

I wish I'd taken a picture of the bento boxes I'd made for my husband and myself earlier this week! Kara age (fried chicken), brown rice with umeboshi, carrot kinpira and Japanese pickled cabbage and cucumber.

God, I love pickles. Give them to me in just about any form and I'm a happy camper.


Unlike your dill or bread and butter pickles, these Japanese pickles don't use any vinegar as part of the fermenting process. Instead they rely entirely on salt.

And, if you like, you can toss them with a little soy sauce at the end.

Otherwise, just leave them alone. They're meant to cleanse the palate, not overwhelm it.

Quick Japanese Pickles

(adapted from both Washoku and Just Bento)


Ingredients

3 small Japanese cucumbers, thinly sliced (1/8" thick)
¼ head savoy cabbage, shredded or finely sliced
1½ tsp kosher salt
1 piece kombu, 1" square
½ tsp soy sauce

Directions

1. In a large bowl, toss cucumber slices with ½ tsp salt, massage for a couple of minutes, until slices begin to become limp and start to sweat.

2. Combine cabbage with cucumbers and toss with remaining salt. Massage again, increasing pressure as the vegetables become limper and you are able to squeeze a fair bit of liquid from them. Keep whatever liquid you get in the bowl.

3. Add in kombu and massage again. The kombu will feel a bit slippery which is a good thing. Place a plate, smaller than the size of the bowl directly on top of the vegetables. Weigh down with heavy weights (I put an 8 lb weight in a heavy jar on top of my plate) and marinate for at least 1 hour (preferably 3 hours) at room temperature (or 24 hours in the fridge).

4. Before serving, rinse under cold water and drain, squeezing to make sure no water remains. Drizzle soy sauce over pickles just before serving.

Sunday, April 17, 2011

A Japanese Inspired Soba Recipe

April is one of those months that teases. After cold winter nights and endless amounts of snow and frost, April is that month that whispers sweet nothings and tells you, soon, soon it'll all be over. She takes your hand and shows you the deep blue hyacinths and vibrant yellow crocuses, her sweet, blossom scented breath caresses your cheek.

And then, as you turn to meet her lavender eyes, she knees you in the crotch and punches you in the stomach with wild, blisteringly cold rain storms.

Heck, as I write this, sleet is bashing against our windows. Earlier this week, some of my students were wearing shorts.

This recipe is that warm blanket used on shock victims. Sink into its warmth and stay out of April's mood swings.


Soba with Beef and Onions in Shiitake Broth

(inspired by The Japanese Food Report)

Ingredients

3 cups water, divided
6 dried shiitake mushrooms
½ package (4g) dashi powder
4 tbsp soy sauce, divided
2 tbsp mirin
½ lb thinly sliced beef
1 medium onion, thinly sliced vertically
3 tbsp sake
2 tbsp sugar
4 oz dried soba noodles
shichimi spice powder to taste (Japanese 7 spice chili powder)
1 green onion, finely sliced

Directions

1. Bring 1 cup water to a boil in a small saucepan. Soak dried mushrooms in water for 30 minutes. Remove mushrooms from liquid and set aside. Stir in 1½ cups water, dashi powder, 2 tbsp soy sauce and mirin. Bring to a simmer and keep warm on back burner while you prepare the rest of the recipe.

2. Cut rehydrated shittake mushrooms into 5-6 slices each.

2. Place beef, onion, mushrooms remaining soy sauce, ½ cup water, sugar and sake in a frying pan, and bring to a simmer. Let cook until beef is cooked, onion is meltingly tender and liquid is almost completely evaporated, about 10 minutes. Remove from heat and set aside.

3. Cook soba noodles in a large pot of boiling water until al dente, between 6-8 minutes. Divide between two large bowl. Top noodles with beef mixture. Gently ladle broth over noodles. Garnish with shichimi and green onions.

Monday, February 28, 2011

Adventures with Purple Carrots

So, I bought a bag of locally produced heirloom carrots last week and was totally pleased with myself because, not only were they local AND heirloom AND organic, but they were also cheaper than a standard bag.

Inside the bag were three different kinds of carrots, a dark orange-red variety (can you tell I've little experience with heirloom varieties?), a purple one and a pale yellow carrot.

before peeling

all peeled up
 While I was making carrot kinpira this week, I decided I wanted to try it with a mixture of all three carrot varieties. It had the makings of pure awesome.

In my head, all I could see was the rainbow.


Totally pretty, huh? I mean, how often do you get to eat purple vegetables?


Doesn't it look somewhat freakish?

So, here's what I realized with this whole cooking experiment: the minute you throw a purple carrot into anything, prepare yourself to eat a whole lot of purple.

The kinpira ceased to have any colour other than purple.


Not only were the all the carrots purple post cooking, but my fingers were stained purple and a section of the couch where my husband dropped a sliver of carrot is also purple.

We sprayed the slip cover with stain remover. It's not coming out.

Moral of the story: treat purple carrots as you would beets. With respect. And wearing gloves if you don't want to walk around with purple fingers for two days.

Tuesday, February 15, 2011

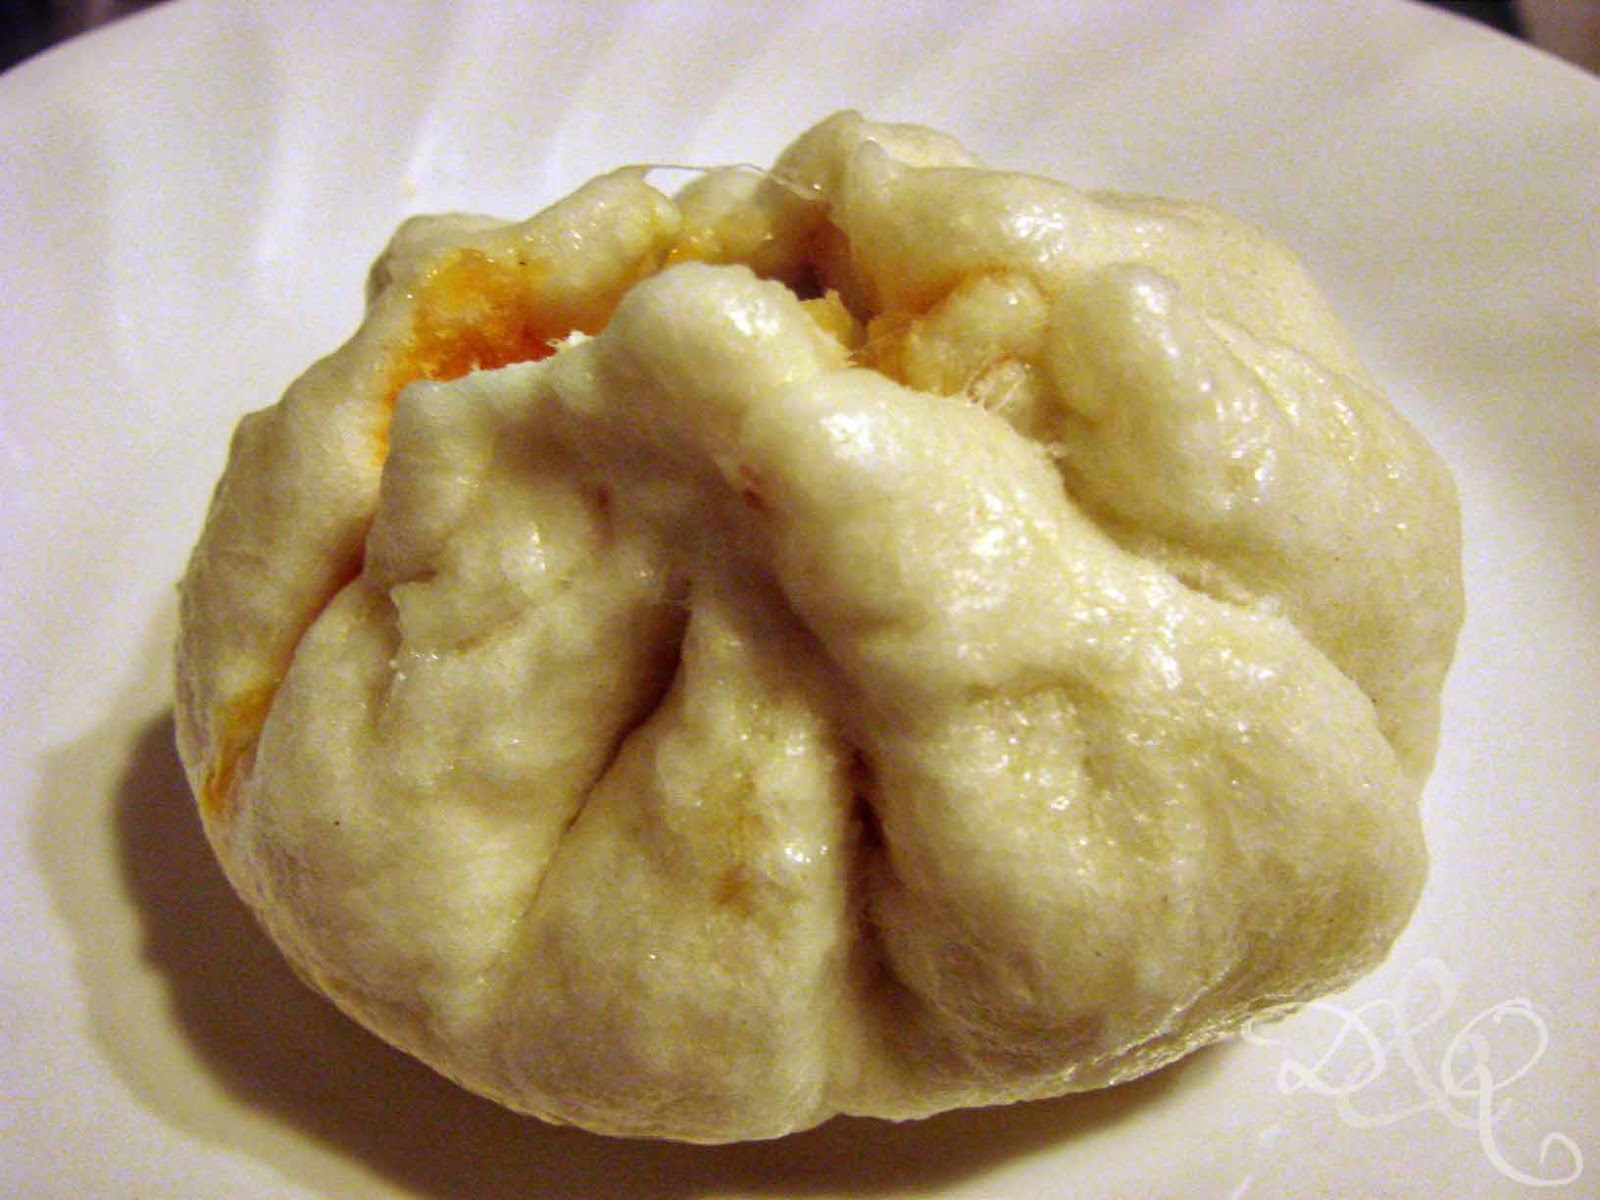
Nikuman: Japanese Steamed Buns

I was over on the blog La Fuji Mama earlier this week, and stumbled across this recipe for nikuman. If you haven't seen the blog, it's an interesting one, though I prefer her more traditional recipes to the hybrid ones she does.

And I won't copy her recipe over here. That would be tacky, right?

Now, I have fond, fond memories of these pork buns - the curry flavour was my absolute favourite, so this past weekend, I decided to try my hand at making them.

Let's just say the results were mixed. The filling was amazing. My husband claims it was better than any basic nikuman he'd had in Japan, and I think I agree with him. Totally tasty, if a bit greasy.

pork, soy, bamboo, onion, sugar, chile-garlic paste, ginger
But that is how they're supposed to be!

The challenge lay in the dough. It was crumbly. Very crumbly. After attempting to get crumbs to stick together for about 15 minutes, I ended up adding 3 or so tablespoons more milk to the mixture just to be able to form something that would hold together. I was terrified the recipe would be a total disaster; that the dough would be tough and not soft and fluffy and that 9:00 pm would roll around and I wouldn't have any dinner.

After 20 minutes of kneading, this is what my dough looked like:


Certainly not the smoothest, prettiest dough I've ever made in my life. You can understand my concern.

After letting the darned thing rest for half an hour, I divided the whole thing into eight pieces and attempted to roll them out into circles. Due to the elasticity of this dough, it has a nasty habit of snapping back into place after you roll it out.


And once rolled, I divided the filling into eight balls and placed one at the centre of each dough circle (well, they were supposed to be circles).


And attempted to pinch the seams closed. Heavy emphasis on the attempted.


The dough was beginning to look a bit prettier though!

Once I had four done, I started the steamer up and placed them, along with their parchment paper bases, into the top and steamed them for 15 minutes.

With trepidation and the buzzer alarm sounding off frantically in my ear, I lifted the lid to the steamer off.


Hm. Although split, they looked like nikuman.


Yep. That's definitely a steamed bun. Heck, the dough even felt springy!

I think Phil and I bit in at the exact same time. His bun spurted orange oil over our freshly washed sofa cover.

But you know what? It was worth it, because these were delicious.


If only I hadn't pulled a wrist muscle trying to knead that stupid dough (which turned out pretty tender in the end)!

**edit: these freeze beautifully. You can steam them from frozen for 15-20 minutes and voila!**

Wednesday, February 02, 2011

Oden

Oden is... well, I liken it to a cross between a soup and a stew. I don't entirely know how to describe it with one all encompassing word! Even wikipedia calls it a "Japanese winter dish". It was always my favourite winter lunchtime meal when I was getting school lunches in Japan. Daikon, potatoes, hard boiled eggs and various fish products get simmered for hours on end until they're infused with gorgeous soy-mirin-dashi goodness.

The conbinis (convenience stores) even have big pots of them simmering away, where we'd probably have a old hot dogs dripping oil onto metal rollers. It's a big thing.

I haven't had it since winter 2006. I remember being in that freezing cold school, heated only by kerosene heaters, with the hood of my Roots sweatshirt pulled up tight around me. One inhalation of that broth - one taste of that meltingly infused daikon - I could feel the cold melting out of my body.

I've been talking about making it for years now. In fact, when we were last in Hawaii, I picked up a package of oden broth seasoning. But, I haven't touched it as I'm:

a) lazy and prone to talking big
b) afraid of purchasing processed fish products, because I wouldn't use them for any other purchase

and

c) not usually in possession of 4 hours on a weekend to dedicate towards the dish

Today, after a trip to the P.A.T. and some encouragement from my husband, I decided it was time to tackle the dish.

Some things just shouldn't remain locked away in your memory.


If you're not familiar with Japanese cooking, you're probably going to be weirded out by a few of these ingredients. I promise you though, the whole thing is delicious and totally worth any initial hesitation.


Now, the assorted fishy things are pretty much all processed pollock.


If you can't find any/are totally turned off by the thought of this stuff, just leave it out! One of the joys of oden is you only have to put in what you want to eat.

Oden

(adapted from The Japanese Kitchen)

Ingredients

Broth:
5 cups dashi (for vegetarian version)
¼ cup soy sauce
2 tbsp mirin
½ tbsp sugar

Add ins:
enough peeled hard boiled eggs to serve the number of eaters present
½ block konnyaku, rinsed with boiling water
4 fingerling potatoes, scrubbed
1 small daikon, peeled, halved lengthwise and cut into chunks
various fish products

Directions

1. Bring a pot of water to boil. Add potatoes and daikon. Reduce heat and simmer for 15 minutes. Drain and set aside.

2. Place all broth ingredients together in a large pot. Bring to a boil.


3. Add in all your other ingredients, including potatoes and daikon. Simmer with the lid partially on for 3 hours, topping up with water if the level drops below half of the original starting point.

4. Serve piping hot.

So remember how I said that my absolute favourite part of this dish is the daikon?

Check out what happens to it:

before cooking
and...

 after 3 hours of simmering

It turns from solid white to this translucent brown. That how you KNOW you're in for a treat and that it has absorbed all that brothy deliciousness. That's happiness in a bowl, right there.

Tuesday, February 01, 2011

A trip to P.A.T.

One of my favourite things about Toronto is all the distinct little cultural neighbourhoods. We straddle the border of the university-student supported sushi strip and Korea Town. Now, aside from awesomely cheap fruit and vegetable stores, my favourite part about this area is the P.A.T.

Photo from yelp
One of the many, many reasons I love this place is their vast selection of both Korean and Japanese foods. This is where I go for all of my Japanese pantry staples, but if I'm really lucky they'll have something pre-made that reminds me of Phil's local grocery store in Tokishi.

Today, for example, we scored two awesome finds:


Potato Korokke (link here for a recipe). Mashed potatoes, a few peas and grated carrots. Serve with tonkatsu sauce and you're in business! Honestly, you're probably in business without the tonkatsu sauce (it's a ketchup-worcestershire-allspice type sauce, if you didn't know). Deep fried potatoes are hard to mess up!

But really, the super find was this little beauty, which reminds me of something I'd get from the Gifu city train station:


It's a danish. 

With chopped hotdogs. 

And cheese. 

And mayo. 

And ketchup. 

Topped with parsley and nori.

The first time I had it, I thought it was the grossest thing ever. I thought it was going to be a sweet pastry, so the seaweed-mayo combination was especially distressing. I may have shouted "What is wrong with this country?" at the top of my lungs.

In the end, I don't know what prompted me to try it again, but I did. And then I did it again. And now I totally love that I can relive the taste, even if it's something I eat for nostalgia and smiles rather than for a taste-bud explosion of happiness.


Mmm. I feel like I'm confessing a dirty secret here! Perhaps the title of this post should be Things that Taste Good but Shouldn't. 

But, what's the fun of loving food if you're snobby about it? I'd call this little number the Vince Vaughn/Will Ferrell flick of the food world. Something like Dodge Ball.

Tell me I'm not the only one! Do you secretly love a food that you'd be embarrassed to admit to your foodie friends?

Thursday, January 13, 2011

The Need for Greens

All this week, I've been really sick with some kind of chest cold/virus. For the first 3 days, I couldn't go five minutes without having a coughing fit. Now, the virus has moved up into my head (read: streaming nose), and the coughing has changed from less frequent to more intense attacks.

I've had 4 days off work. My husband has taken to calling me Wheezy McWheezerton.

Let's hope it's a name that doesn't stick.

Anyway, as I've been sick, I've been craving healthy, colourful food with tons of flavour.

One night, we went a little Japanese and did this:

From bottom right: snap peas, kale, chard and cabbage namul, rice and Ma Po Tofu
 Now, I have to admit, of all the things on that plate, the one thing I could have eaten the entire serving bowl of was the namul.

Namul (or namuru) comes to Japan via Korea, and is frequently used as a bento filler. It was certainly one of the more common fillers as a part of my school lunches in Japan. I've experimented with different versions off the Just Bento website (here and here), and I'll be honest, I'm still trying to recreate that exact one that I used to get in Sakashita. It's a work in progress.

The great thing about this recipe is it works with just about any greens you have lying about in your fridge. I had leftover kale, swiss chard and cabbage, so that's what got used up. I never measure the greens, so I guess it's lucky that the dressing seems to work no matter how much I throw into it.

Namuru Greens

(based on Just Bento's recipe)

Ingredients

1 half bunch chard leaves shredded, stems discarded
1 half bunch kale leaves shredded, stems discarded
¼ cabbage, shredded

½ tsp salt
1 tbsp sesame oil
1 tbsp rice vinegar
2 tsp honey

Directions

1. Bring a large (and I do mean large, you'll be blanching all the greens in there at once) pot of water to a boil. Once boiling, add cabbage. Cook for one minute, then add kale and chard. Cook for one more minute, or until bright green. Remove greens from boiling water and plunge into ice water. This will stop the cooking process.

2. Once the greens are cold, remove from water, squeezing to exact as much liquid as possible.

3. In a bowl, whisk together remaining ingredients. Toss with greens and serve.

It's funny, because this recipe tastes to me like there's soy sauce in it, even though there isn't! It's got a great umami taste though.


I've had some success keeping the namuru overnight and putting it in a bento for the following day, but I've also had occasions where it has turned grey. If anyone knows why that's happening, let me know!

If you're wondering why I didn't post a recipe for the Ma Po Tofu, here's your answer:


We cheated.

I'm sick. It's allowed.

Sunday, January 09, 2011

A Quick, Loaded-with-Vitamins, Miso Soup

It's amazing how quickly one can move from feeling perfectly healthy to feeling like death. That transition period, when you're just beginning to get sick, always feels like a crucial moment when you can control whether you're actually going to go through the illness or if you're going to be able to avoid it.

Whether that's true or not, I have no idea. What I do know is that, upon waking up with sore lungs and a cough, I needed something warming and easy to make that would, at the very least, make me believe that I was getting tons of vitamins and minerals.

Miso soup, loaded with wakame, seemed like the best option.

Because I was feeling lazy, I didn't bother with making my own dashi broth; I just reached for a package of the powdered stuff.


If you're going to get powdered dashi, be sure to get the stuff that's MSG free. You don't need that gunking up your system.

I'm not going to bother with a full on recipe here, because one of the great things about miso soup is that you can make it as minimalist as you like. I will say though, that I used 3 cups of water to a ½ package of the dashi powder.

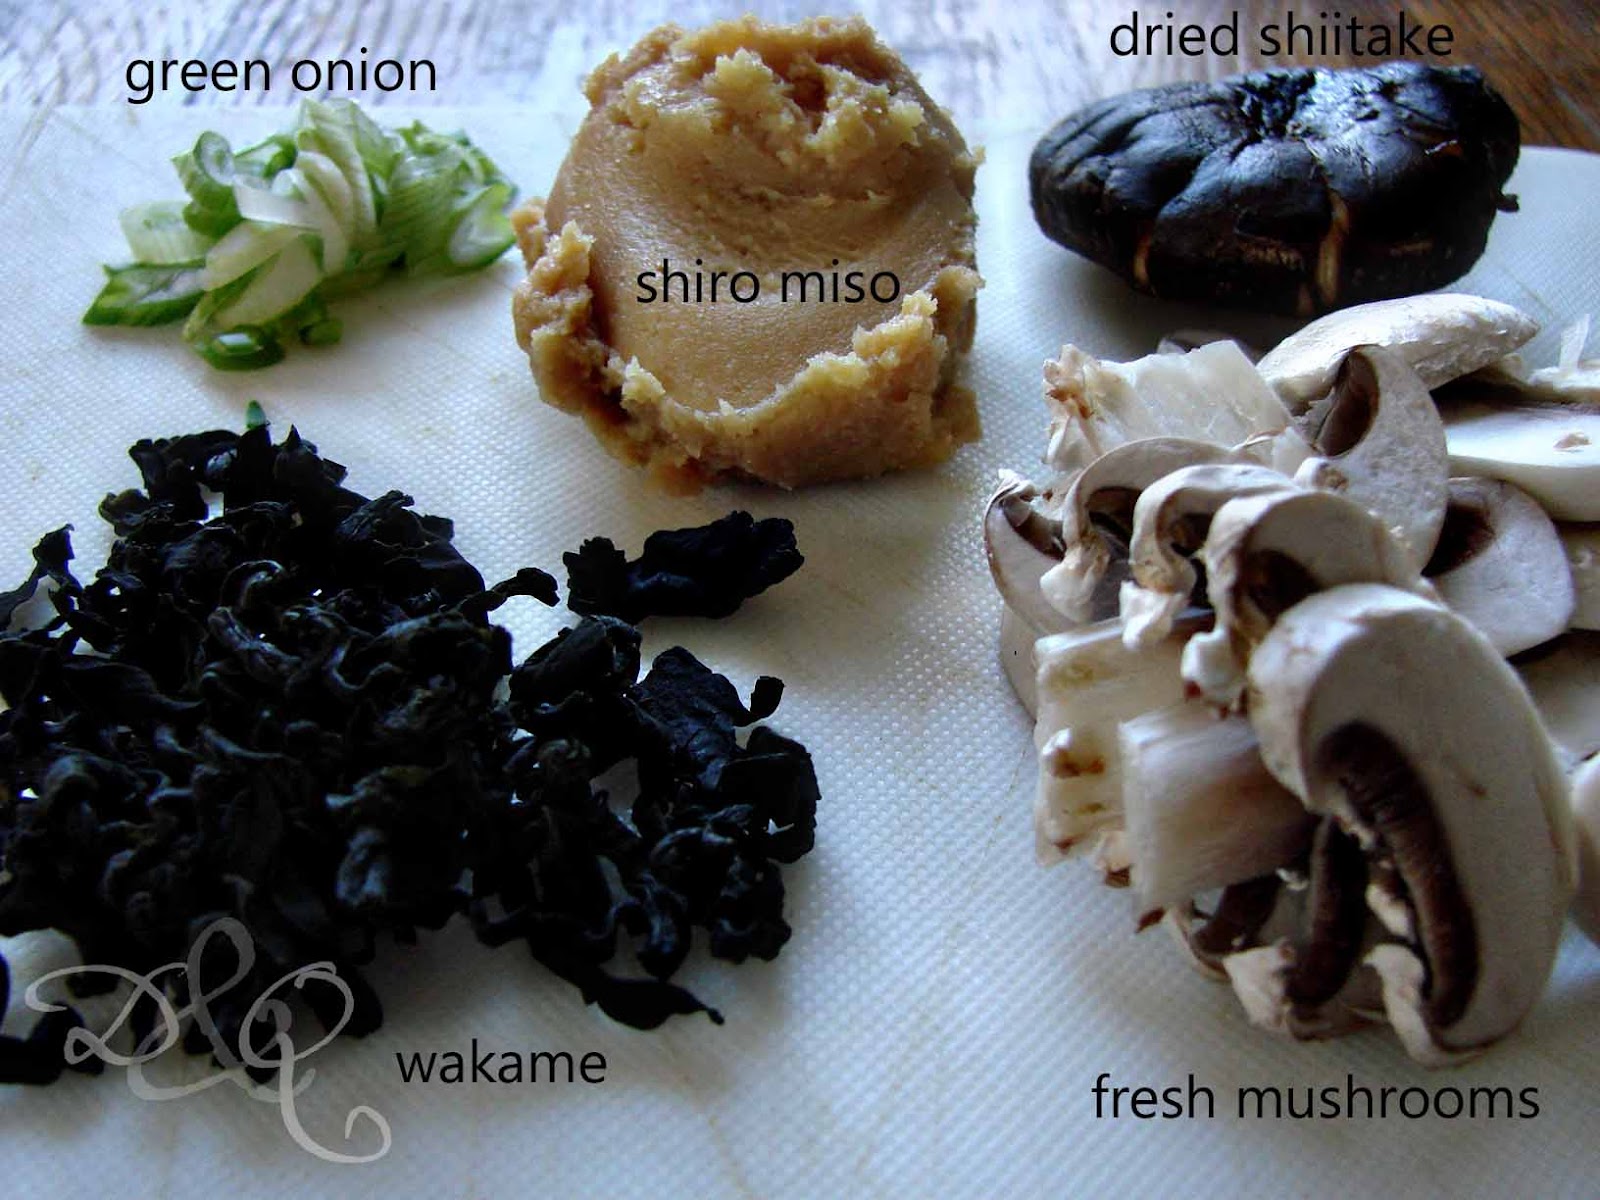
Here's what I opted to put in:


Clockwise from bottom left: wakame (seaweed, one green onion, a dollop of miso, dried shiitake mushroom, 3 sliced, fresh mushrooms

Because I had opted to go with powder, I wanted to bump up the flavour of the broth. That's where the dried shiitake came in. I threw it into the broth to simmer for 10 minutes while I was boiling the water for the wakame. This both infused the broth with a mushroomy undertone and softened the mushroom up so I could slice and add it to the soup at the end.

Wakame is usually sold dried and looks a lot like big tea leaves. You must reconstitute it. DO NOT eat it dry. I remember hearing a story about a woman who once ate dried wakame and her stomach exploded because it swelled up in side her.

True story.

Okay, maybe not, but the stuff does expand like crazy. So, to avoid death by seaweed, pour boiling water over it, and let it sit for 3-4 minutes. It'll quadruple in bulk.

See?

Before reconstitution
And then (mind the steam)...

After reconstitution
Once the shiitake are tender, remove and slice. Return it to the pot along with all the other ingredients except the miso.

Ready to add
Remove a little of the dashi to a separate bowl and whisk in the miso until smooth. Add to pot and stir. Serve immediately.

We ate our with a couple of rice balls (salmon wakame and green onion wakame) and an umeboshi (pickled plum).


Here's hoping that's enough to fight off illness!

Monday, November 08, 2010

Okonomiyaki

This is, by far, one of my favourite quick dinner recipes of all times. I eat way too much of it each time we have it, but it's SO good, and SO ridiculously easy to make.

Phil even made the sauce from scratch because he forgot we had a bottle of it in the fridge.

The finished product.
So, okonomiyaki is a Japanese dish that's essentially a pancake batter mixed with cabbage, pickled ginger and other vegetables and meats. It's a very customizable dish! At okonomiyaki restaurants in Japan, the okonomiyaki is cooked on huge griddles in front of you. Some will have you do the cooking at low tables.

This recipe is based on one from The Japanese Kitchen, which was my first Japanese cookbook.

Sauce

¼ cup ketchup
1½ tbsp Worcestershire sauce
¼ tsp smooth Dijon mustard
2 tbsp mirin
1 tbsp sugar
1 tsp soy sauce

In small saucepan, mix all sauce ingredients together. Bring to a boil, reduce heat to low and simmer for 3 minutes. Remove from heat and set aside.

Batter

1 cup flour
2 tbsp potato starch
1 cup water (or dashi, if you have it)
½ tsp salt

Sift the flour together with the potato starch into a bowl. Add water and salt and mix. Divide the batter between two bowls.

Remaining ingredients

¼ large head shredded cabbage
¼ cup benishoga (pickled red ginger)
¼ cup sliced green onions
3 sliced bacon, chopped (set one piece aside)

2 eggs

Put half the cabbage, ginger, green onions and one piece chopped bacon into each bowl of batter. Press the center of each bowl to make a small depression. Break the eggs, and drop one into the center depression of each bowl.

Heat a large skillet, add 2-3 tbsp neutral flavoured oil and swirl to coat. When the oil is hot, dump out the excess. Reduce heat to low.

With a spoon, mix the batter and the other ingredients in one of the bowls. Raise the heat under the skillet to medium and pour all of the batter from the first bowl into the skillet. Spread the batter into a disk, about 6-7" in diameter. Top with half of the remaining chopped bacon, pressing it into the surface of the pancake. Cook the pancake over medium heat until the bottom is golden.

Now comes the fun part: the flipping. This is a two spatula job. Be quick and decisive. If the bottom is cooked enough, the whole thing shouldn't fall apart.

Once you've flipped it, press to flatten the bottom and cook until the other side is golden. While it's doing that, brush the top with the sauce. Transfer to a plate to keep warm in the over while you repeat the directions with the second bowl of ingredients.


Cut each pancake into six pieces, like a pizza, and serve hot. Phil and I just tend to cut it with our chopsticks and serve ourselves from the middle of the table.

The last piece of bacon shall be mine!
Just for the record, I don't really use my chopsticks like that.

Saturday, November 06, 2010

A Recent Find

Many of you know that I collected Japanese pottery while I was living in Japan. Our area, Gifu, was pretty rich with the most amazing potters! So, when I came back to Canada with this new found love of all things clay, I was so disappointed in what the artisans here were doing (and still are). There's just something so clunky and generic about North American pottery.

I suppose that has something to do with Japanese notion of finding perfection in imperfections. I like that.

So, when I found Analogue Life one day, I nearly died from joy.

Plate by Yasko Ozeki (Seto)
Nanbu Iron Trivet
Bud Vase by Shoji Morinaga
Chopstick Rest by Masanori Oji
Nabe pot by Azmaya
Tea leaf box by Tatsuyu Aida
Nanbu Iron Bell
Ceramic Bottles by Sゝゝ
I don't even know what I'd do with this stuff. But I love it.
Related Posts Plugin for WordPress, Blogger...